Contents
How to build a Custom MCP Server on Peliqan with SSO using OAuth
Setup the API handler script in Peliqan
Use the following API handler script template in Peliqan:Click to expand code
Click to expand code
- Your Peliqan account id
- Set the OAuth provider to use: Microsoft Azure, Google or Peliqan OAuth
- Enter your Microsoft Azure tenant id or Google client id (if applicable)
- Add user mappings: the key is the SSO user name or email, the value is the personal API key of the user in Peliqan (see User Settings > API keys)
Grant permissions based on SSO group memberships
The above template maps individual users from the SSO to Peliqan API keys. You can also grant permissions based on the groups that the user belongs to, e.g. groups in Azure Entra Id. Here’s some example code on how to do that:Click to expand code
Click to expand code
Setup API endpoints in Peliqan
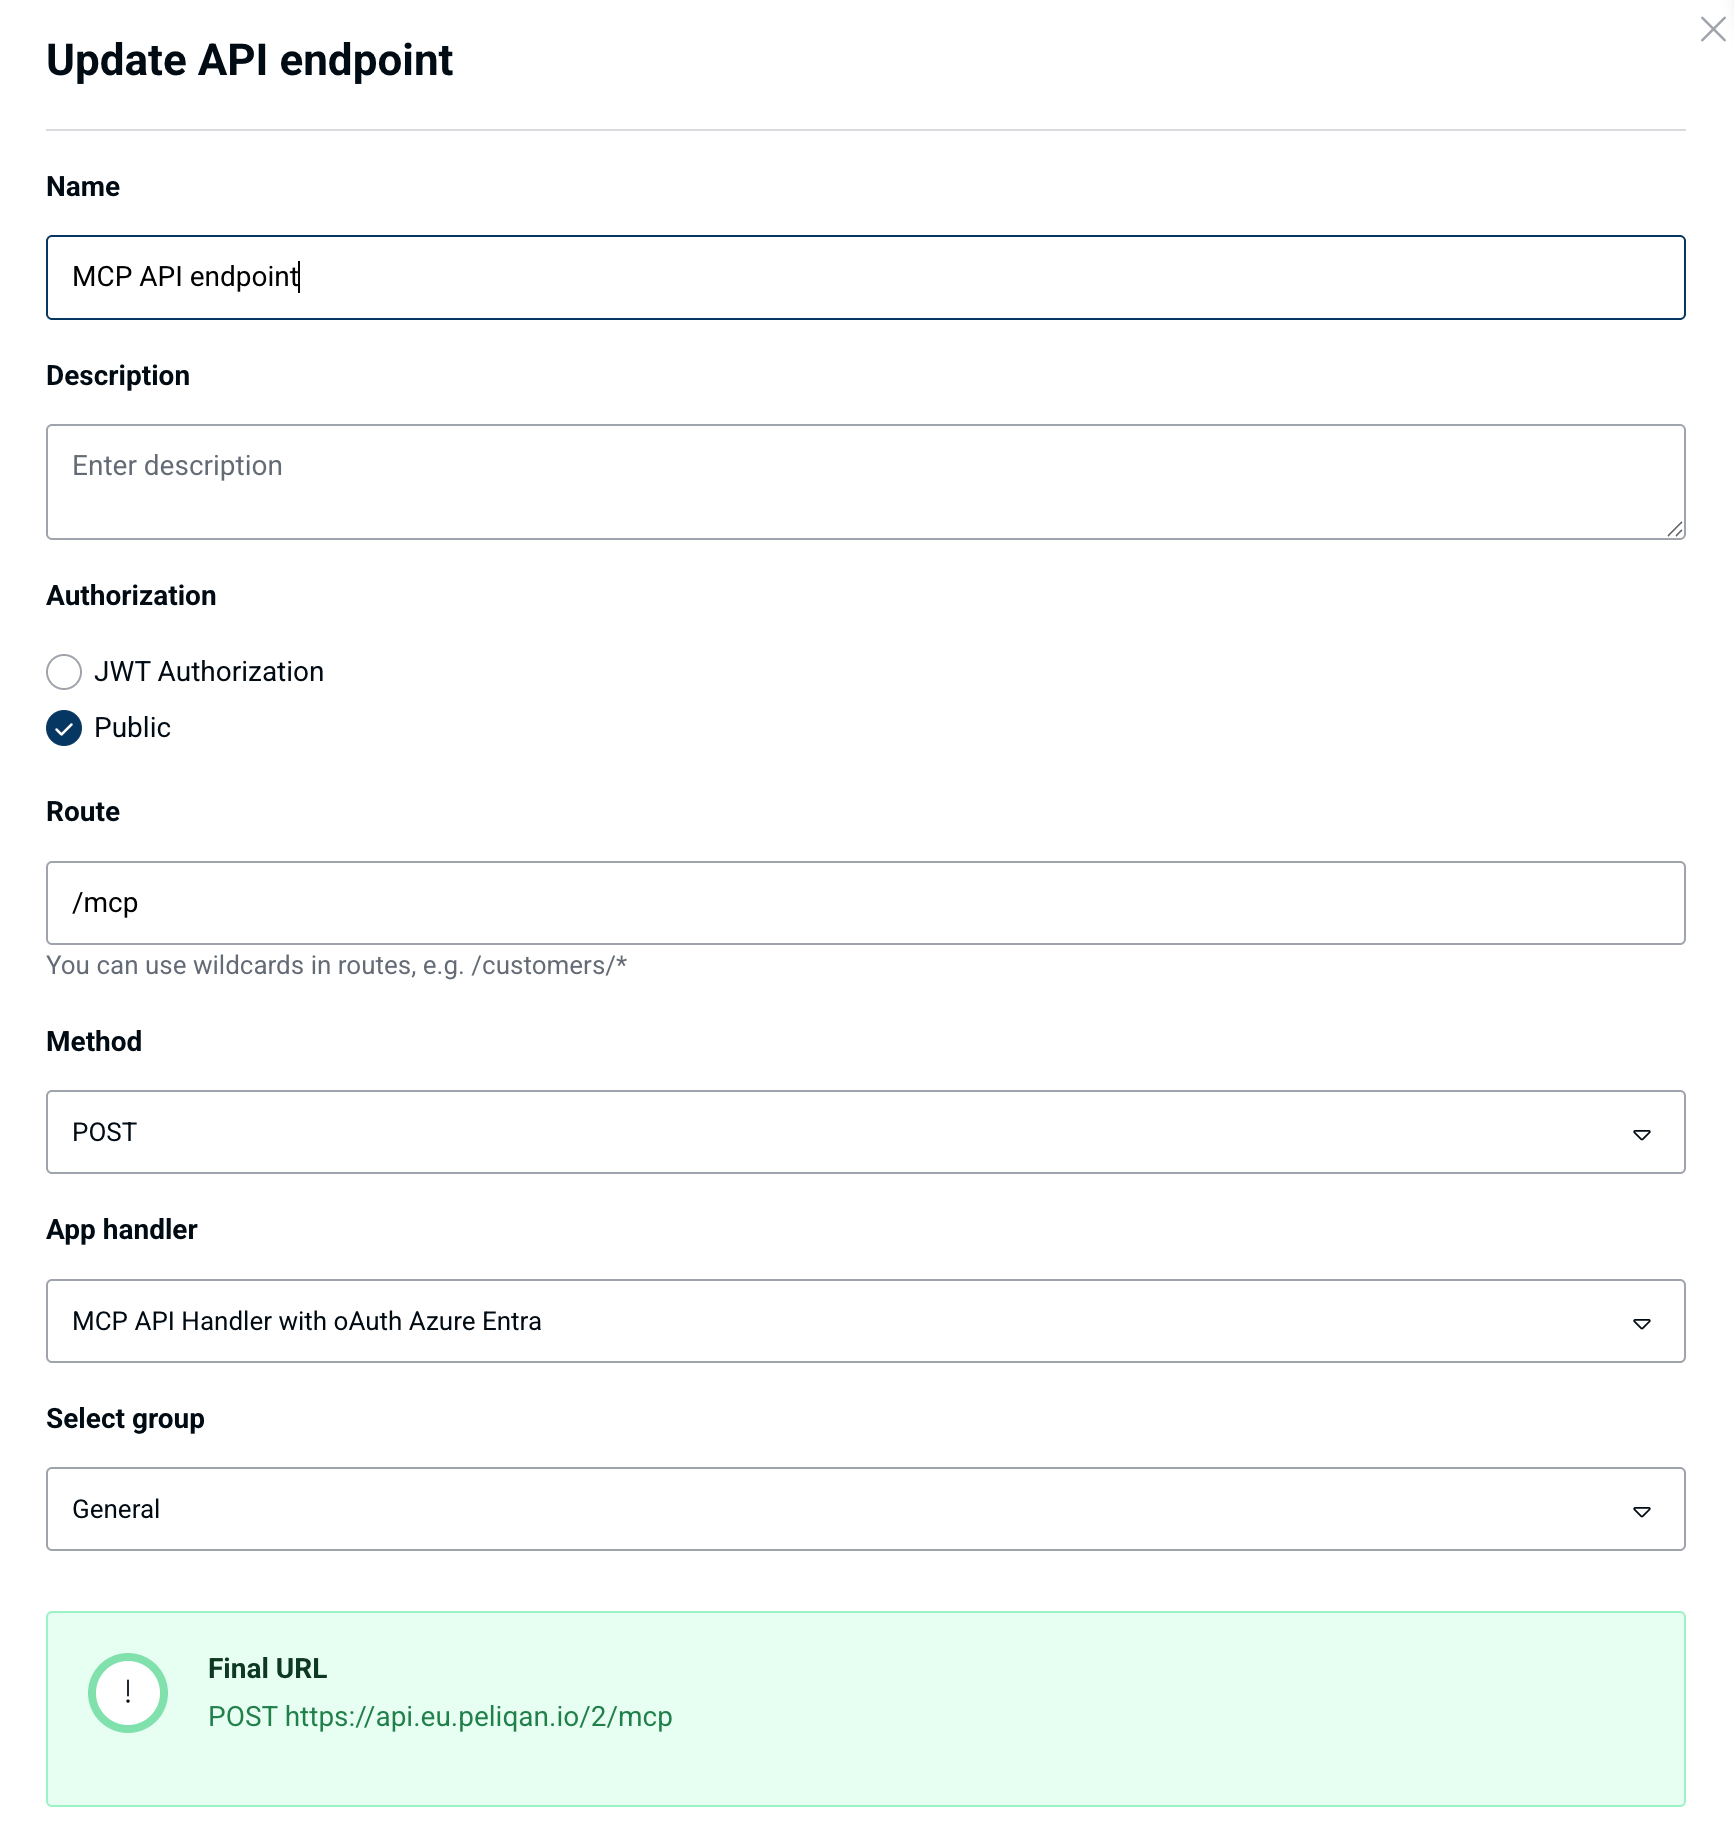
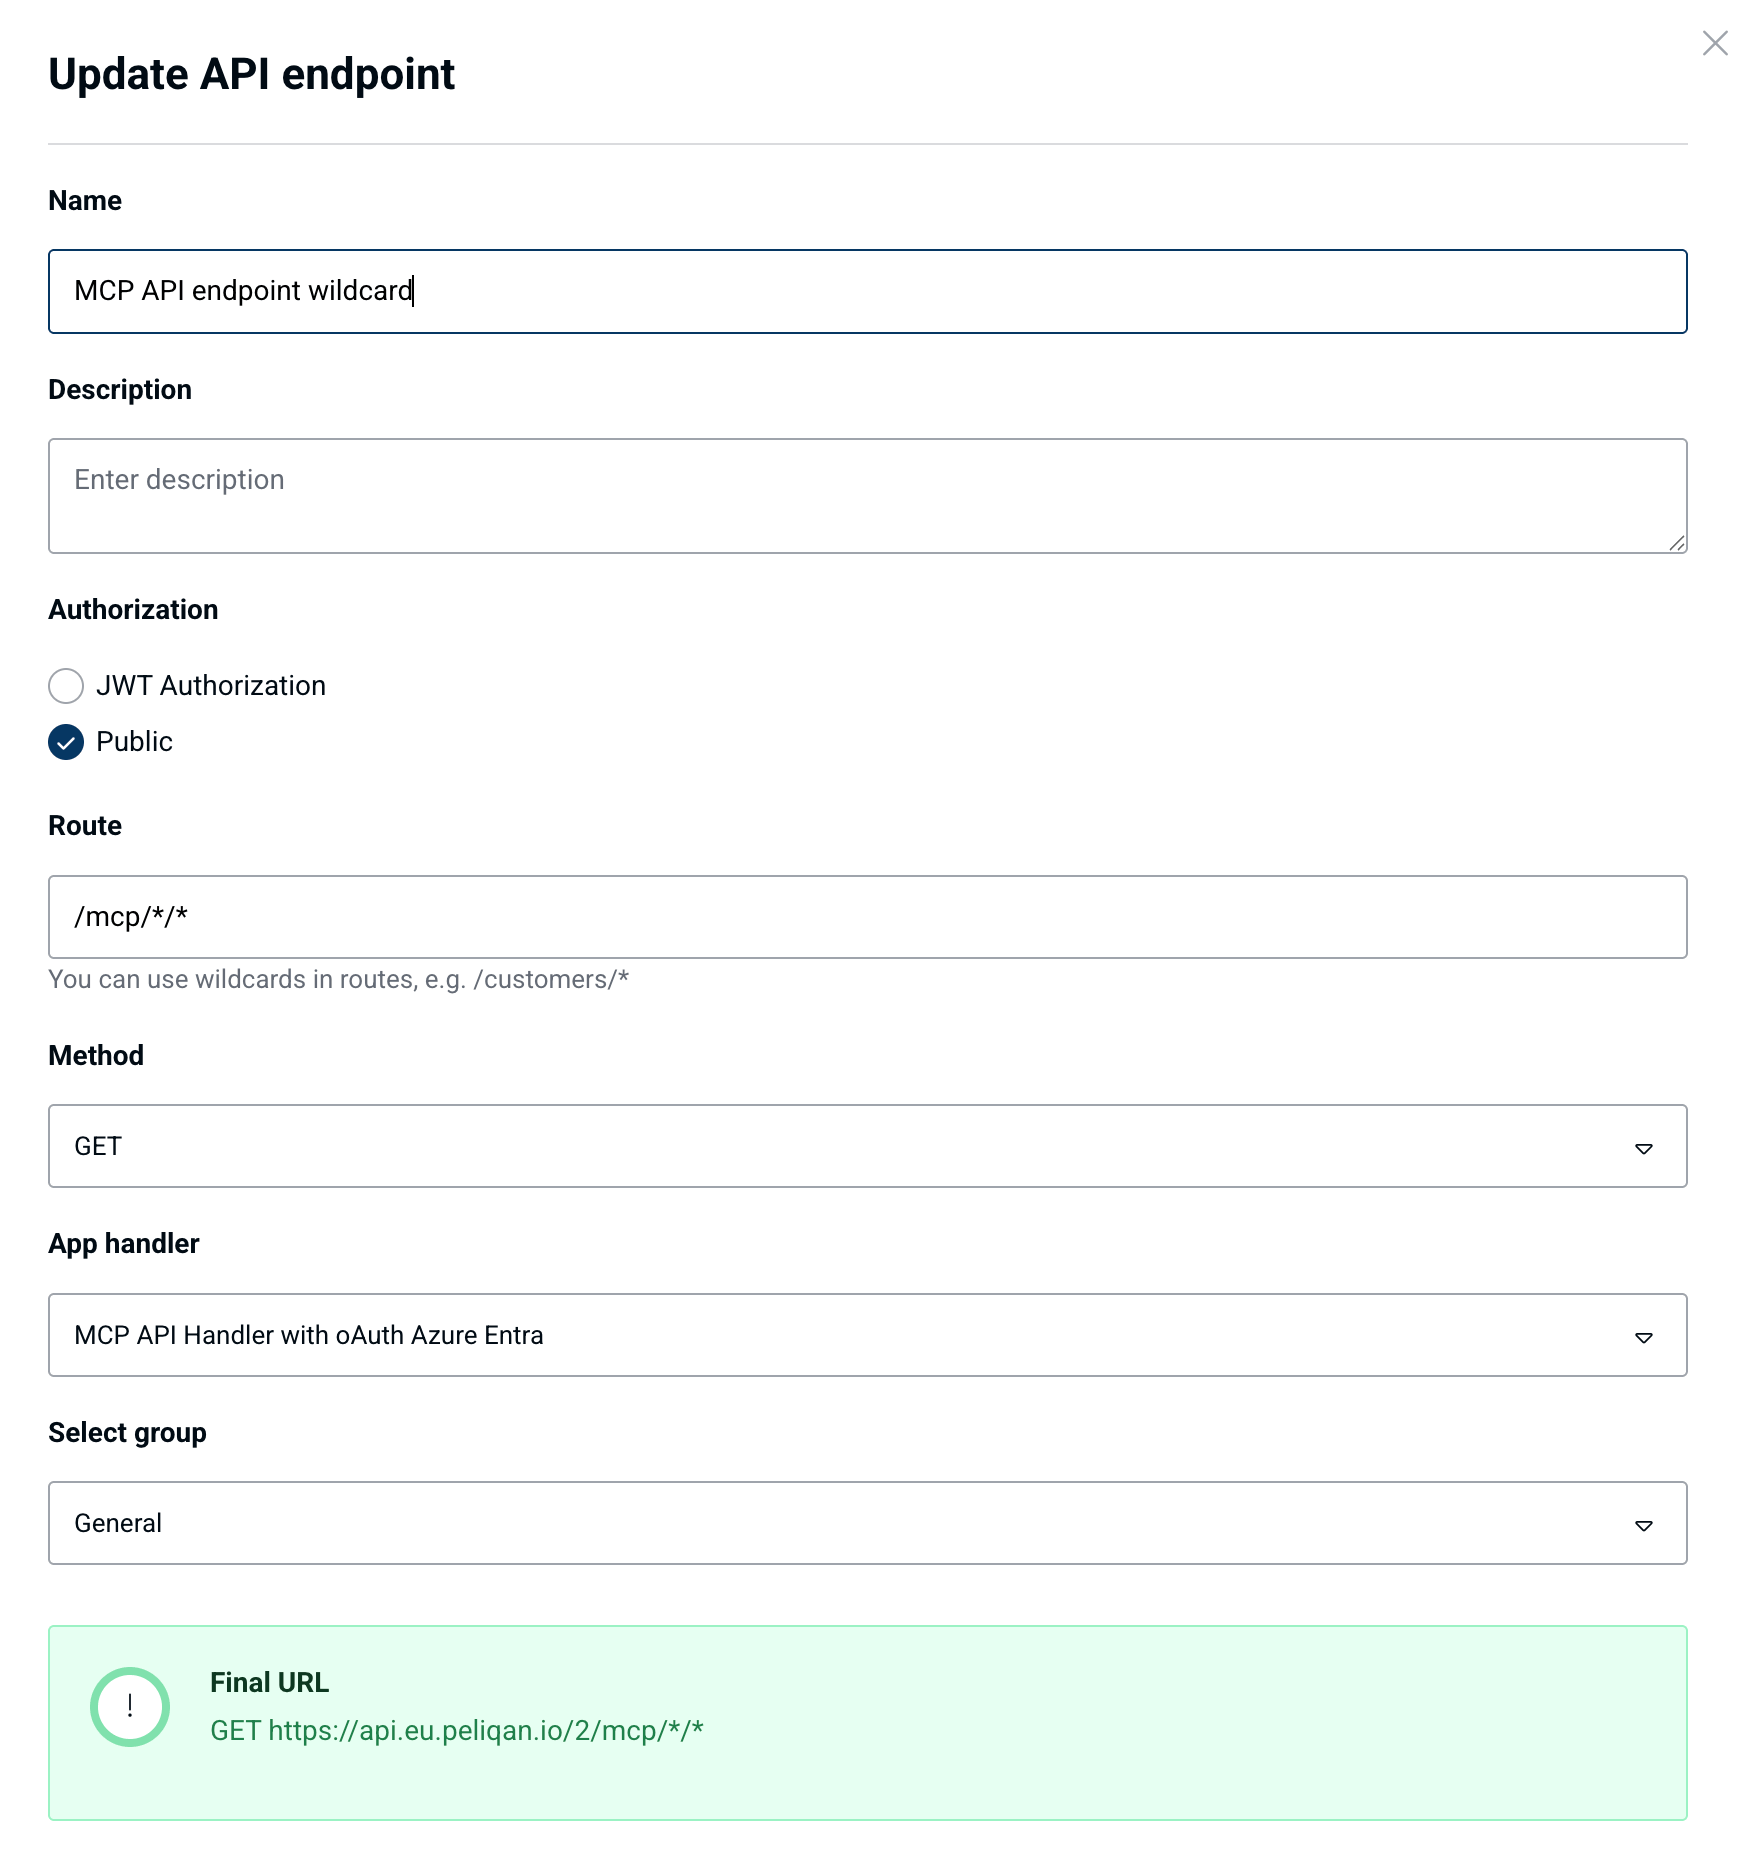
Add two API endpoints and link them both to the above API handler script:POST /mcpGET /mcp/*/*
Create an OAuth app
Google OAuth app
Create an app in Google Cloud Console: https://console.cloud.google.com/ under “API & Services” > OAuth consent screen. Create an internal app and copy the client_id and client_secret:- Authorized redirect URI: see below (depends on the AI Client that you will use)
- App type (audience): “internal”
- OAuth 2.0 client type: Web application
- Data access: you do not have to add scopes here
Microsoft Azure OAuth app
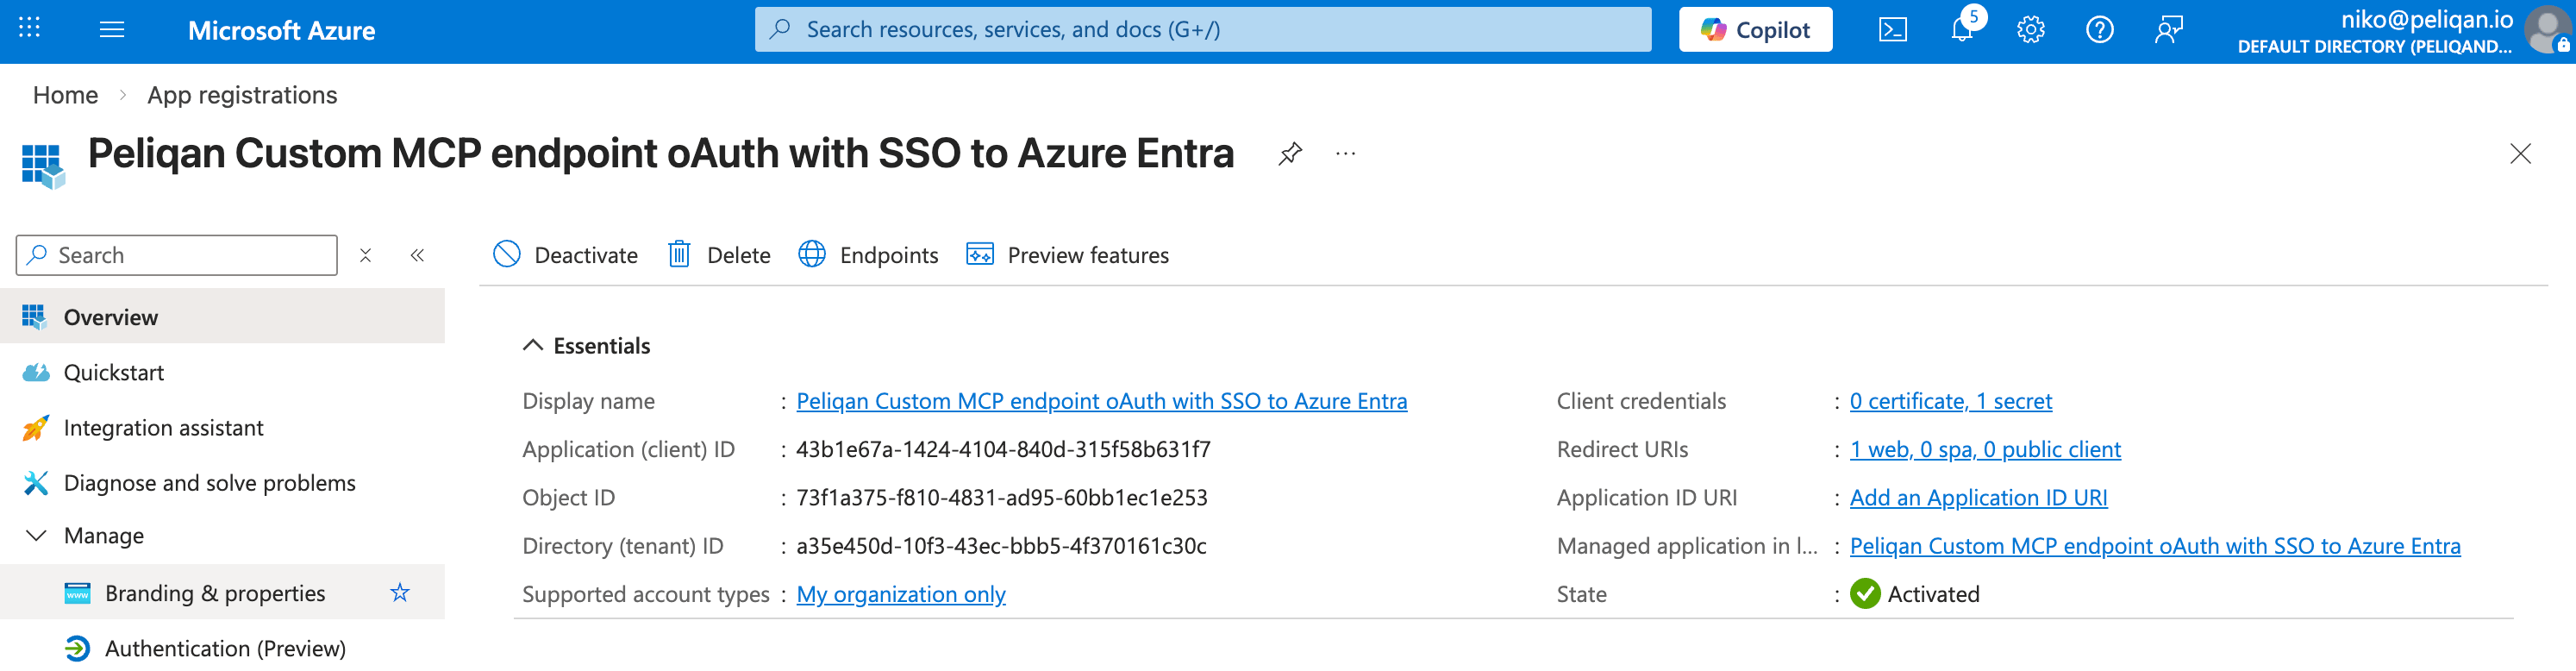
You need to create two apps in Azure under App registrations: 1. App registration for oAuth authorization flow (with client secret)- Client id
- Client secret
- Redirect URI: see below (depends on the AI Client that you will use)
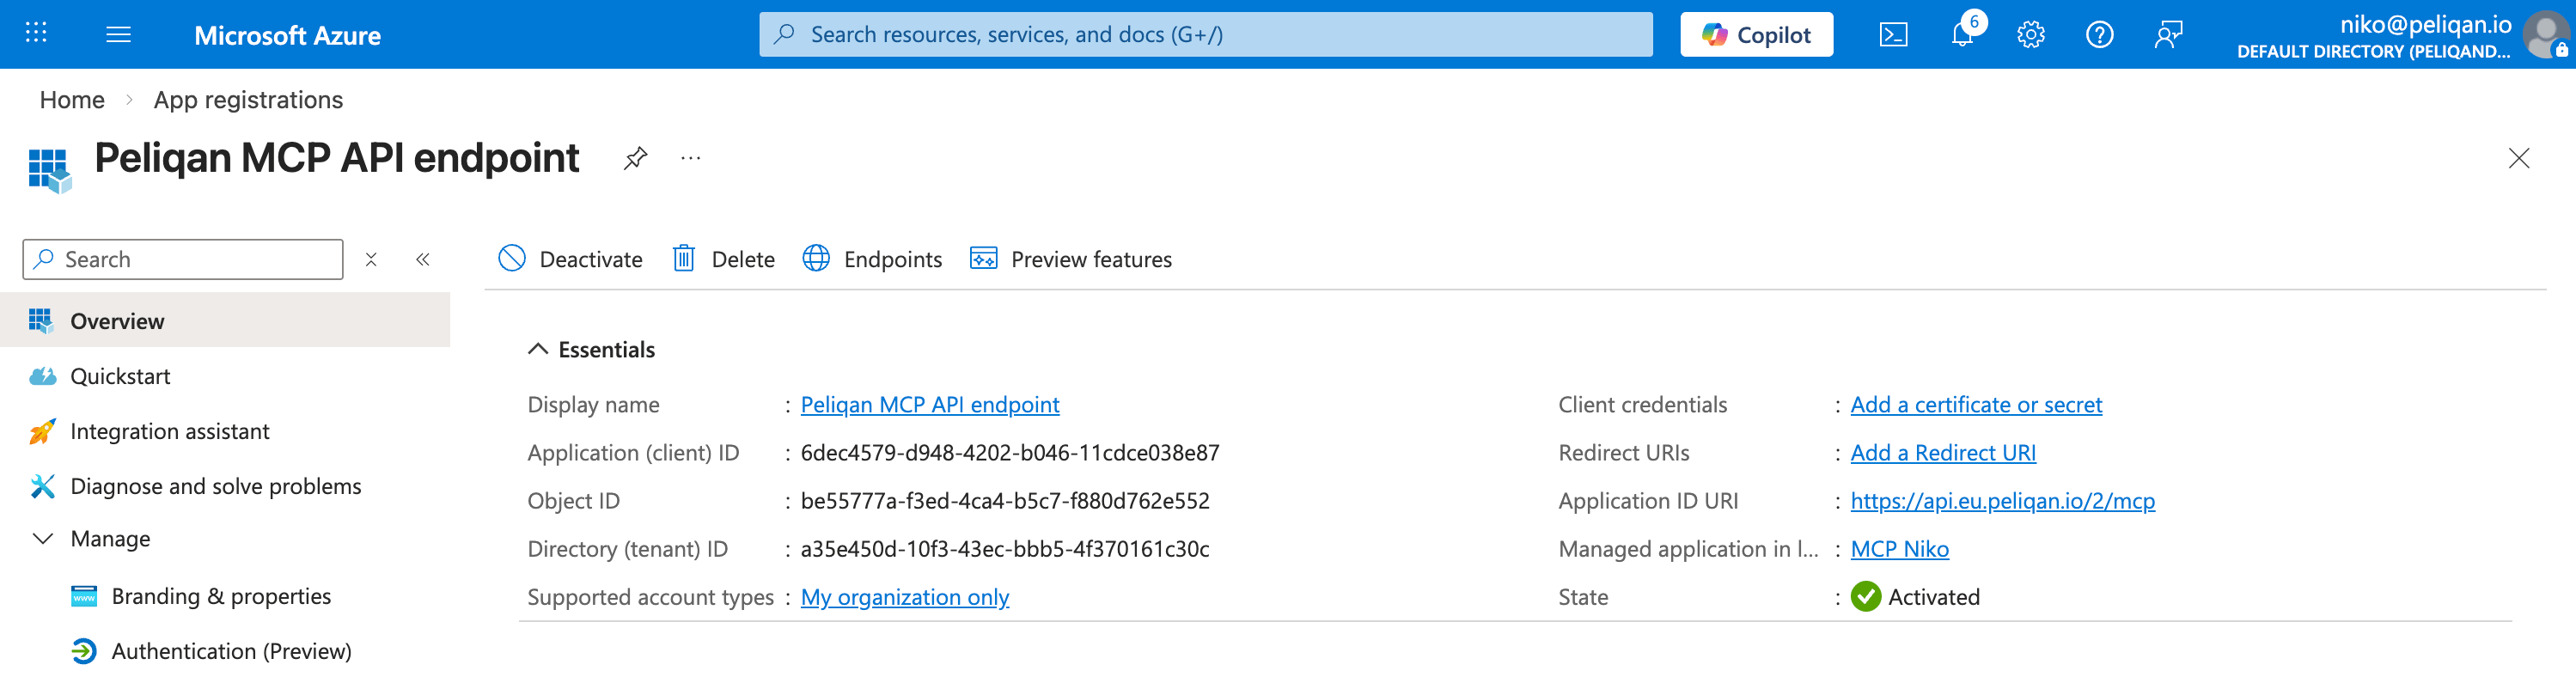
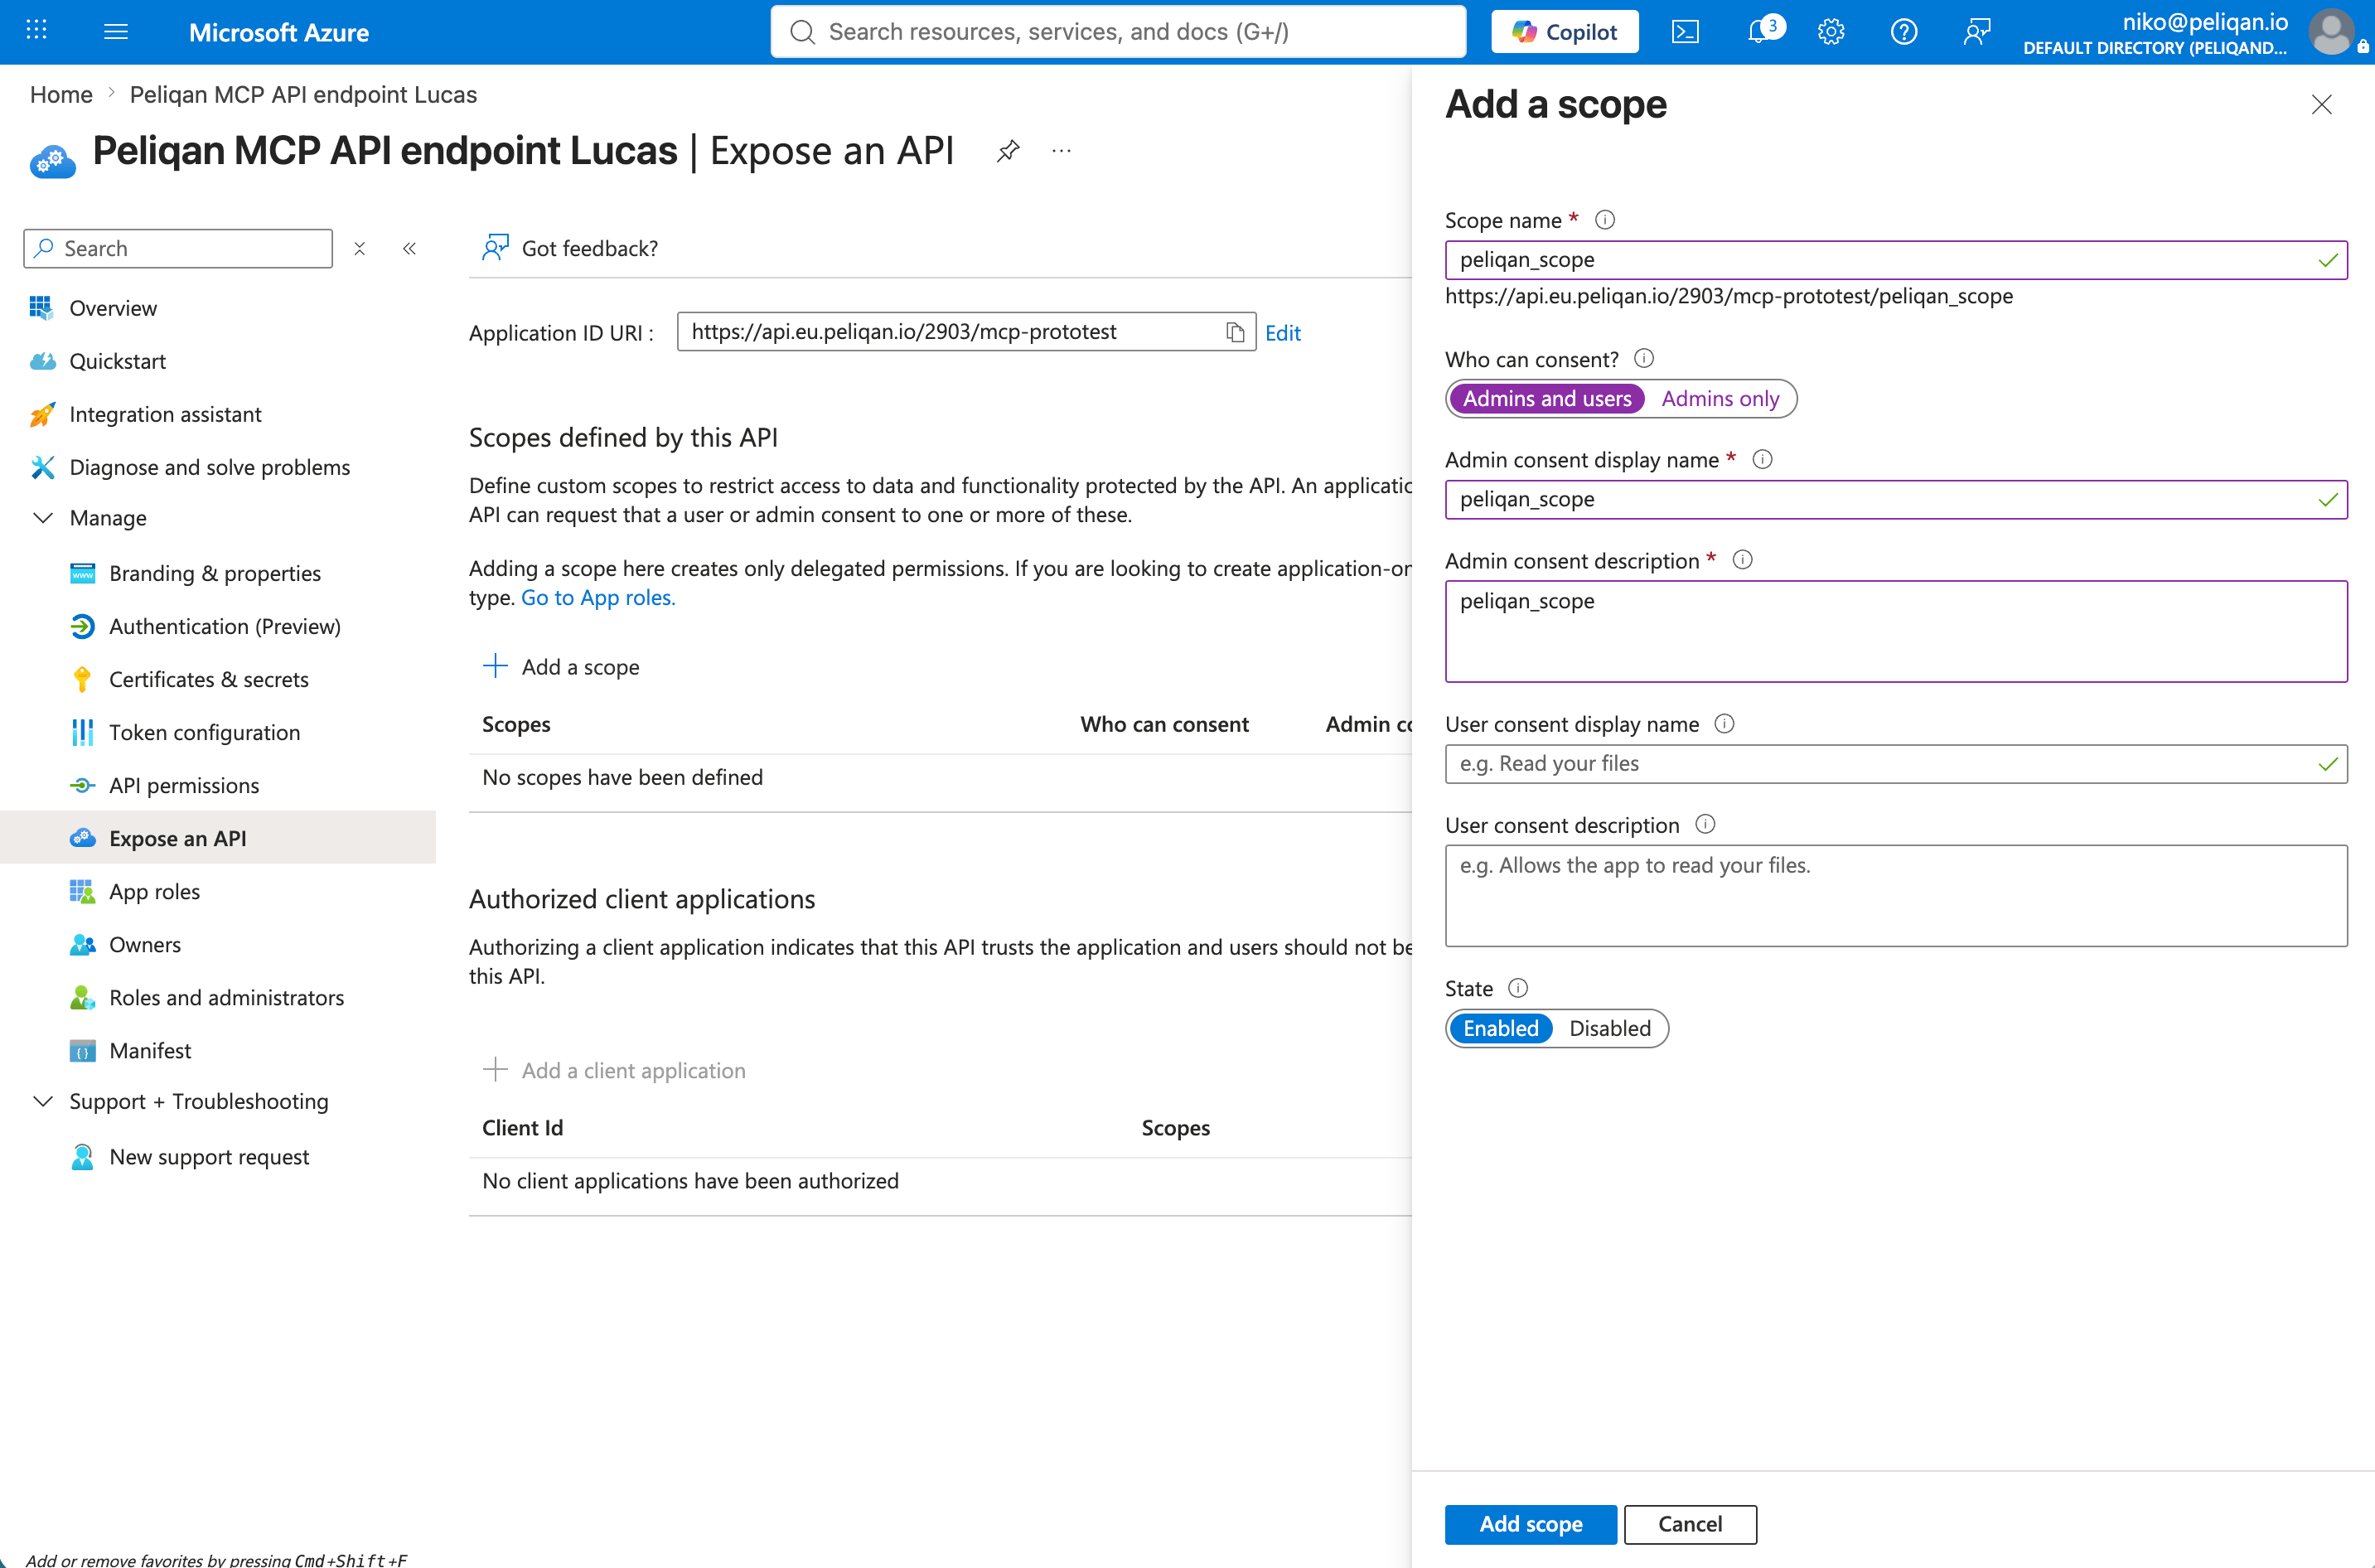
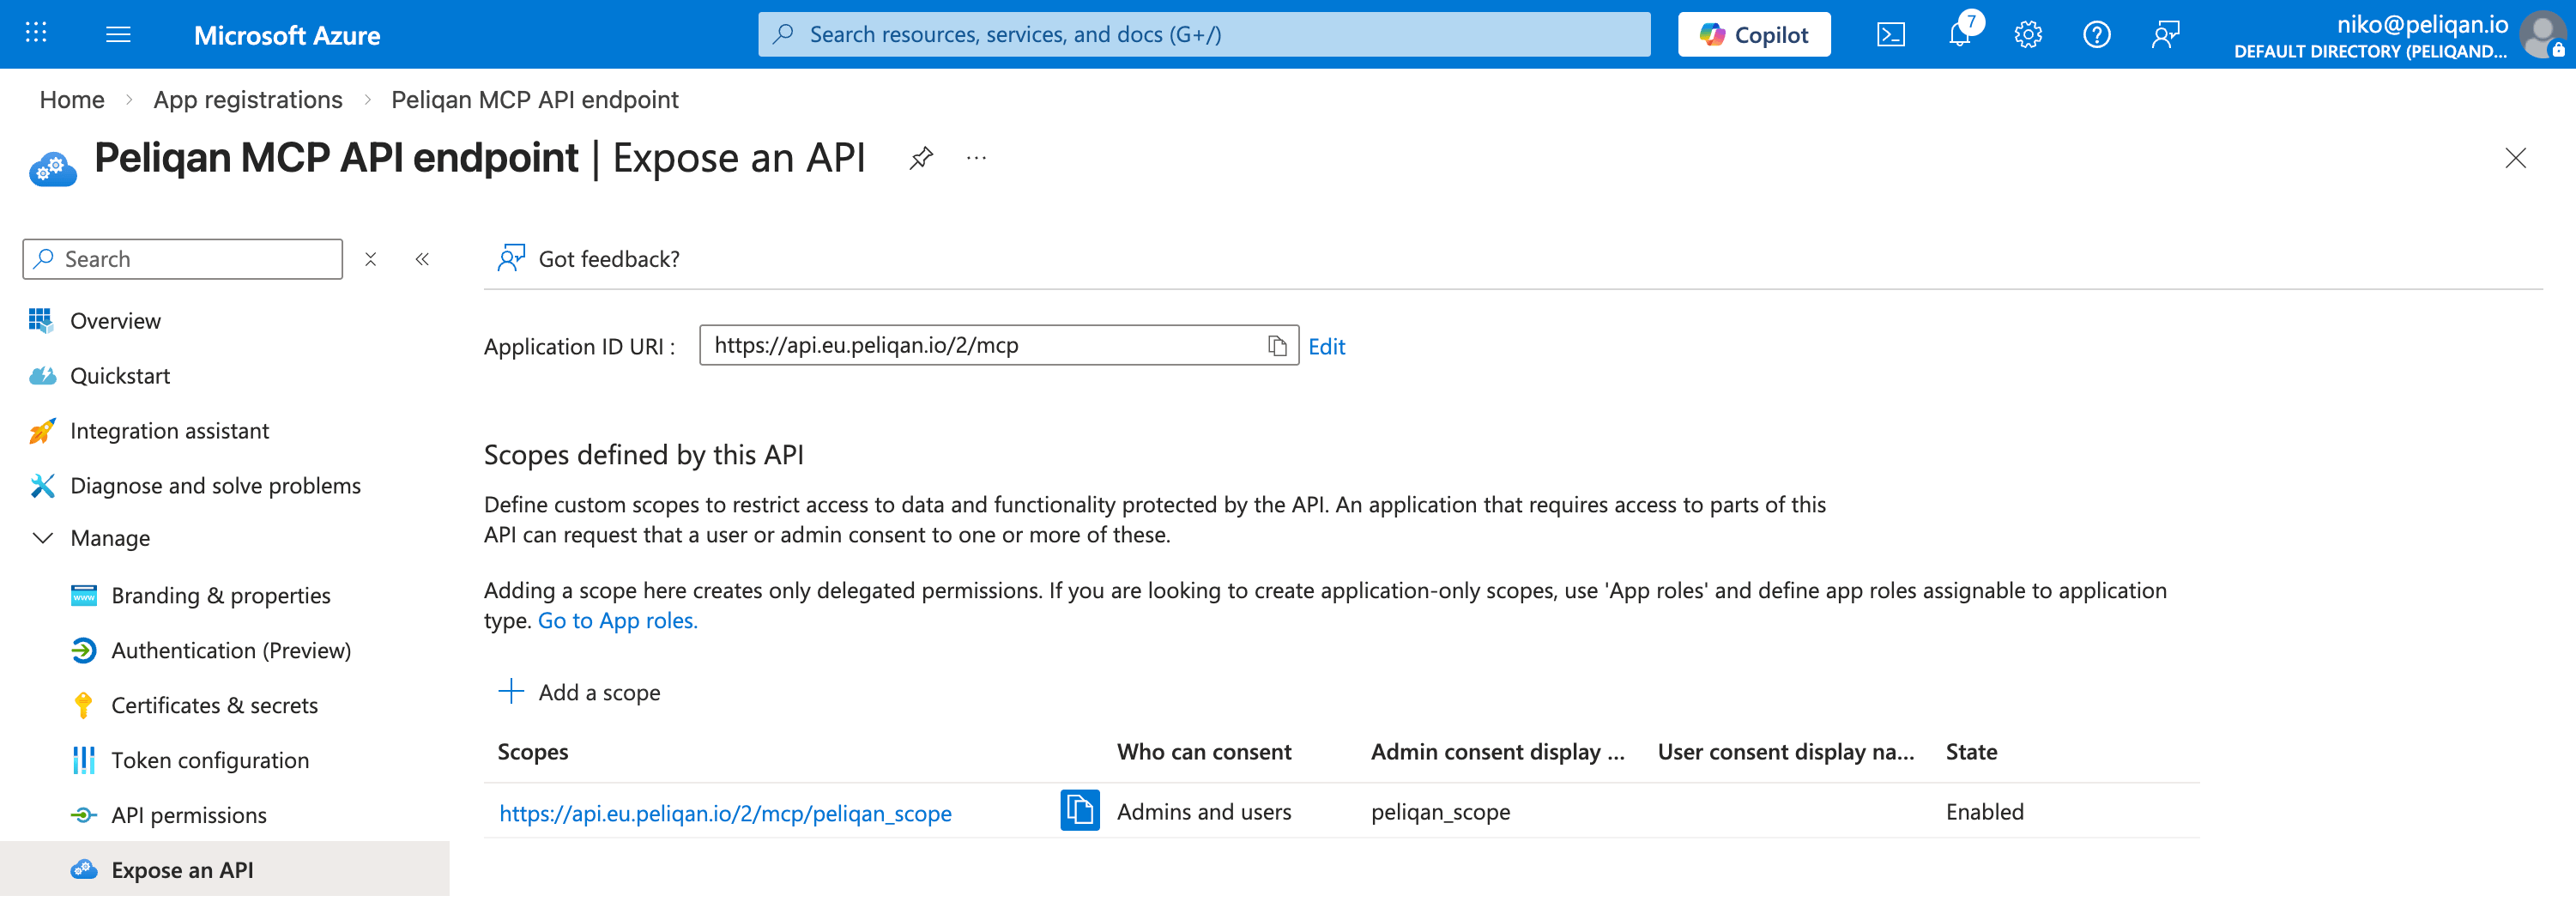
- Set the Application ID URI: for example
https://api.eu.peliqan.io/123/mcp(use the exact URL of this MCP Server) - Add a scope under “Expose an API”, e.g. “peliqan_scope”
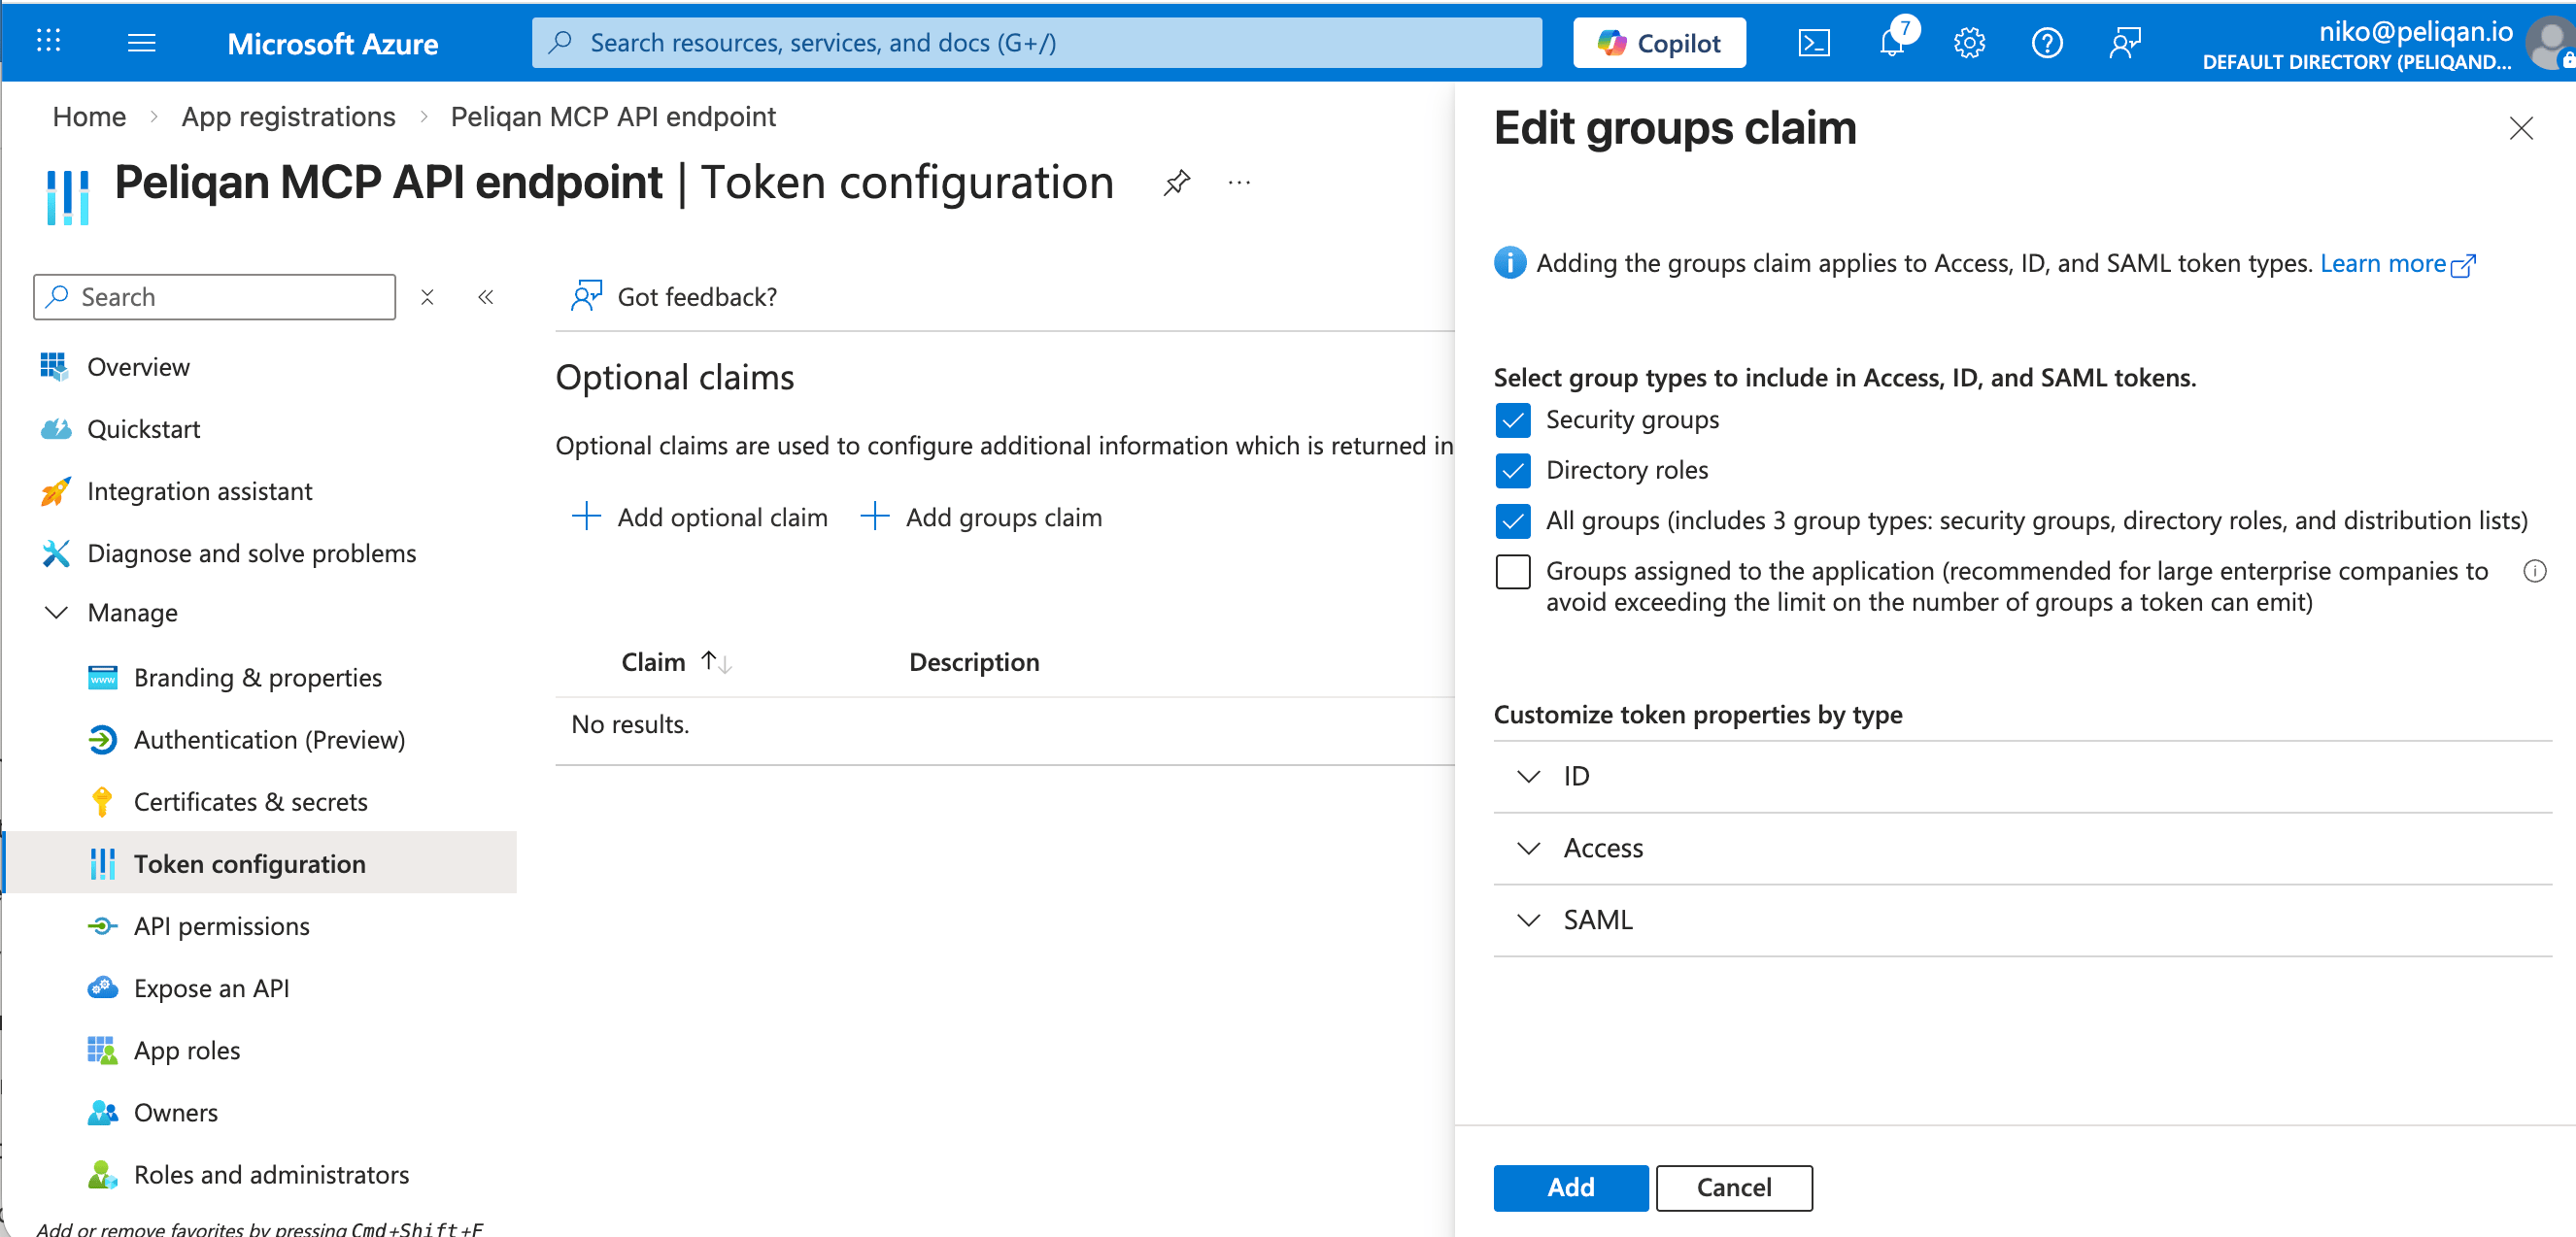
- Add groups claim under “Token configuration” > Add groups claim > All groups
Peliqan OAuth app
Contact Peliqan support and request activation of OAuth Apps in your Peliqan account Register an OAuth2 app in your Peliqan account under Settings → OAuth2 Apps. Enable scopes: openid and email. Redirect URI: see below ((epends on the AI Client that you will use) Choose “Confidential” app (this has a client secret).Redirect URI for your app
The Redirect URI depends on the client that you will use:-
Redirect URI for Claude:
https://claude.ai/api/mcp/auth_callback -
Redirect URI for ChatGPT: see ChatGPT Settings > Create app > oAuth > Advanced. For example:
https://chatgpt.com/connector/oauth/xxxxxxxxxxNote for ChatGPT: you’ll need to start adding an MCP Server in ChatGPT, and click on Advanced Settings to see the redirect URI from ChatGPT. Once you have it, cancel adding the app in ChatGPT (we’ll complete this step below). -
Redirect URI for Microsoft Copilot: for example
https://global.consent.azure-apim.net/redirect/cr25b-5f...ea2aNote for Copilot: you’ll need to start adding an MCP Server in Copilot (with authentication type oAuth, see details below) and save, in order to see the newly generated redirect URI.
Configure your MCP Server using OAuth in an AI Client
Configure your MCP Server in ChatGPT
In ChatGPT click on your account name (bottom left corner), click Settings. In Settings, go to Apps, and click “Create App”: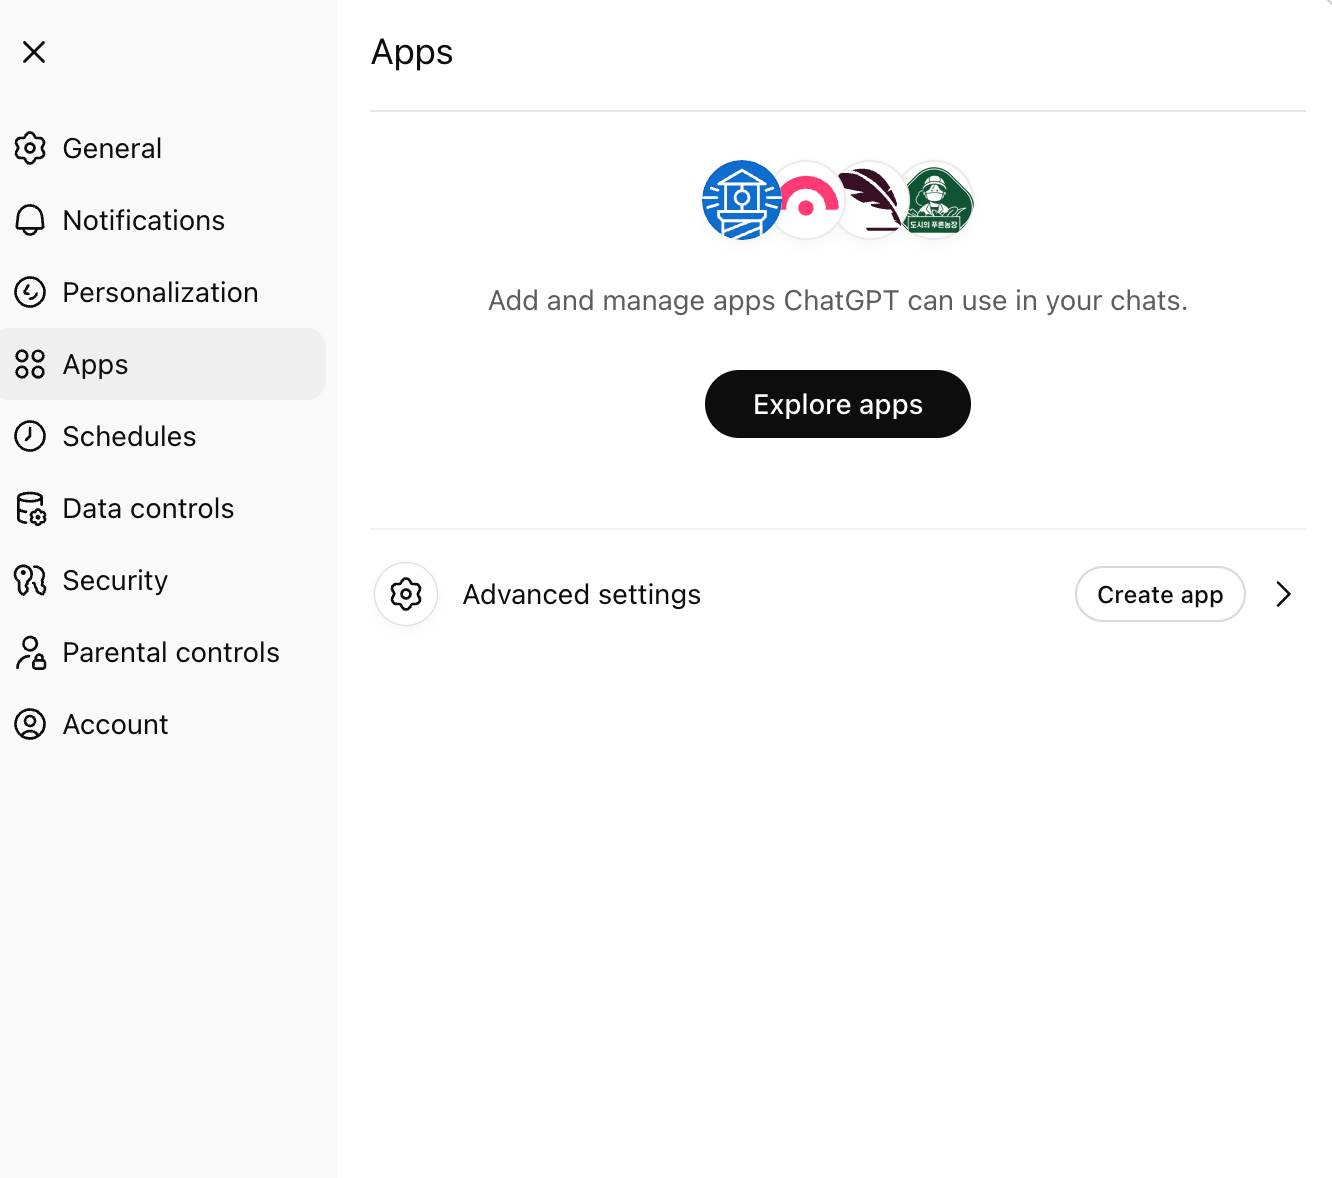
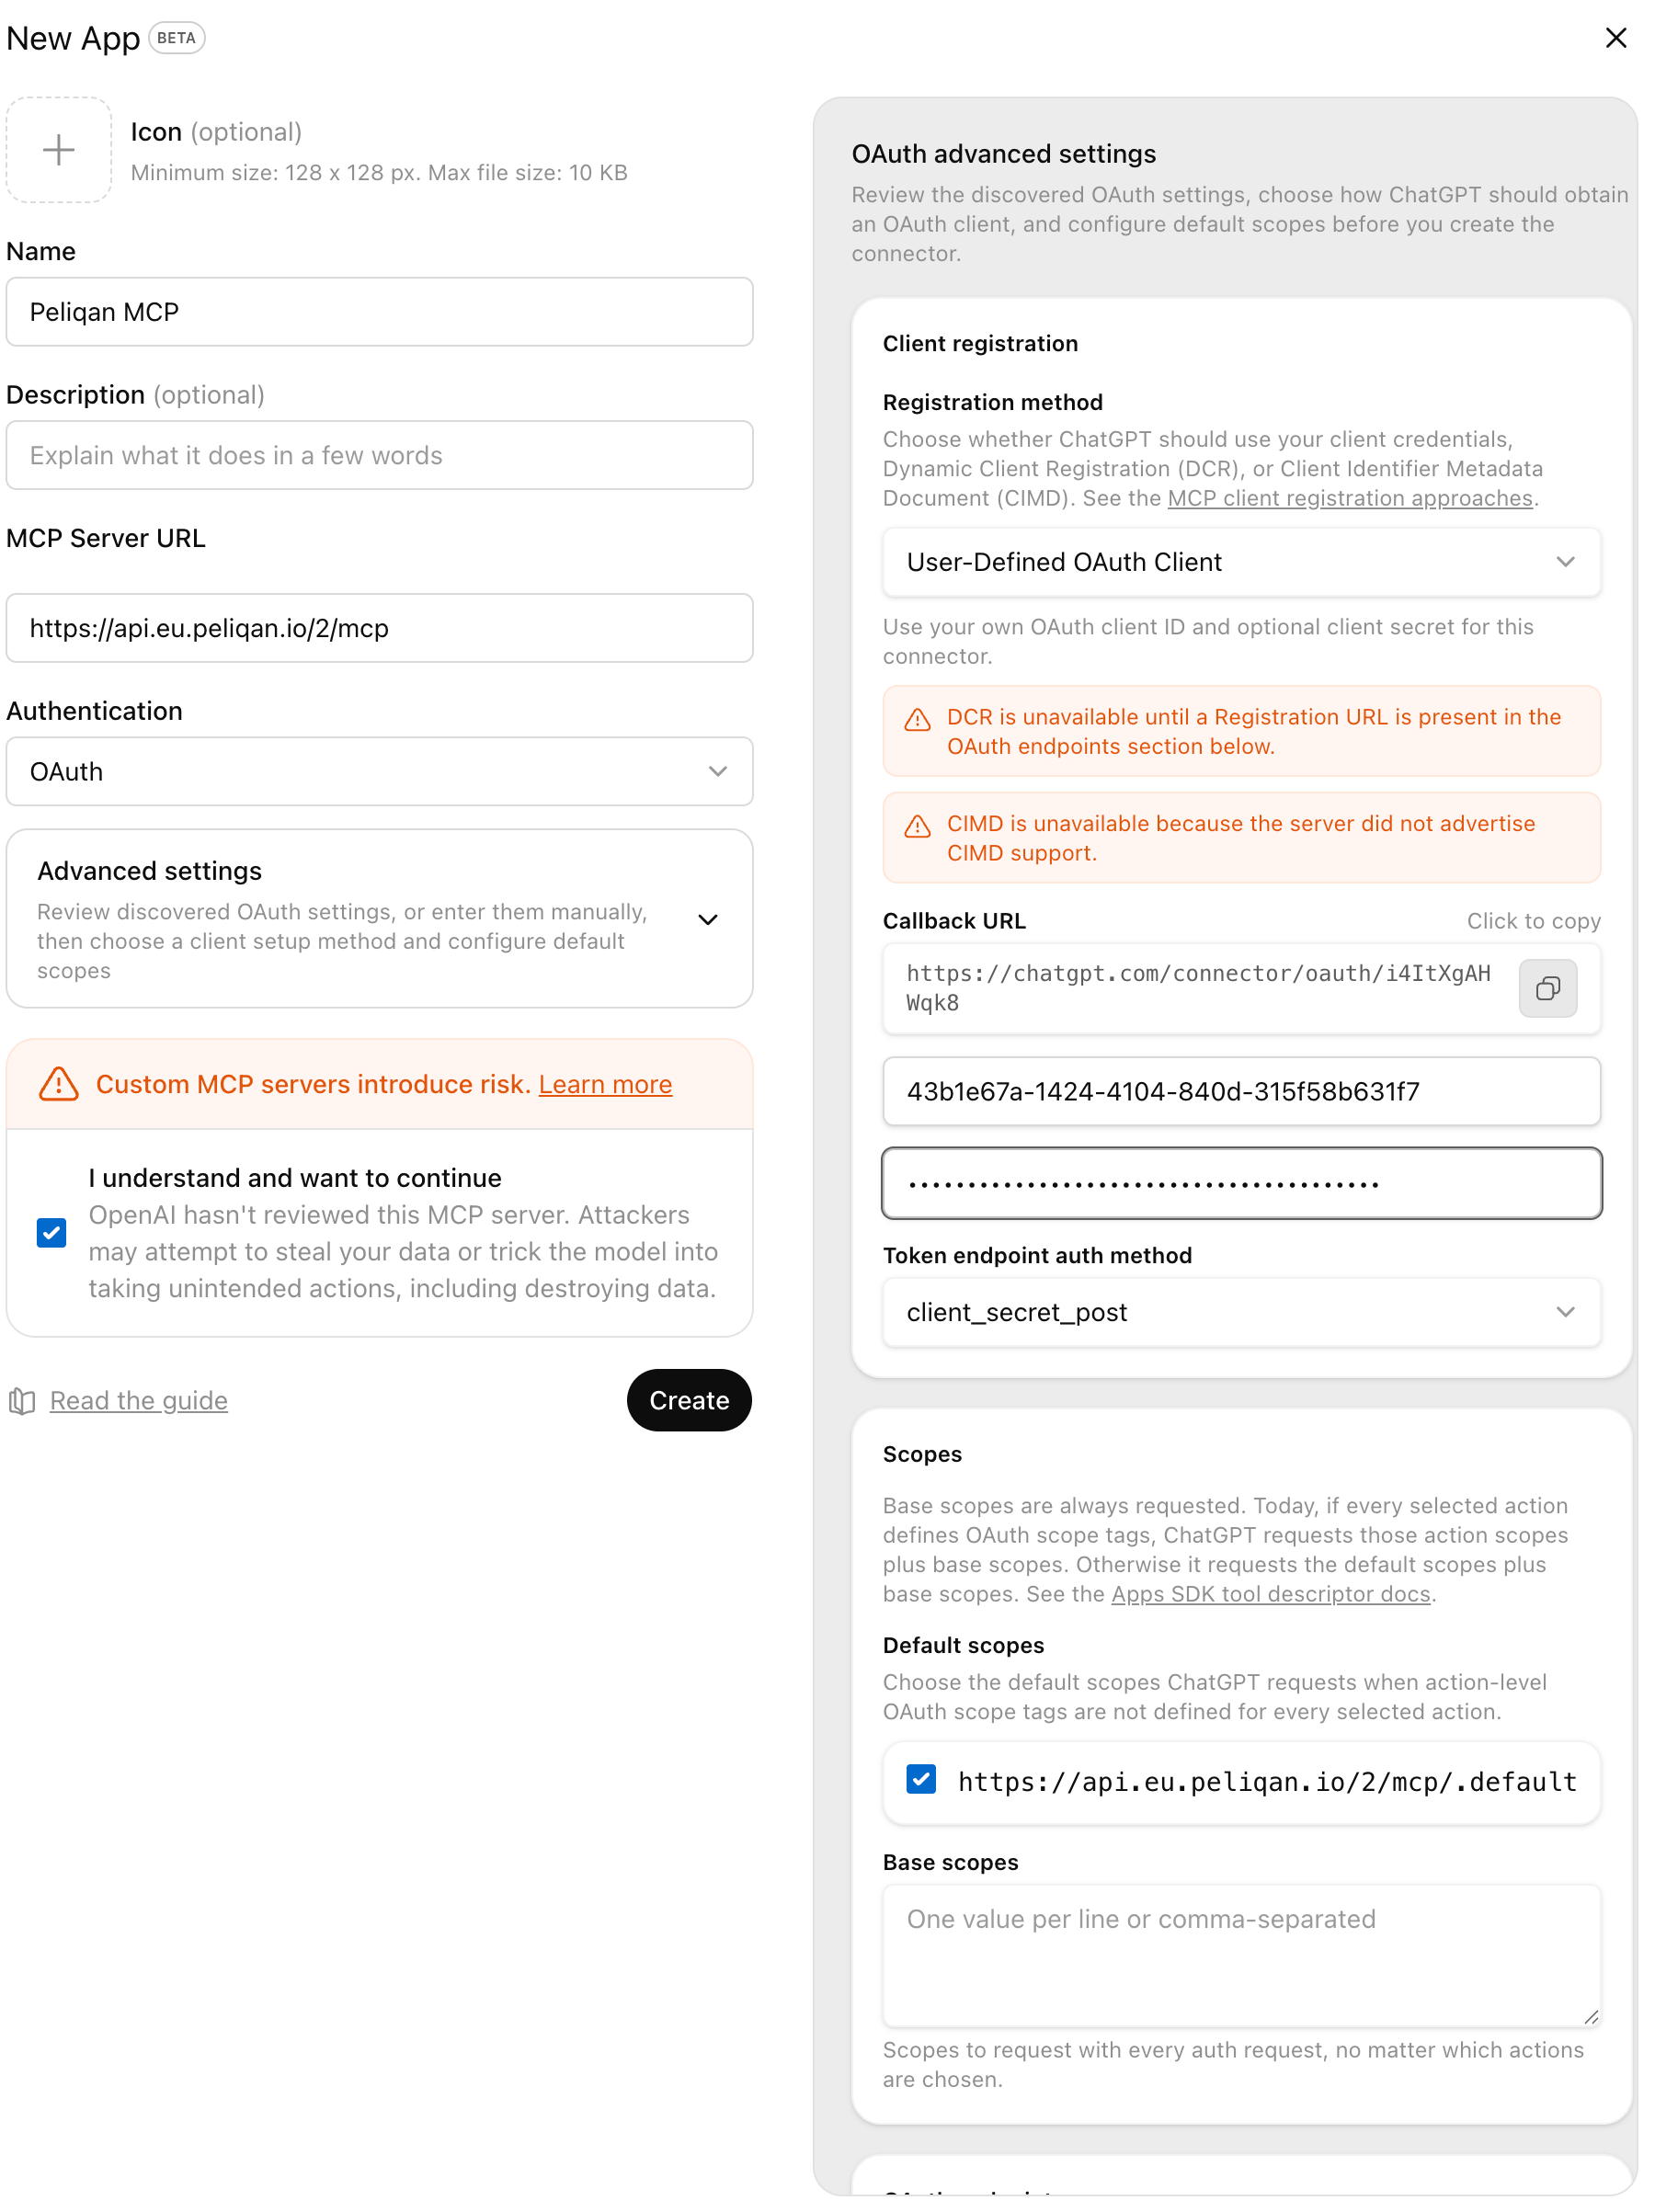
- Fill in the URL of your MCP Server URL:
https://api.eu.peliqan.io/*{your_peliqan_account_id}*/mcp - Select “OAuth” for Authentication
- Check the checkbox “I understand”
- Open Advanced Settings: enter the
client idandclient secretfrom your app created in Google Cloud Console, Microsoft Azure or your Peliqan OAuth app. See for example the client id 43b1e67a-1424-4104-840d-315f58b631f7 the screenshot below. - Click on the “Create” button
- Test your MCP Server: ask ChatGPT “Ask the Peliqan MCP to say hello.”
Configure your MCP Server in Claude
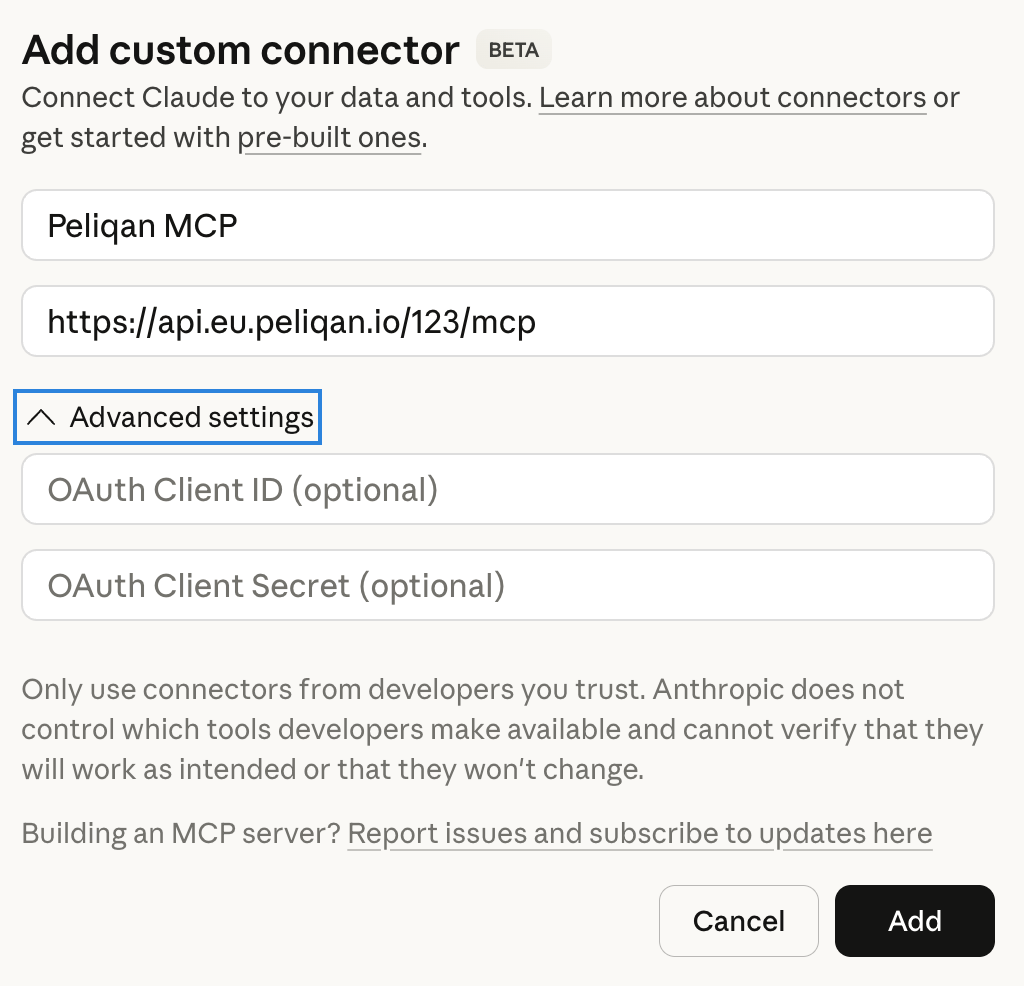
In Claude, go to Customize > Connectors. Click the “+” icon and select “Add custom connector”. Enter the URL of your custom MCP Server, expand the “Advanced” section and enter theclient_id and client_secret from your app created in Google Cloud Console, Microsoft Azure or your Peliqan OAuth app.
Configure your MCP Server in Microsoft Copilot
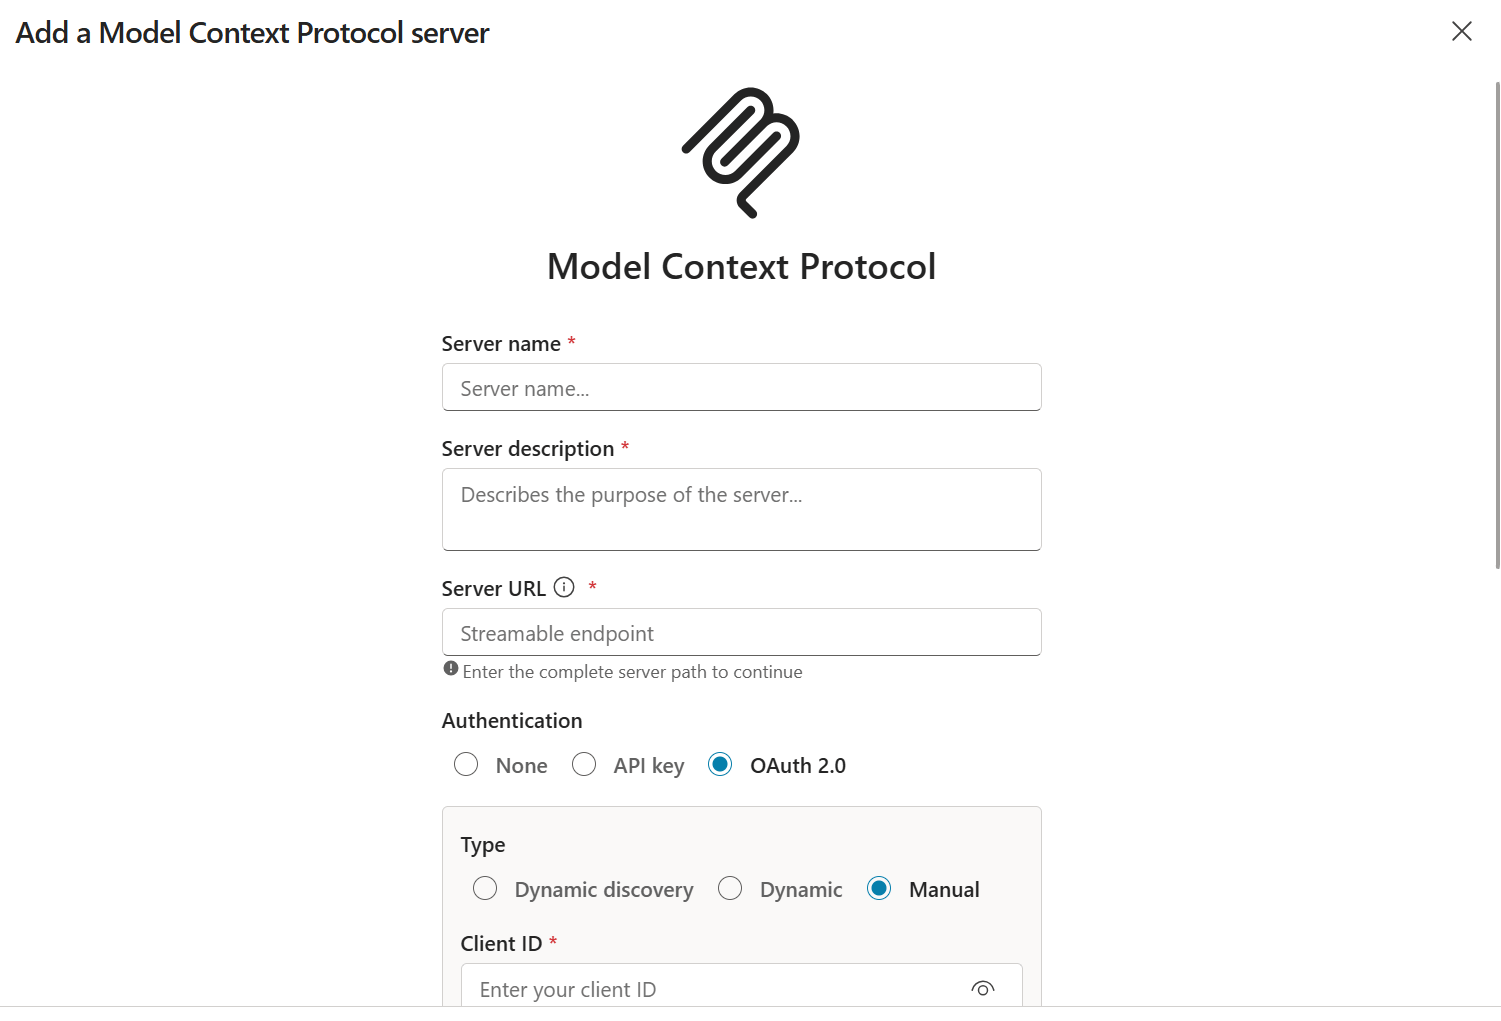
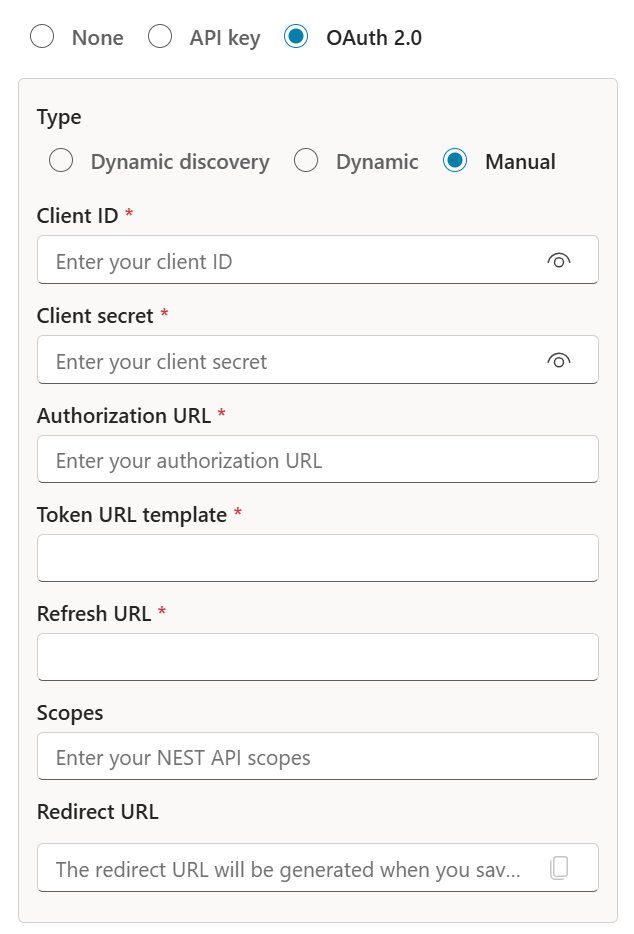
This documentation assumes you are using Microsoft Azure as OAuth provider. In Copilot Studio, add an Agent and add a Tool of type “MCP Server” to the agent. Select oAuth for the MCP Server authentication type, and enter following details:-
client_idandclient_secretfrom your first Azure app -
Authorization URL:
https://login.microsoftonline.com/{tenant_id}/oauth2/v2.0/authorize -
Token URL template:
https://login.microsoftonline.com/{tenant_id}/oauth2/v2.0/token -
Refresh url:
https://login.microsoftonline.com/{tenant_id}/oauth2/v2.0/token -
Scopes:
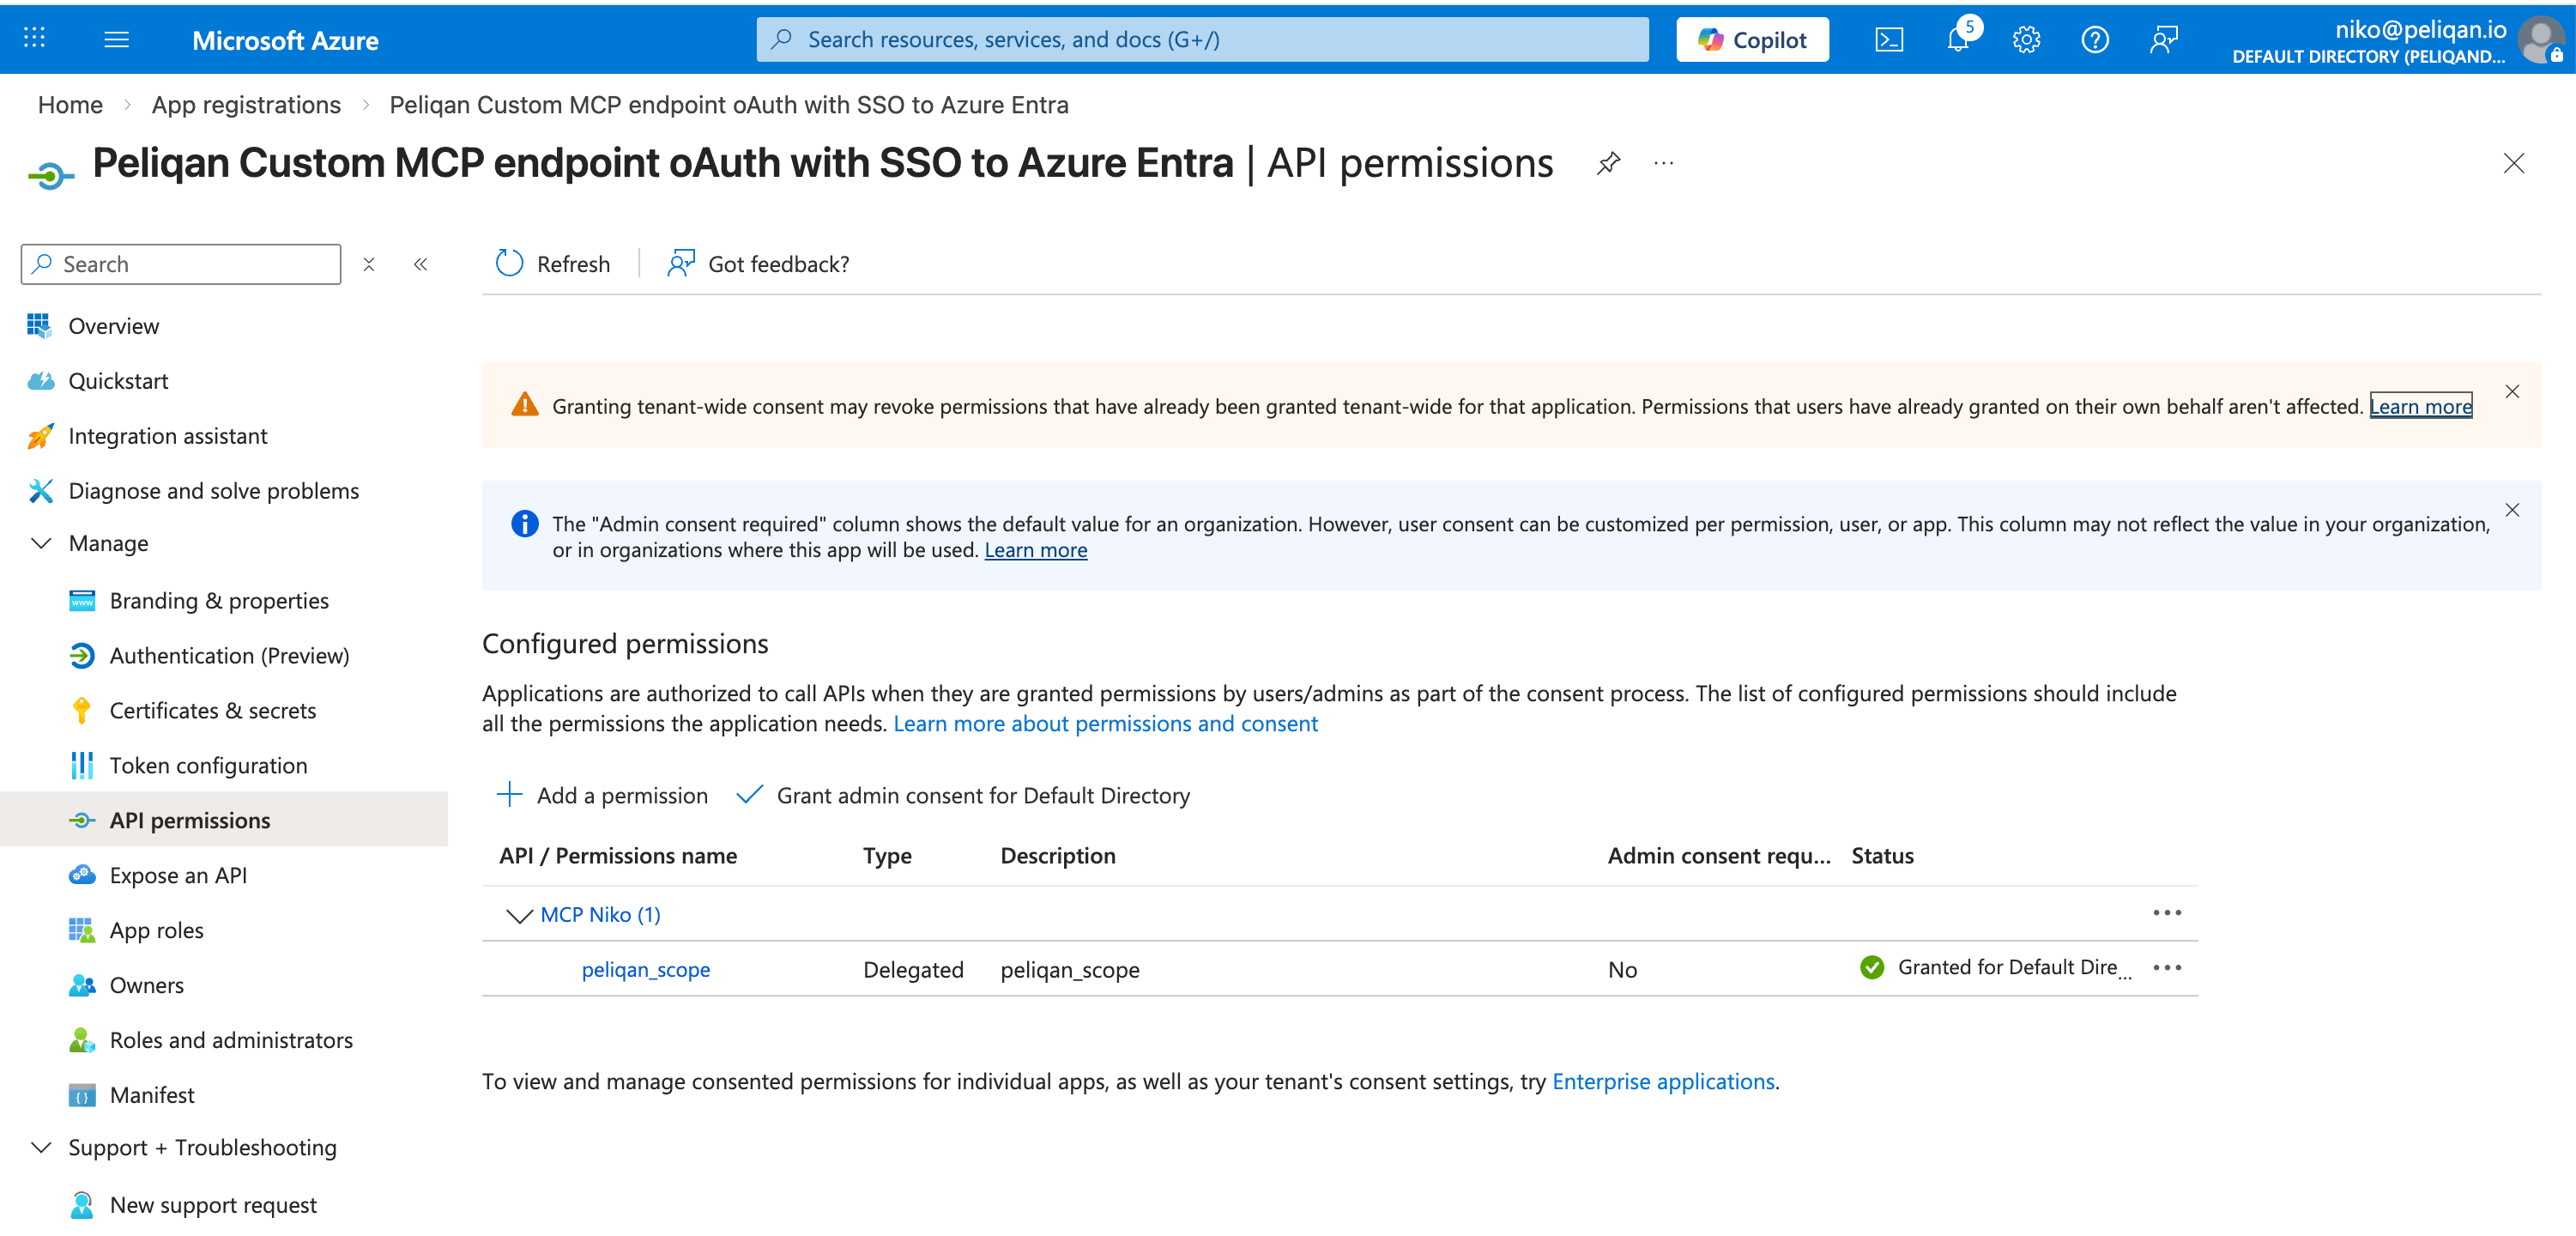
https://api.eu.peliqan.io/123/mcp/peliqan_scope openid profile offline_accessNote: the first scope is the scope URL from your second Azure app