> ## Documentation Index
> Fetch the complete documentation index at: https://help.peliqan.io/llms.txt
> Use this file to discover all available pages before exploring further.
# Visma Net - Getting started in Peliqan
> Connect Visma Net to Peliqan by activating the Visma App Store, adding the Integration Administrator role, and installing the Peliqan app using an invitation code from Peliqan support.
This article provides an overview to get started with the **Visma net** connector in **Peliqan**. Please [contact support](https://peliqan.io/contact) if you have any additional questions or remarks.
## Connect Visma.net
Follow the below steps.
### 1. Enable the Visma app store
Make sure the Visma App Store is activated for your Company:
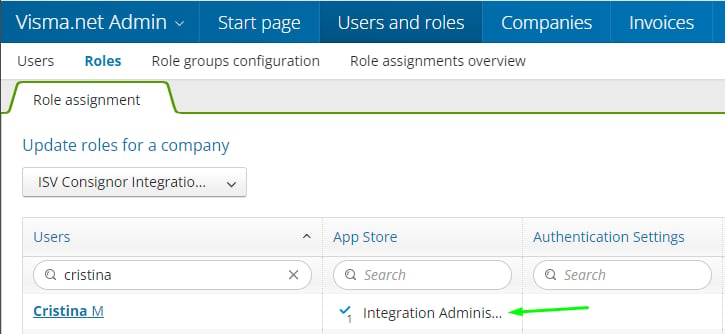
 ### 2. Add role "Integration Administrator" to your user
Make sure you have the role "Integration Administrator" assigned to your user:
### 2. Add role "Integration Administrator" to your user
Make sure you have the role "Integration Administrator" assigned to your user:
 ### 3. Add the Peliqan app to your tenant
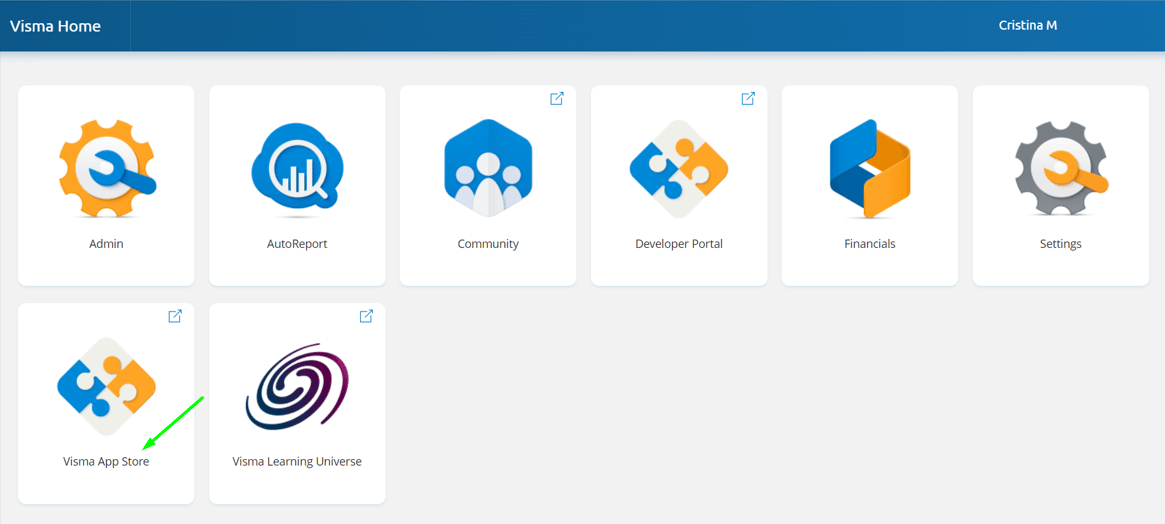
Add the Peliqan app to your Visma net tenant. Go to the Visma app store:
### 3. Add the Peliqan app to your tenant
Add the Peliqan app to your Visma net tenant. Go to the Visma app store:
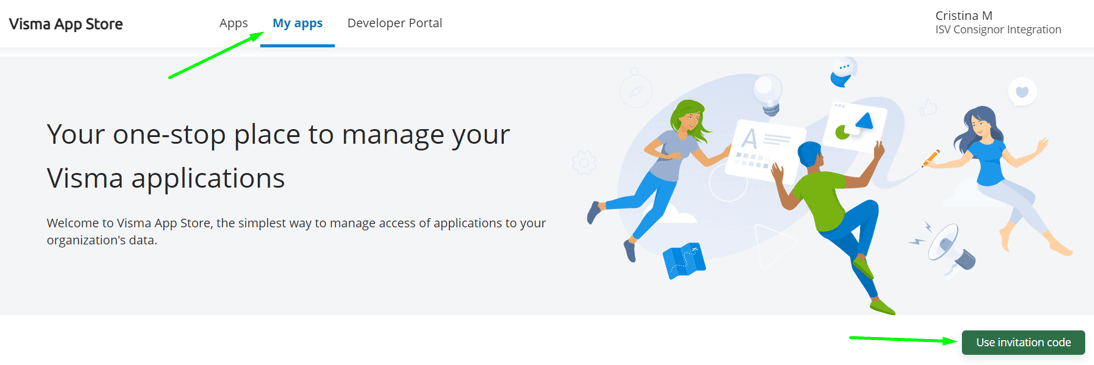
 Go to "My apps" and click on the button "Use invitation code":
 Enter the invitation code that you received from Peliqan support.
In the next steps, approve the different scopes that are shown.
This documentation is built and hosted on [Mintlify](https://mintlify.com), a developer documentation platform.
Enter the invitation code that you received from Peliqan support.
In the next steps, approve the different scopes that are shown.
This documentation is built and hosted on [Mintlify](https://mintlify.com), a developer documentation platform.