> ## Documentation Index
> Fetch the complete documentation index at: https://help.peliqan.io/llms.txt
> Use this file to discover all available pages before exploring further.
# Twinfield - Getting started in Peliqan
> Sync your Twinfield accounting data to Peliqan with OAuth. Register an application, connect, and sync offices, customers, suppliers, GL accounts, and transactions.
***Twinfield*** *is a cloud-based accounting platform from* Wolters Kluwer\*, designed for accountants, bookkeepers, and SMEs. It provides financial accounting, invoicing, bank reconciliation, VAT reporting, multi-company administration, and financial reporting in a single online platform.\*
Connect your **Twinfield** (Wolters Kluwer) administration to Peliqan to sync accounting data (offices, customers, suppliers, GL accounts, transactions, and more).
## **Prerequisites**
* A Twinfield account with access to the **Developer Portal** (`https://developers.twinfield.com`).
* The **company (administration) code(s)** you want to sync (e.g. `1000`). You can also discover these later by syncing the `offices` table first.
## **Step 1 — Register an application in Twinfield**
1. Sign in to the Twinfield Developer Portal → **Clients** → **New**.
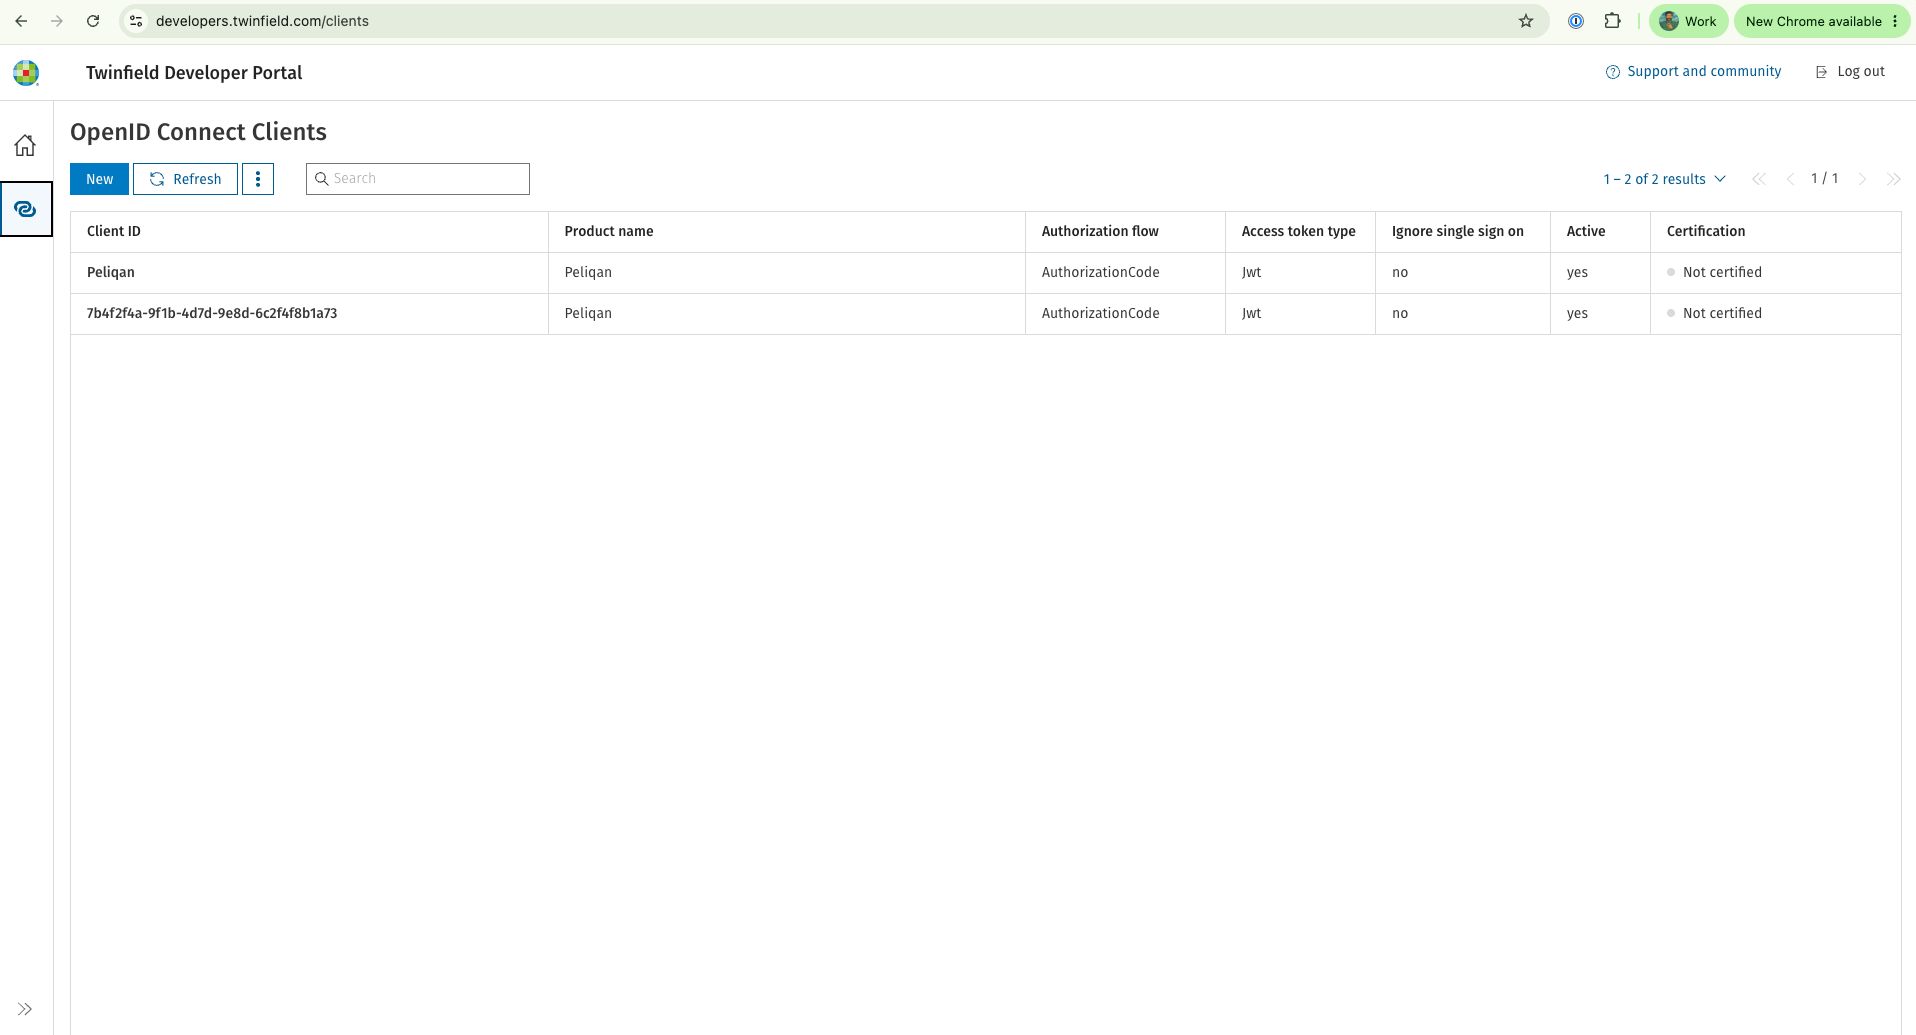 3. Set the **Redirect URI** to exactly: No trailing slash, no extra path — it must match exactly or login will fail.
```none theme={null}
https://oauth.peliqan.io
```
5. Save and copy the generated **Client ID** and **Client Secret**.
3. Set the **Redirect URI** to exactly: No trailing slash, no extra path — it must match exactly or login will fail.
```none theme={null}
https://oauth.peliqan.io
```
5. Save and copy the generated **Client ID** and **Client Secret**.
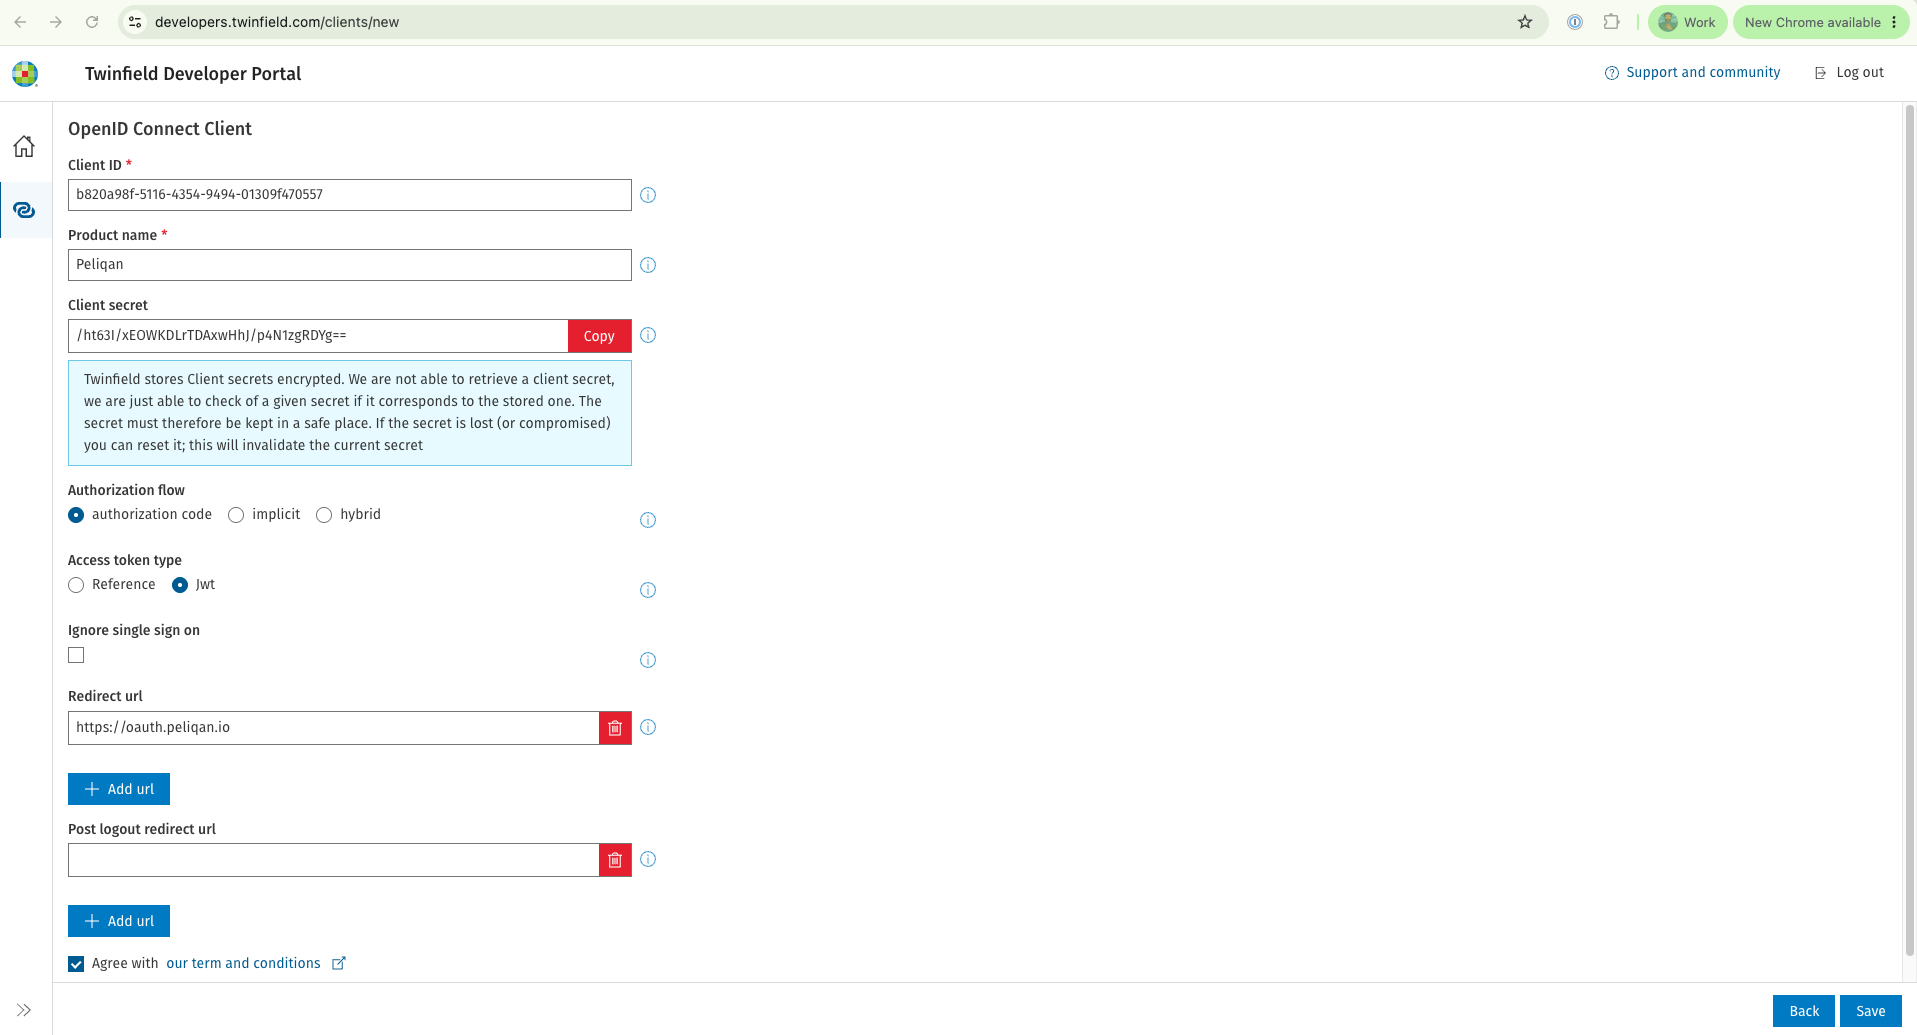 ## **Step 2 — Add the Twinfield connector in Peliqan**
1. In Peliqan, go to **Add data source** → search **Twinfield**.
2. Fill in the connect form:
| Field | Value |
| - | - |
| **Client id** | Client ID from Step 1 |
| **Client secret** | Client Secret from Step 1 |
| **Company code(s)** | One or more administration codes, comma-separated (e.g. NLA003256,NLA003257) |
## **Step 2 — Add the Twinfield connector in Peliqan**
1. In Peliqan, go to **Add data source** → search **Twinfield**.
2. Fill in the connect form:
| Field | Value |
| - | - |
| **Client id** | Client ID from Step 1 |
| **Client secret** | Client Secret from Step 1 |
| **Company code(s)** | One or more administration codes, comma-separated (e.g. NLA003256,NLA003257) |
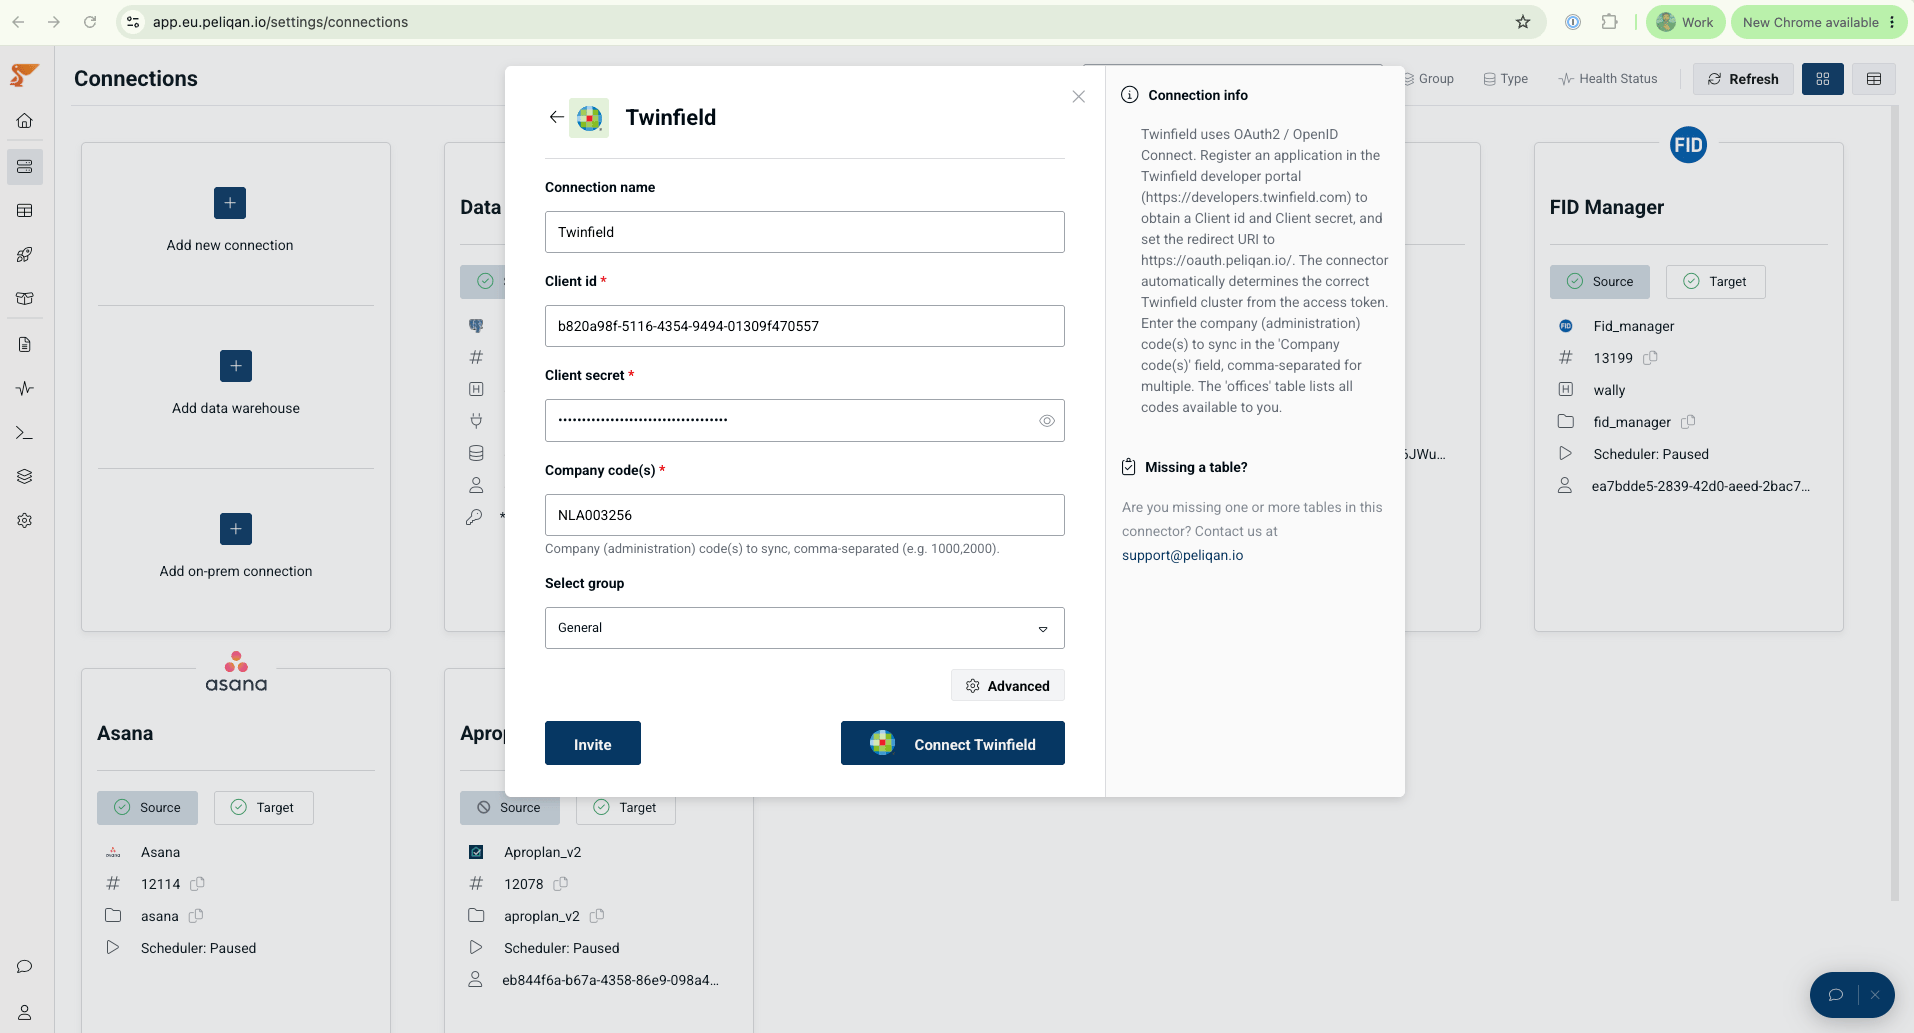 ## **Step 3 — Authorize**
1. Click **Connect / Authorize**.
2. You'll be redirected to **login.twinfield.com** — sign in and approve access.
3. On success you're returned to Peliqan and the connection is created. The connector automatically detects the correct Twinfield **cluster** from your login — no extra config needed.
## **Step 3 — Authorize**
1. Click **Connect / Authorize**.
2. You'll be redirected to **login.twinfield.com** — sign in and approve access.
3. On success you're returned to Peliqan and the connection is created. The connector automatically detects the correct Twinfield **cluster** from your login — no extra config needed.
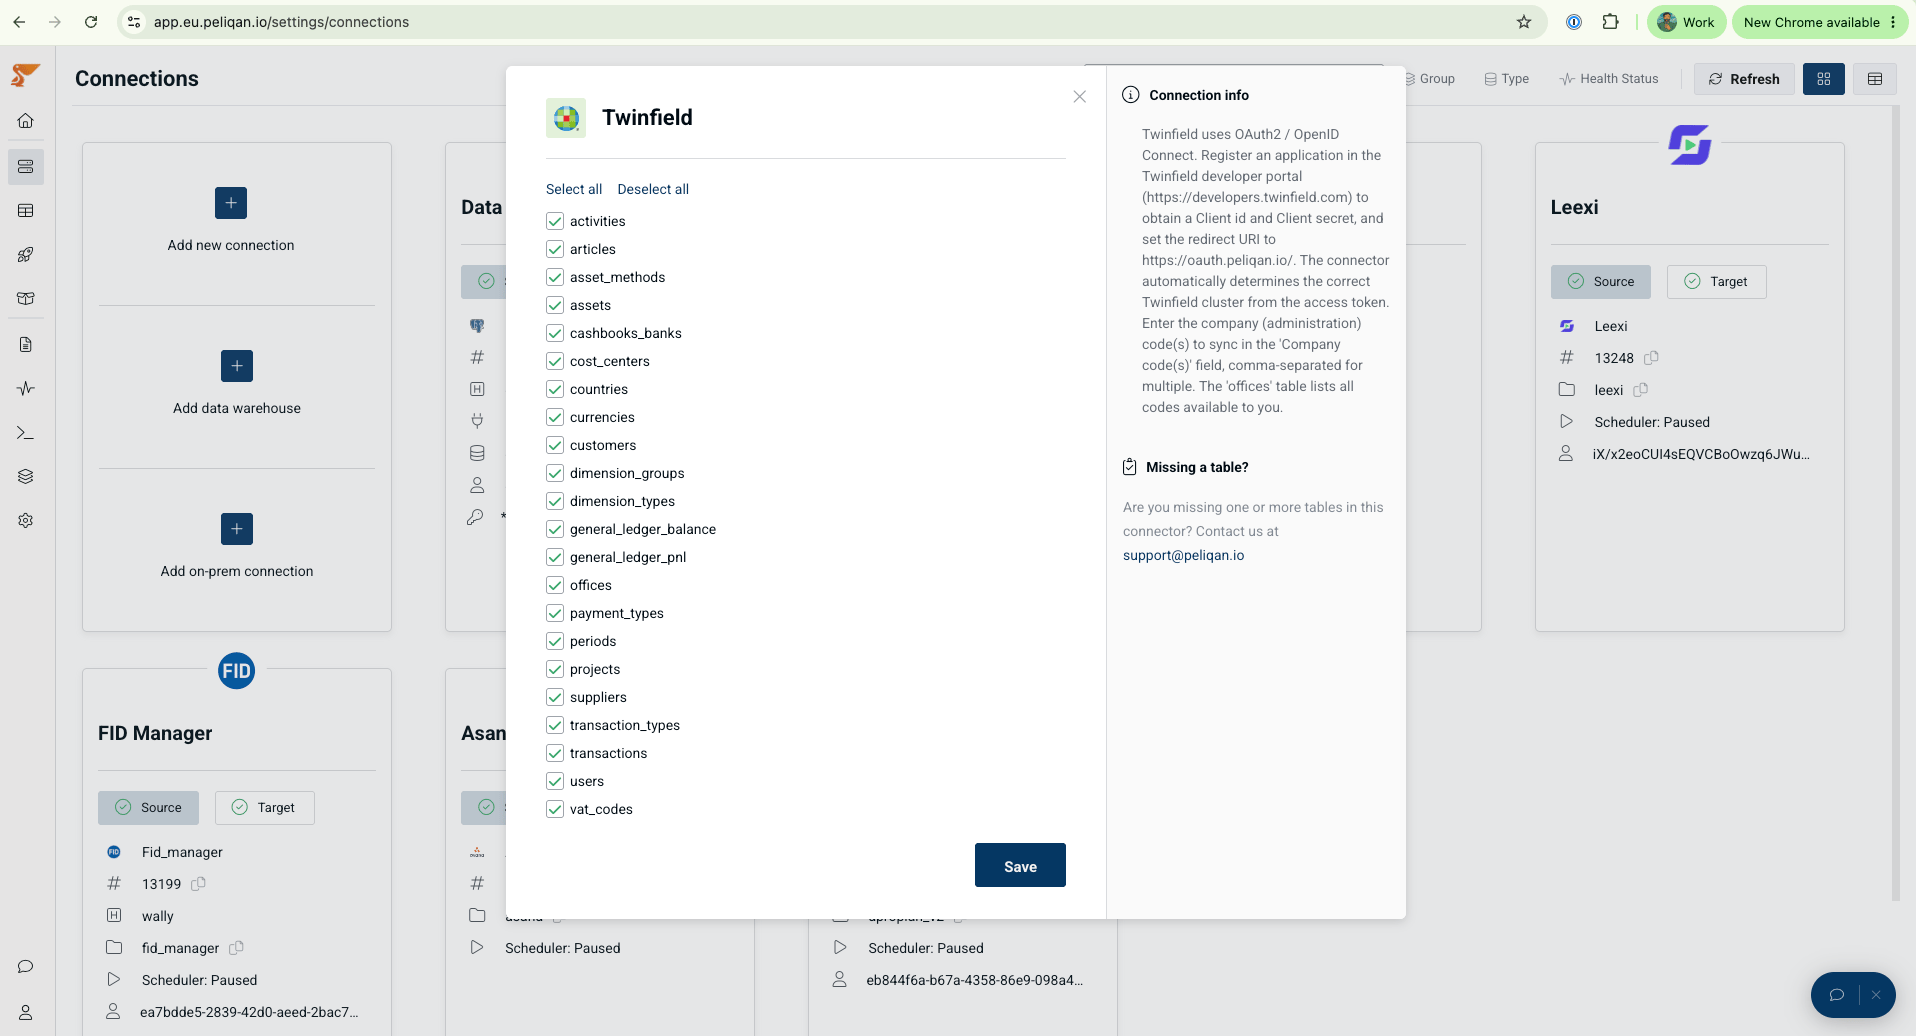
 ## **Step 4 — Select tables & sync**
1. Don't know your company codes? Sync the `offices` table first — it lists every administration code available to you. Then put the right code(s) in **Company code(s)** and re-sync.
2. Click on Advanced Button, select the tables you want and run the sync. Data lands in your Peliqan data warehouse.
## **Step 4 — Select tables & sync**
1. Don't know your company codes? Sync the `offices` table first — it lists every administration code available to you. Then put the right code(s) in **Company code(s)** and re-sync.
2. Click on Advanced Button, select the tables you want and run the sync. Data lands in your Peliqan data warehouse.
 ## **Good to know**
* **Multiple companies:** every administration-scoped table is synced once per company code you entered.
* **Transactions** sync **incrementally** (only changed records after the first full load); the reference/master tables do a full refresh each run.
* **Sync speed:** the connector is throttled to stay within Twinfield's rate limits (tighter for uncertified apps). Large/multi-company syncs take longer by design.
This documentation is built and hosted on [Mintlify](https://mintlify.com), a developer documentation platform.
## **Good to know**
* **Multiple companies:** every administration-scoped table is synced once per company code you entered.
* **Transactions** sync **incrementally** (only changed records after the first full load); the reference/master tables do a full refresh each run.
* **Sync speed:** the connector is throttled to stay within Twinfield's rate limits (tighter for uncertified apps). Large/multi-company syncs take longer by design.
This documentation is built and hosted on [Mintlify](https://mintlify.com), a developer documentation platform.