> ## Documentation Index
> Fetch the complete documentation index at: https://help.peliqan.io/llms.txt
> Use this file to discover all available pages before exploring further.
# Peliqan and Power Automate
You can use Microsoft Power Automate in combination with Peliqan, for example to build automations that use data from the Peliqan data warehouse.
Note that we use the “New designer” in Power Automate. See the toggle in the top right corner in the Power Automate flow designer.
# Example 1: read data from the Peliqan data warehouse, evaluate and send alerts to MS Teams
In the below example we build a Flow in Power Automate that runs on a schedule. The flow fetches data from a view (or table) in the Peliqan data warehouse. It loops over the rows and checks the value for one column. If the value is higher than a treshold, an alert is sent to Microsoft Teams.
In the example below we monitor a table with invoices and if the invoice amount (invoice\_total) is higher than 100.000, we send out the alert.
### Step 1: add a connection in Power Automate to the Peliqan data warehouse
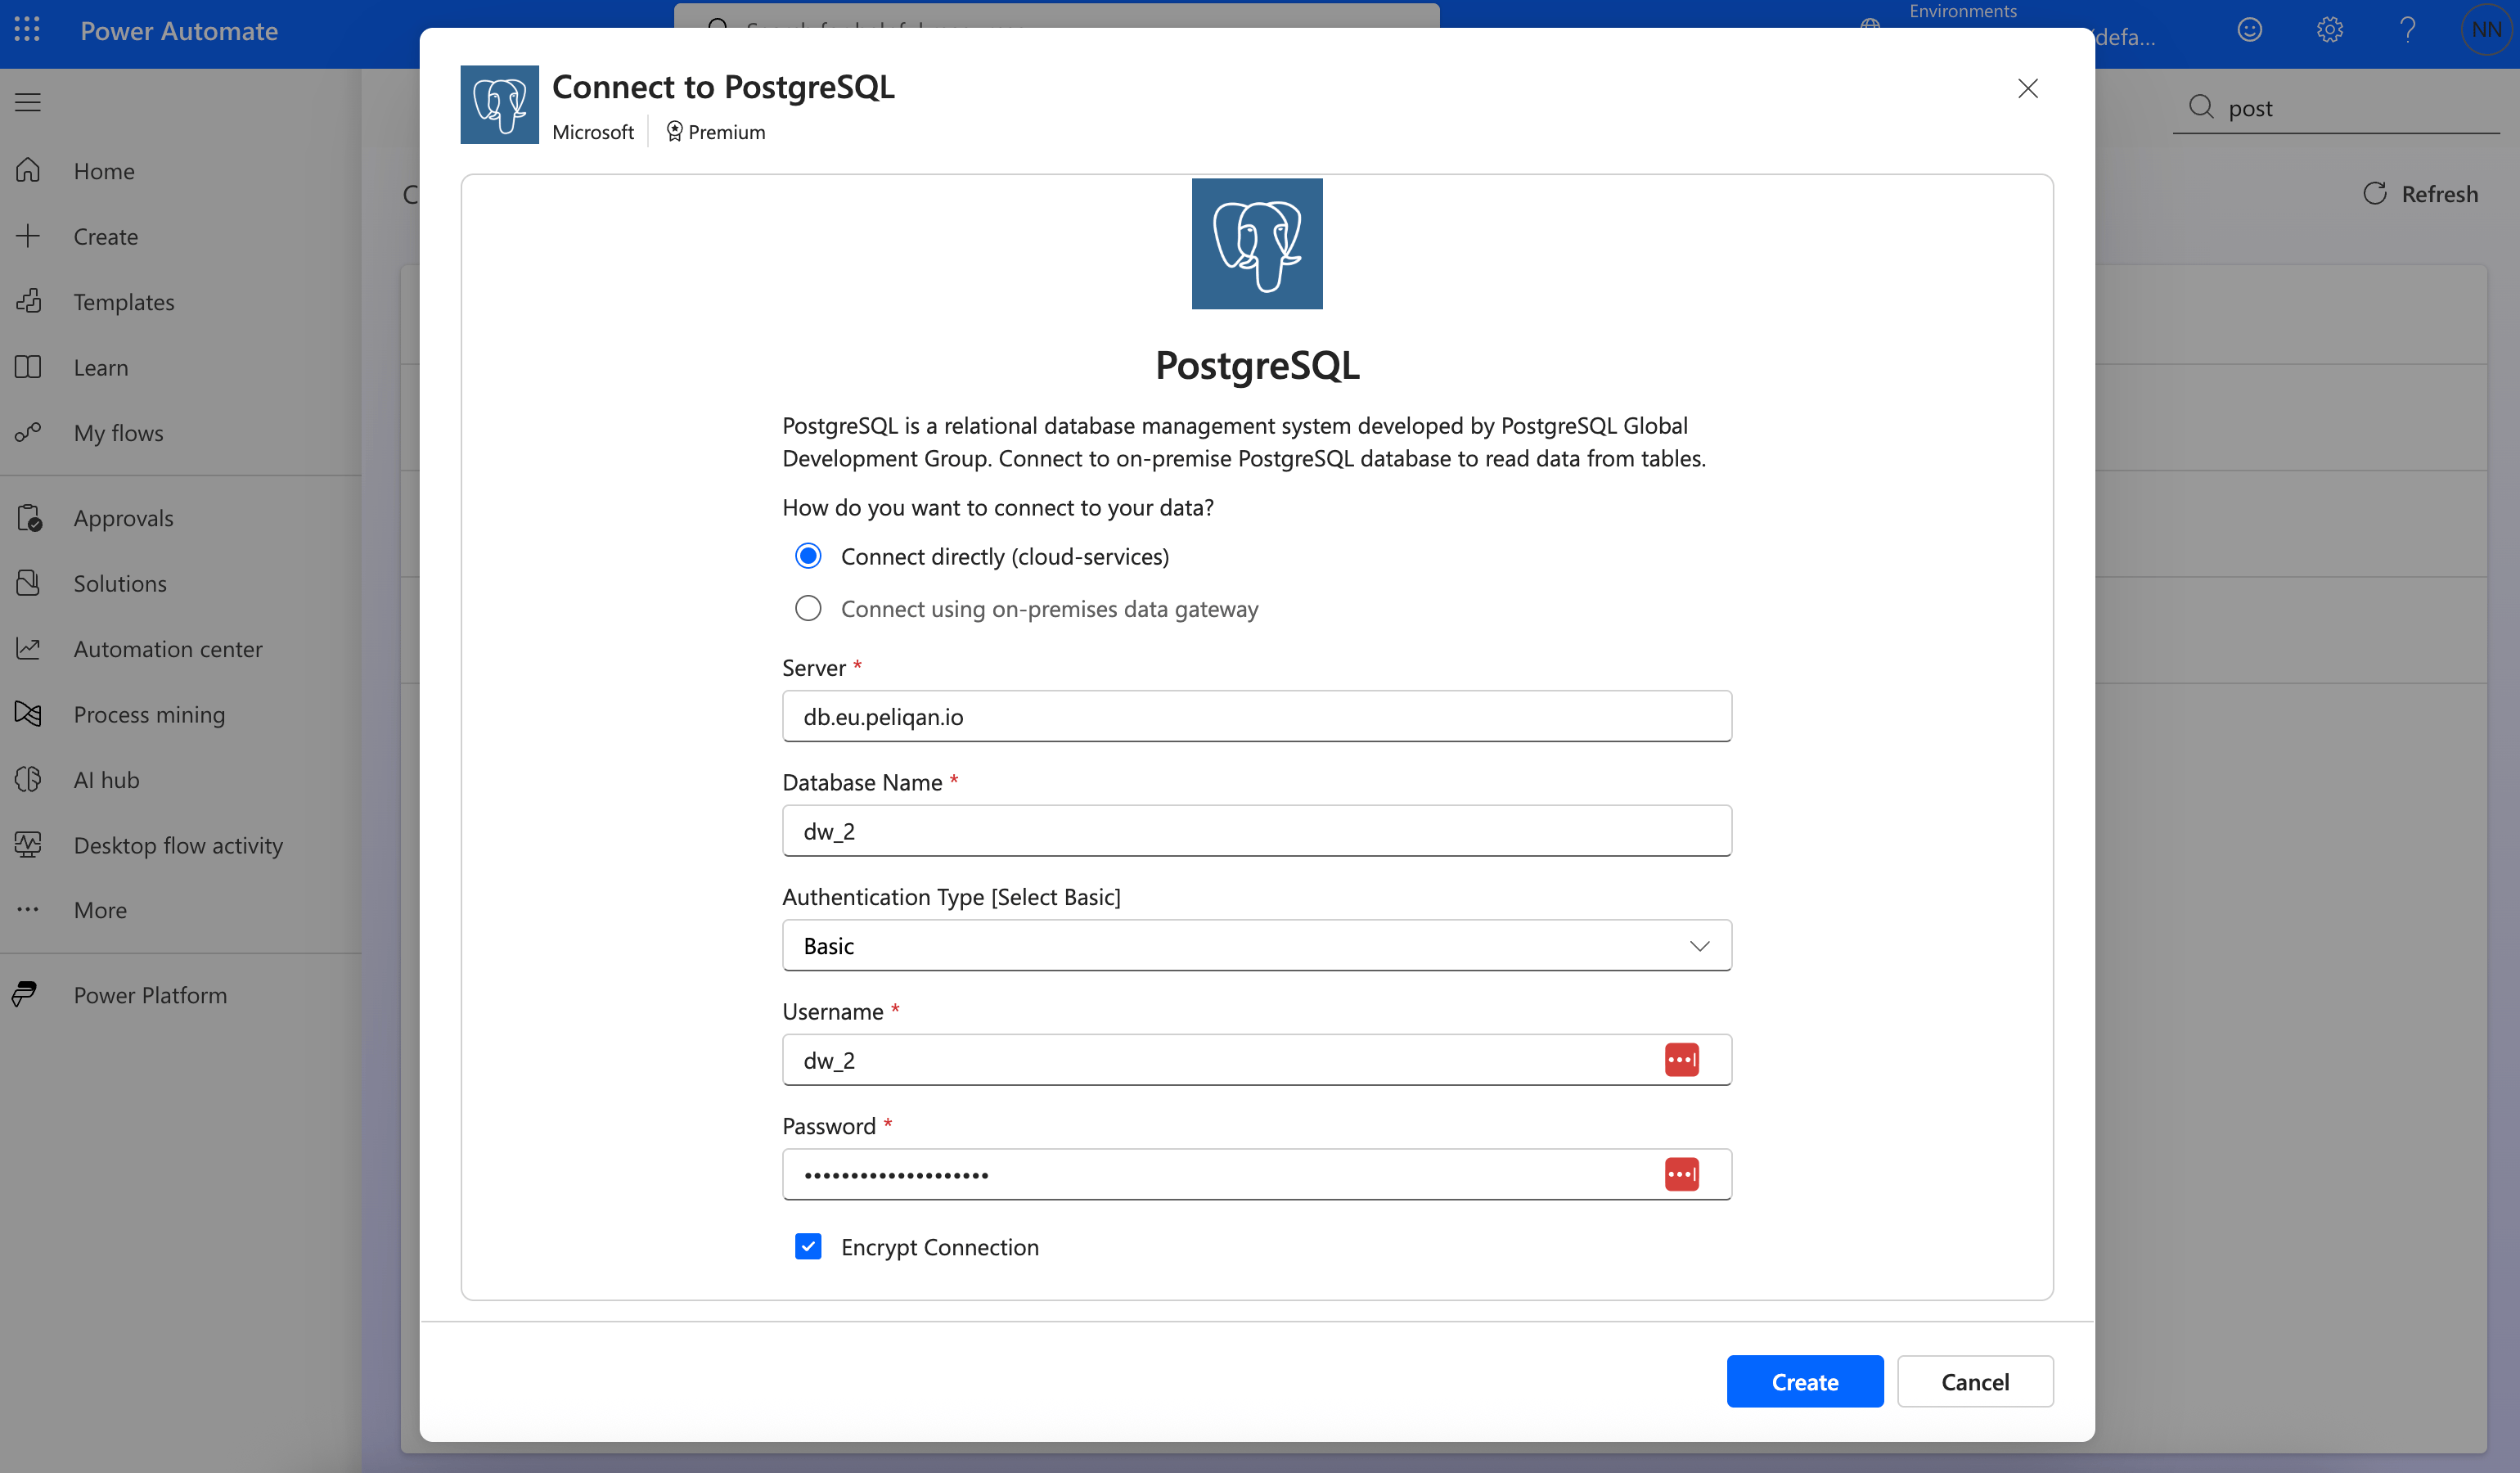
In Power Automate, go to Connections, add a Postgres connection and add the details of your Peliqan data warehouse. You can find all details in Peliqan under “Connections”, see the Connection Card for the Peliqan data warehouse.
 ### Step 2: Create a scheduled flow
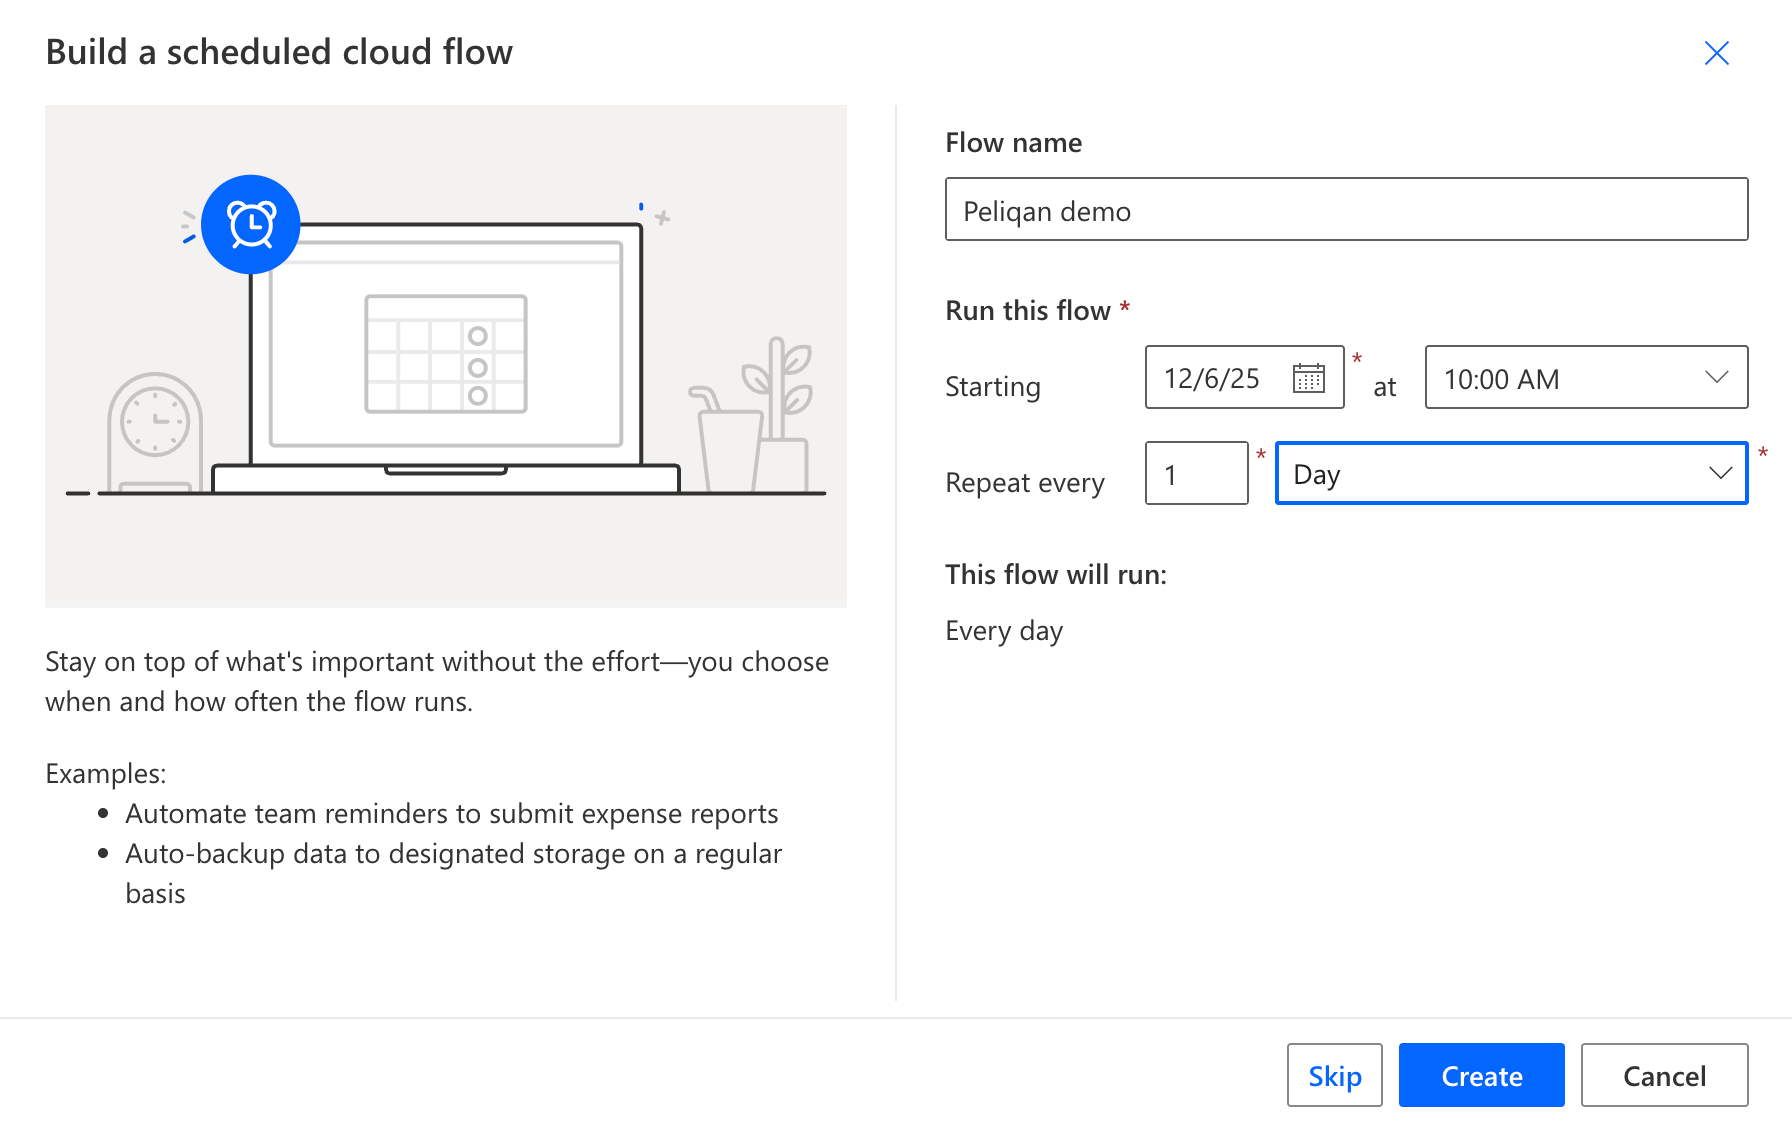
Create a scheduled flow in Power Automate:
### Step 2: Create a scheduled flow
Create a scheduled flow in Power Automate:
 ### Step 3: Get rows from a table or view (query) in Peliqan
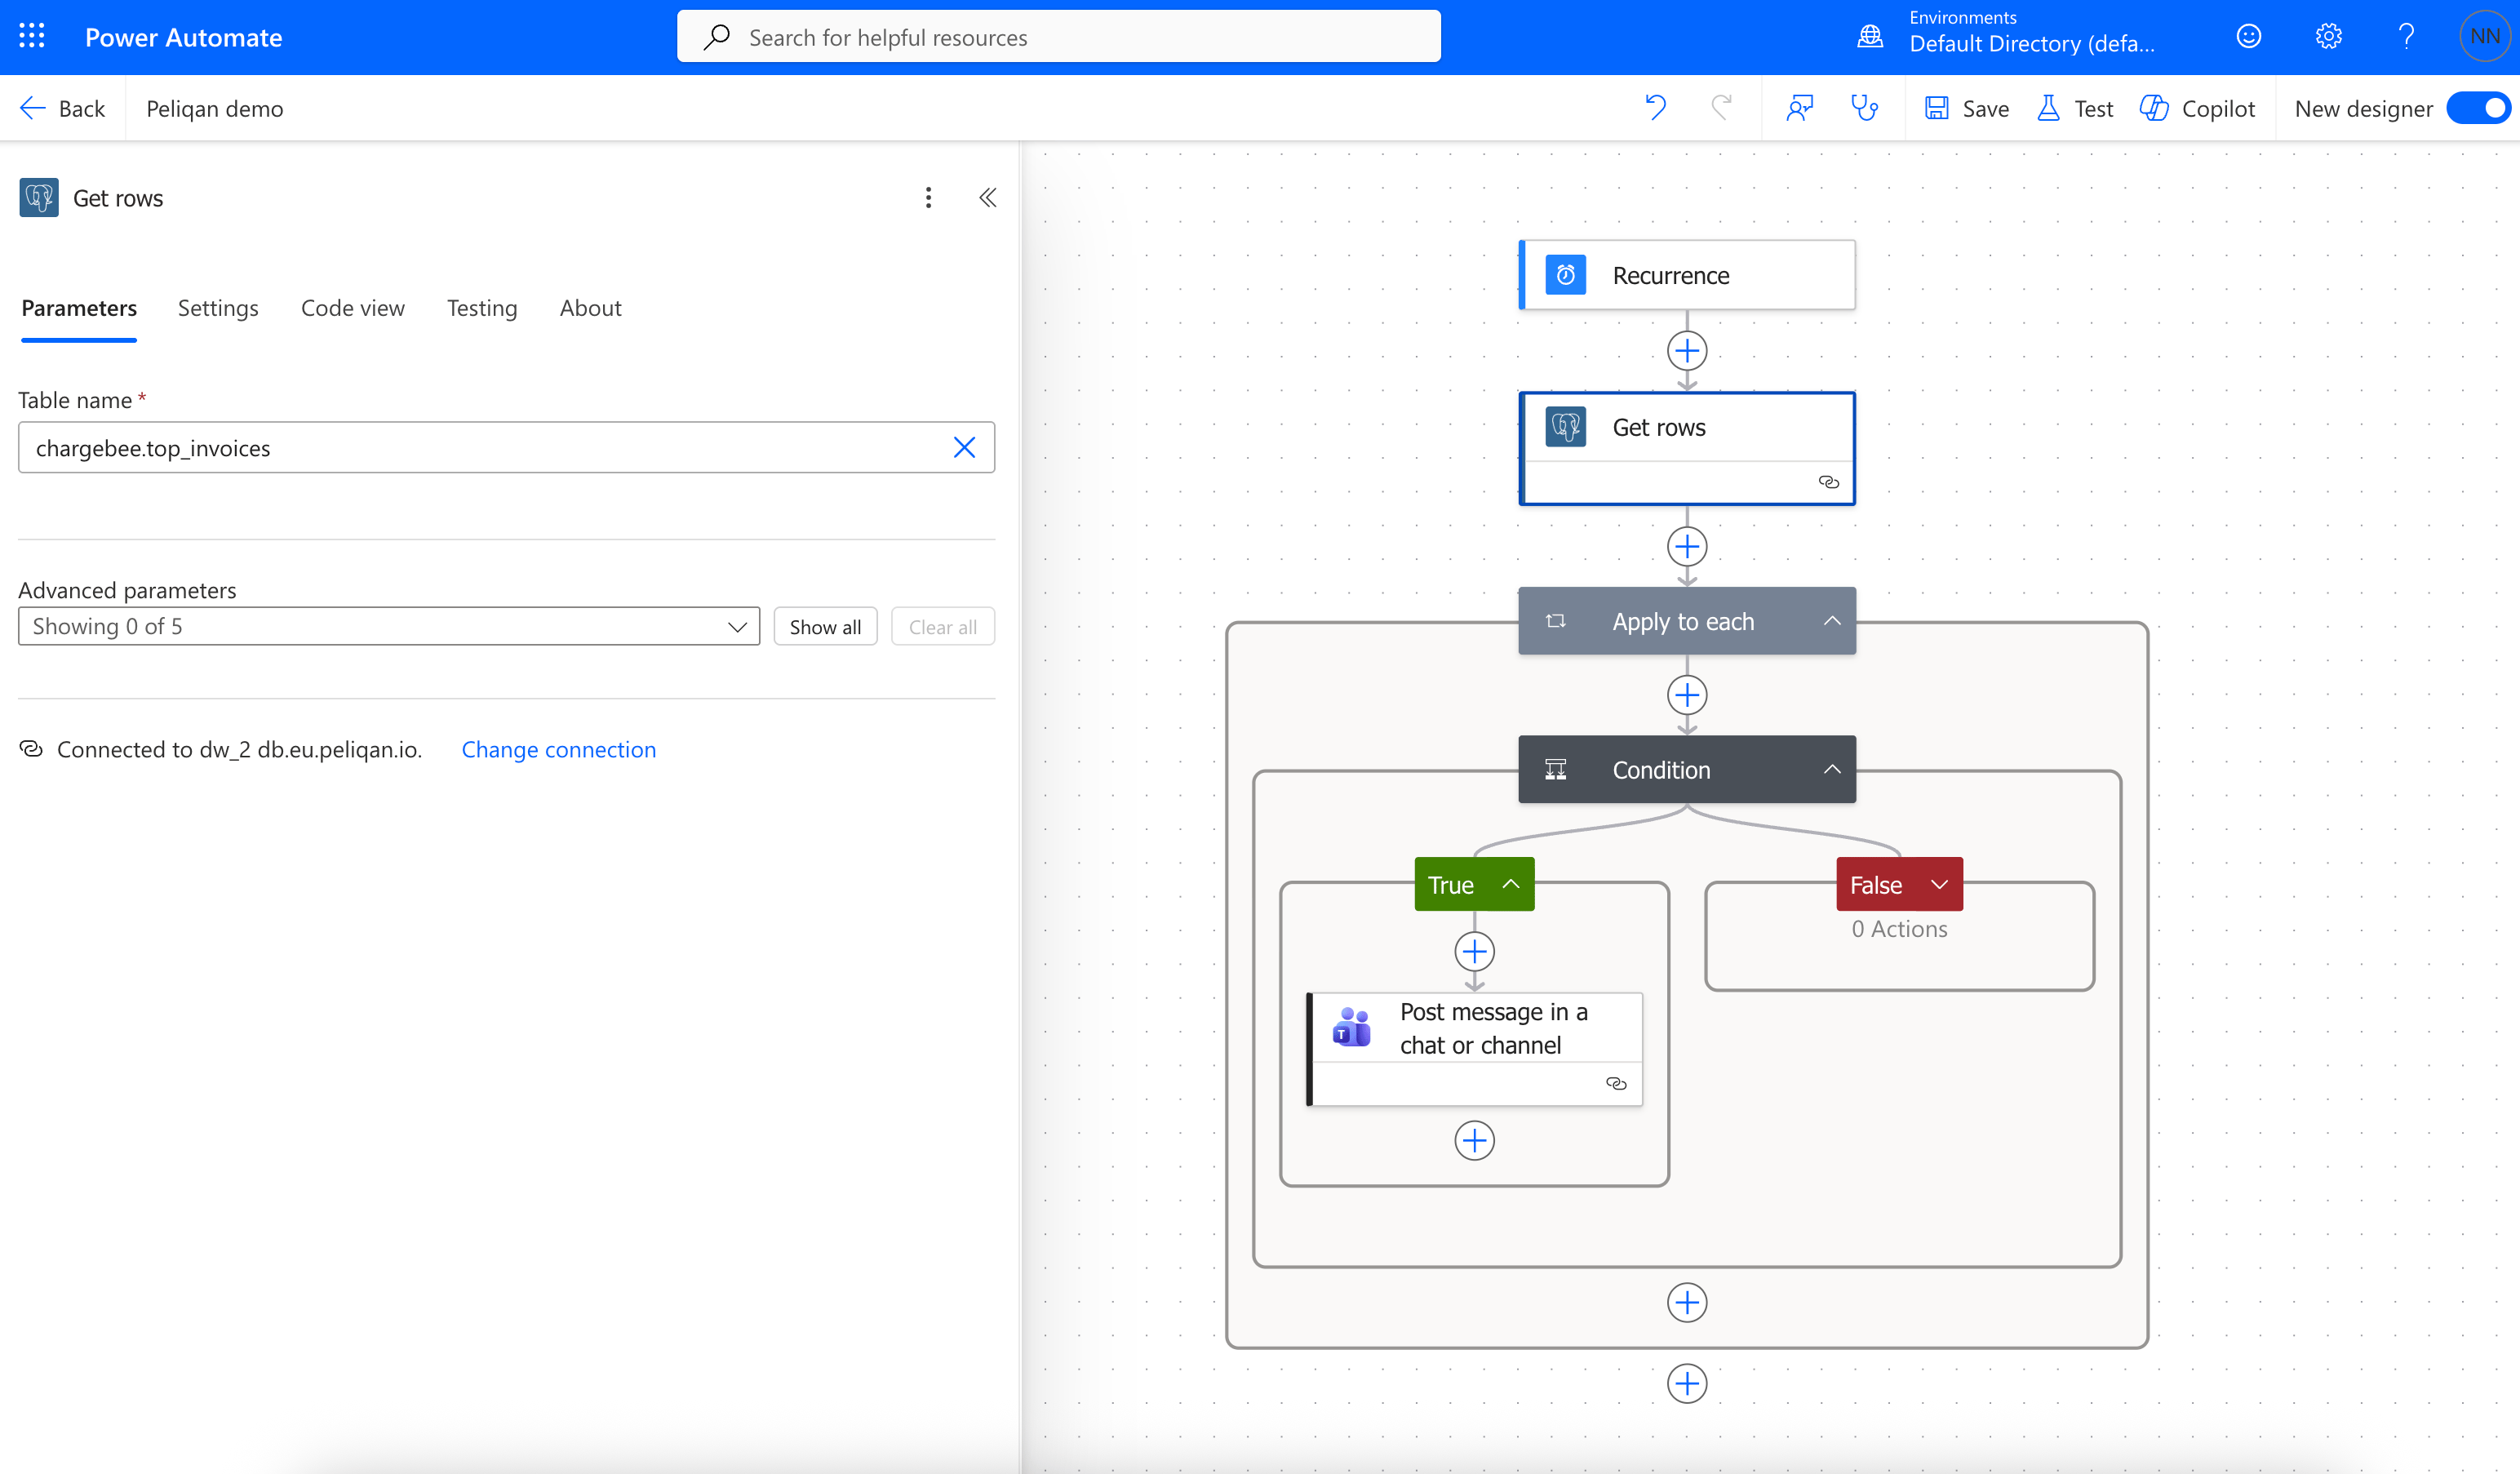
In the flow, add a block “Get Rows” and choose a table or view from the Peliqan data warehouse. In the exampe below we have selected [chargebee.top](http://chargebee.top)\_invoices:
### Step 3: Get rows from a table or view (query) in Peliqan
In the flow, add a block “Get Rows” and choose a table or view from the Peliqan data warehouse. In the exampe below we have selected [chargebee.top](http://chargebee.top)\_invoices:
 ### Step 4: Loop over the rows
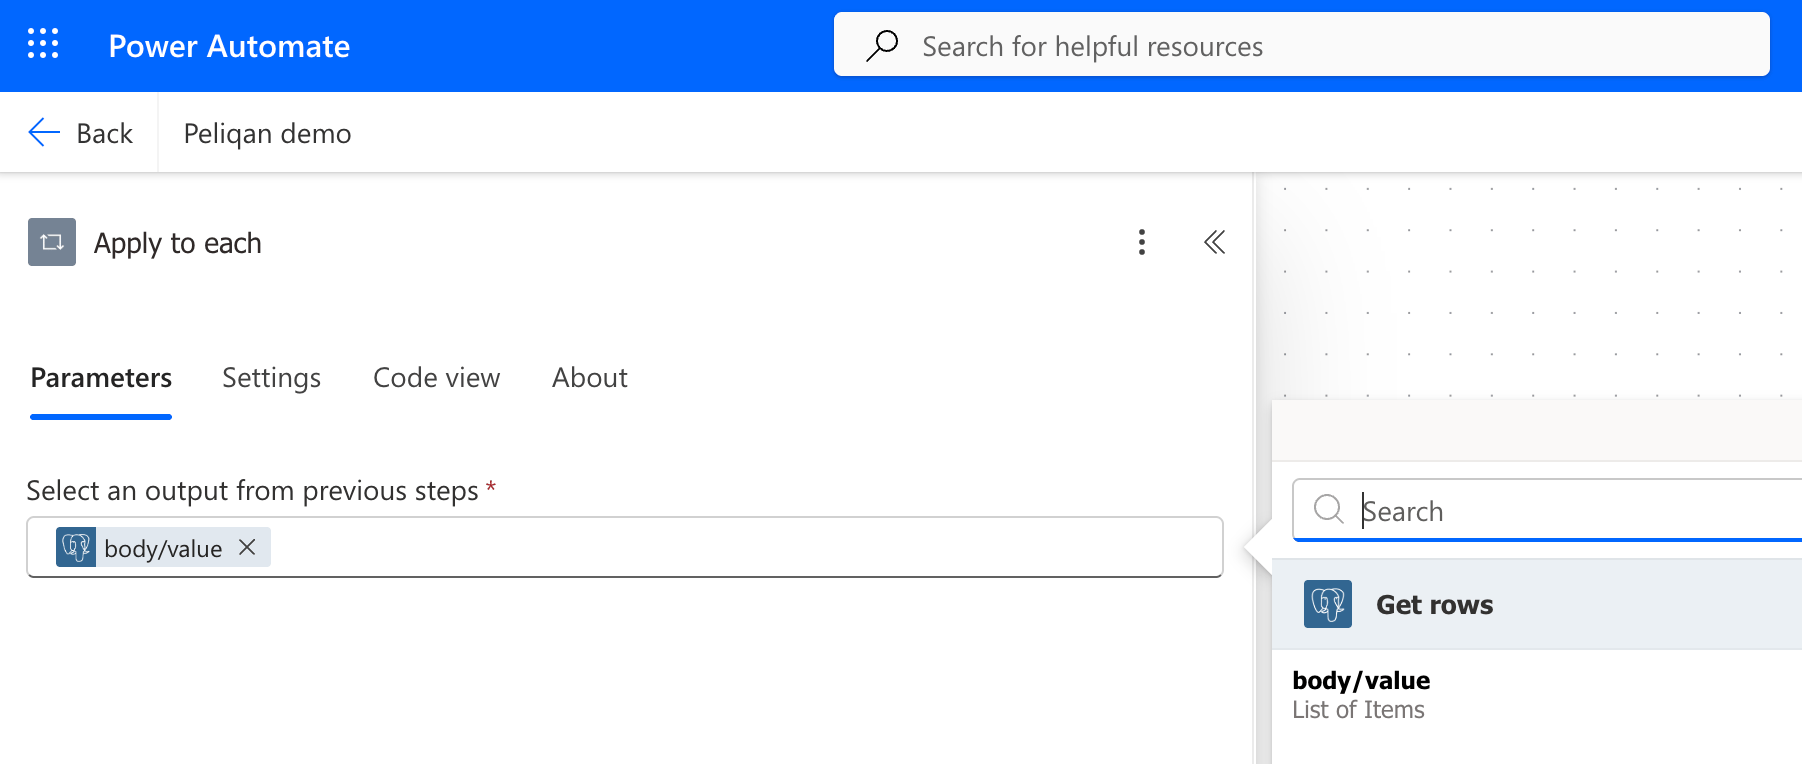
Add a block “Apply to each”. Select the output from the previous step “Get rows”:
### Step 4: Loop over the rows
Add a block “Apply to each”. Select the output from the previous step “Get rows”:
 ### Step 5: Use a condition to check a value for one row
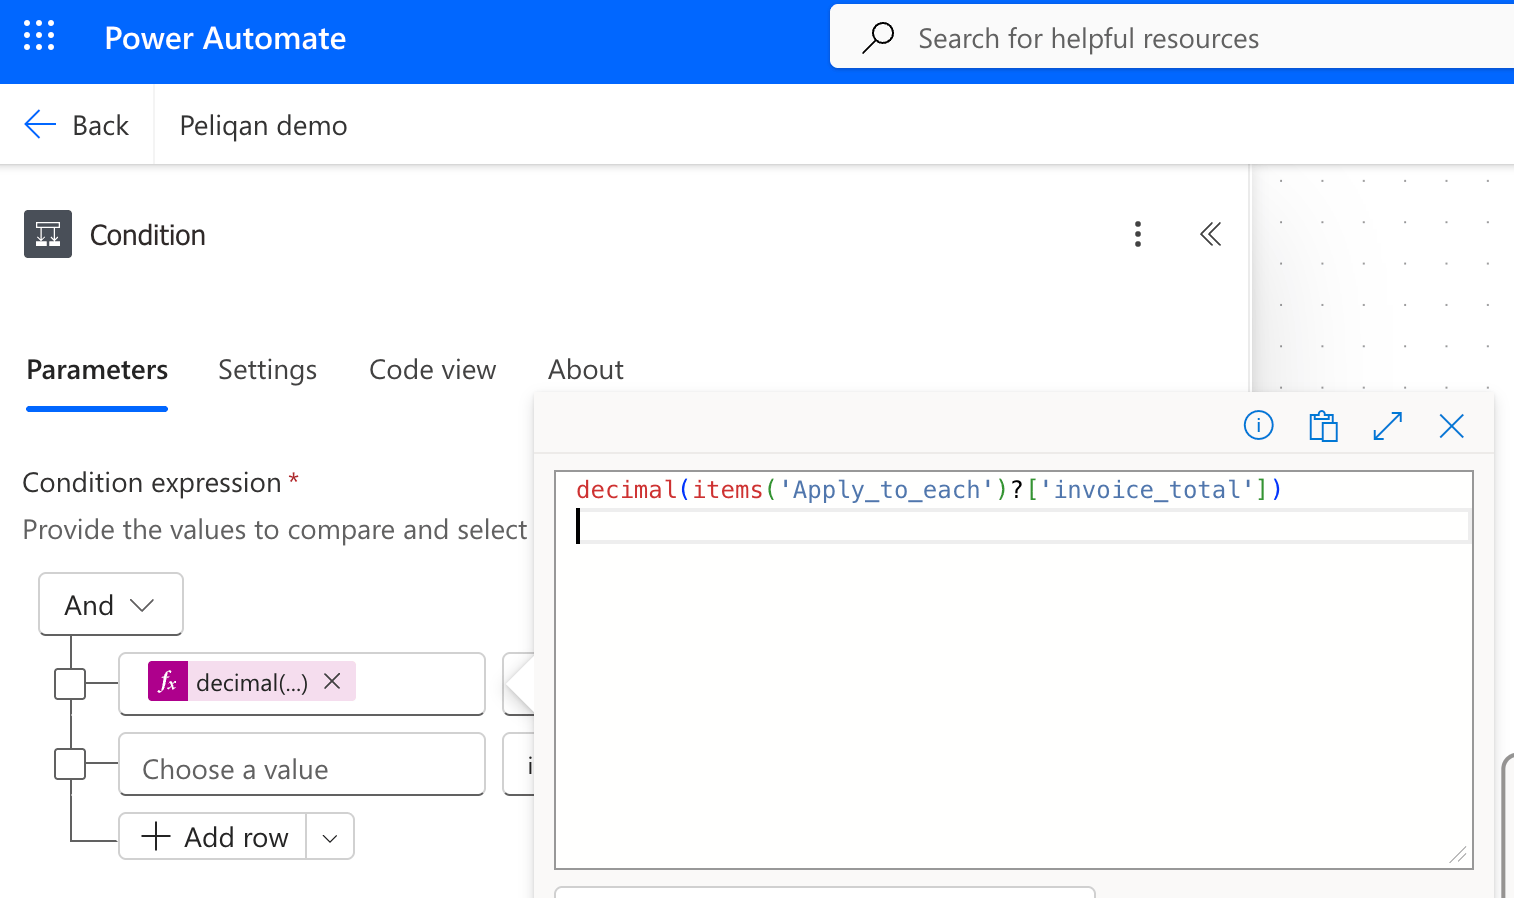
Inside the loop, add a Condition block, and add an expression that references one value from the item in the loop. In the example below we reference invoice\_total from each row, with the expression:
`decimal(items('Apply_to_each')?['invoice_total'])`
### Step 5: Use a condition to check a value for one row
Inside the loop, add a Condition block, and add an expression that references one value from the item in the loop. In the example below we reference invoice\_total from each row, with the expression:
`decimal(items('Apply_to_each')?['invoice_total'])`
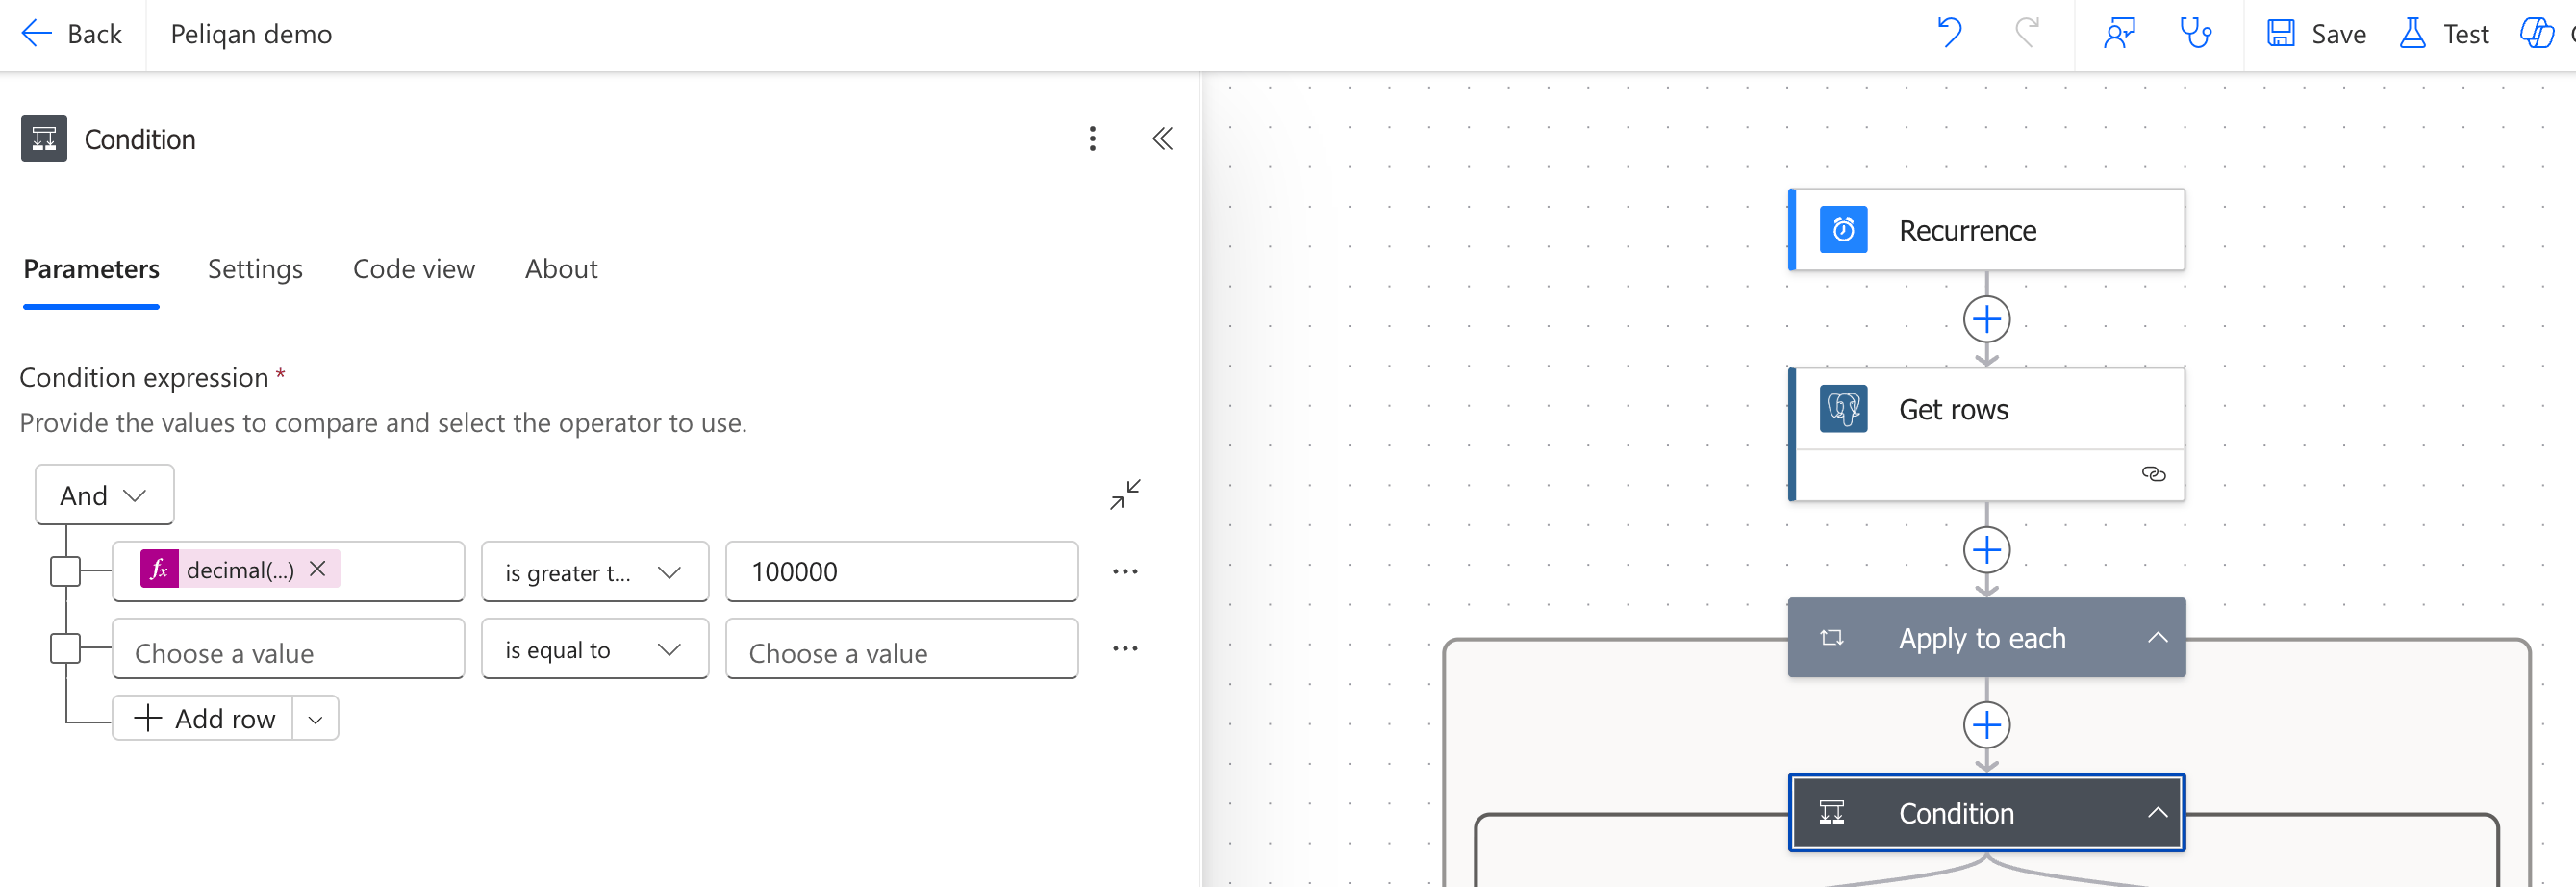
 Add a condition, e.g. “is greater than” and value 100.000:
 ### Step 6: Send an alert to MS Teams if the value > 100.000
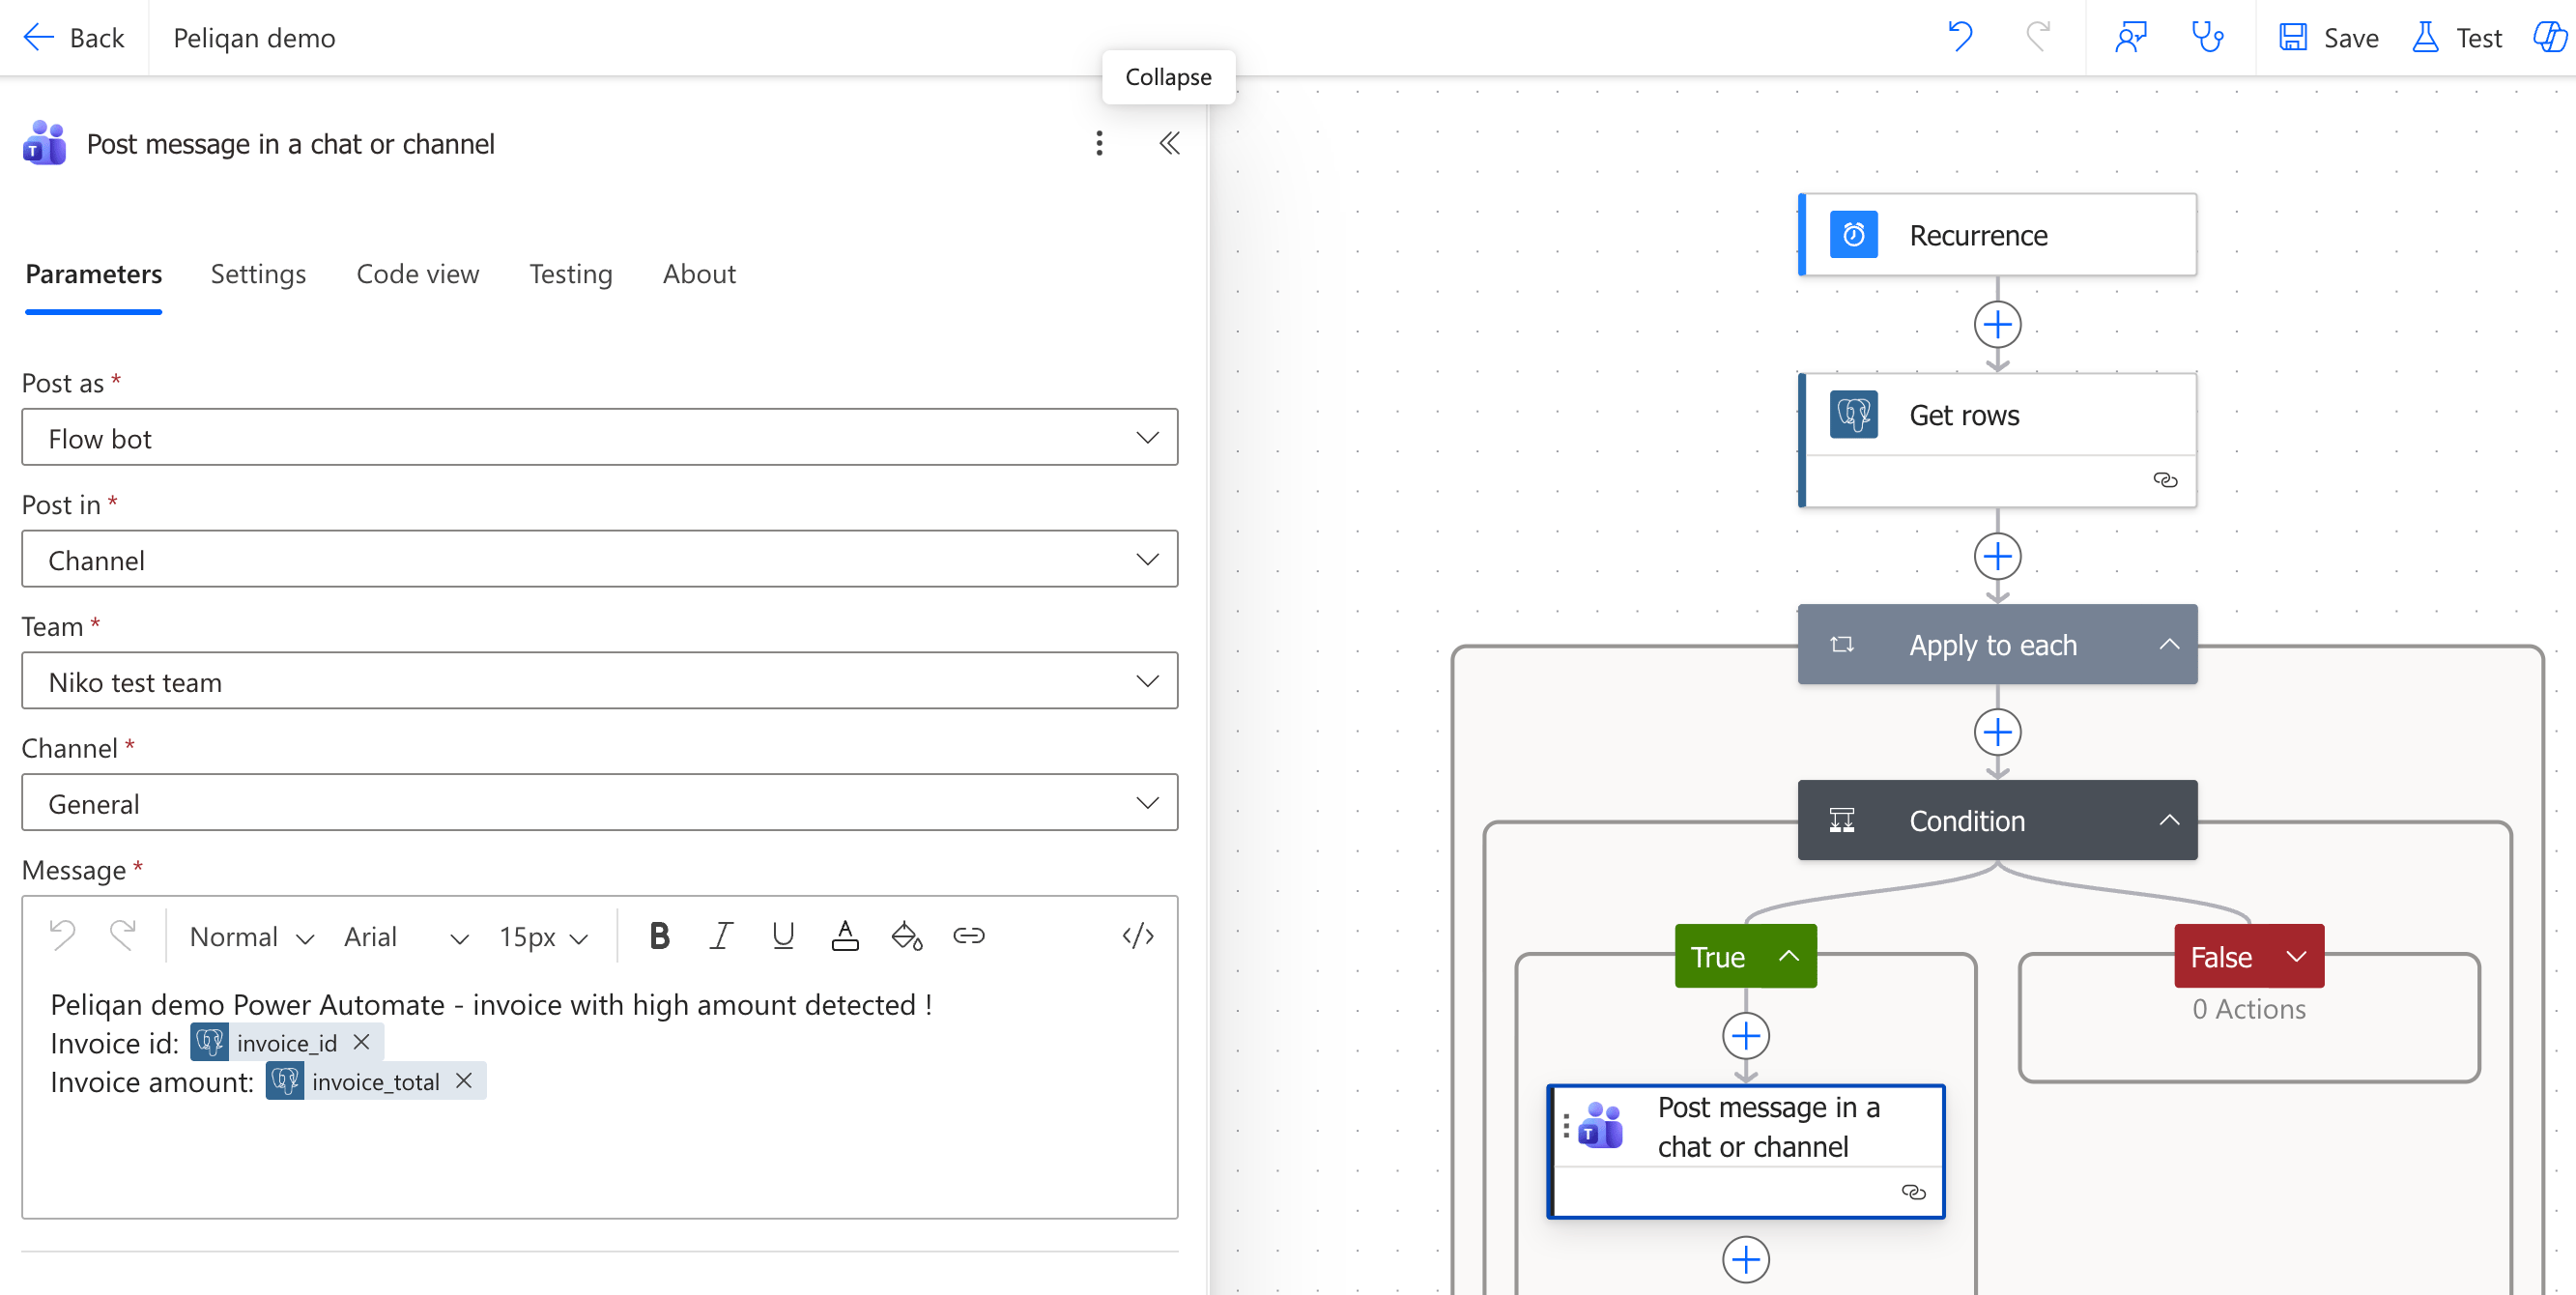
Add a block “Post message in a chat or channel”:
### Step 6: Send an alert to MS Teams if the value > 100.000
Add a block “Post message in a chat or channel”:
 # Example 2: send data from Peliqan to an Excel file on Sharepoint
### Step 1: Add a table to Excel
Create an Excel file on Sharepoint and add a Table on a sheet. Select a region on a sheet, then go to Insert > Table.
### Step 2: Make the table empty
In the flow in Power Automate, we first make the table empty, so that in subsequent runs of our flow, we do not keep adding the same rows to our table.
Do this by adding following blocks:
* List rows present in a table (Excel)
* Apply to each: output from previous step is body/value from the list of rows, example expression: `outputs('List_rows_present_in_a_table')?['body/value']`
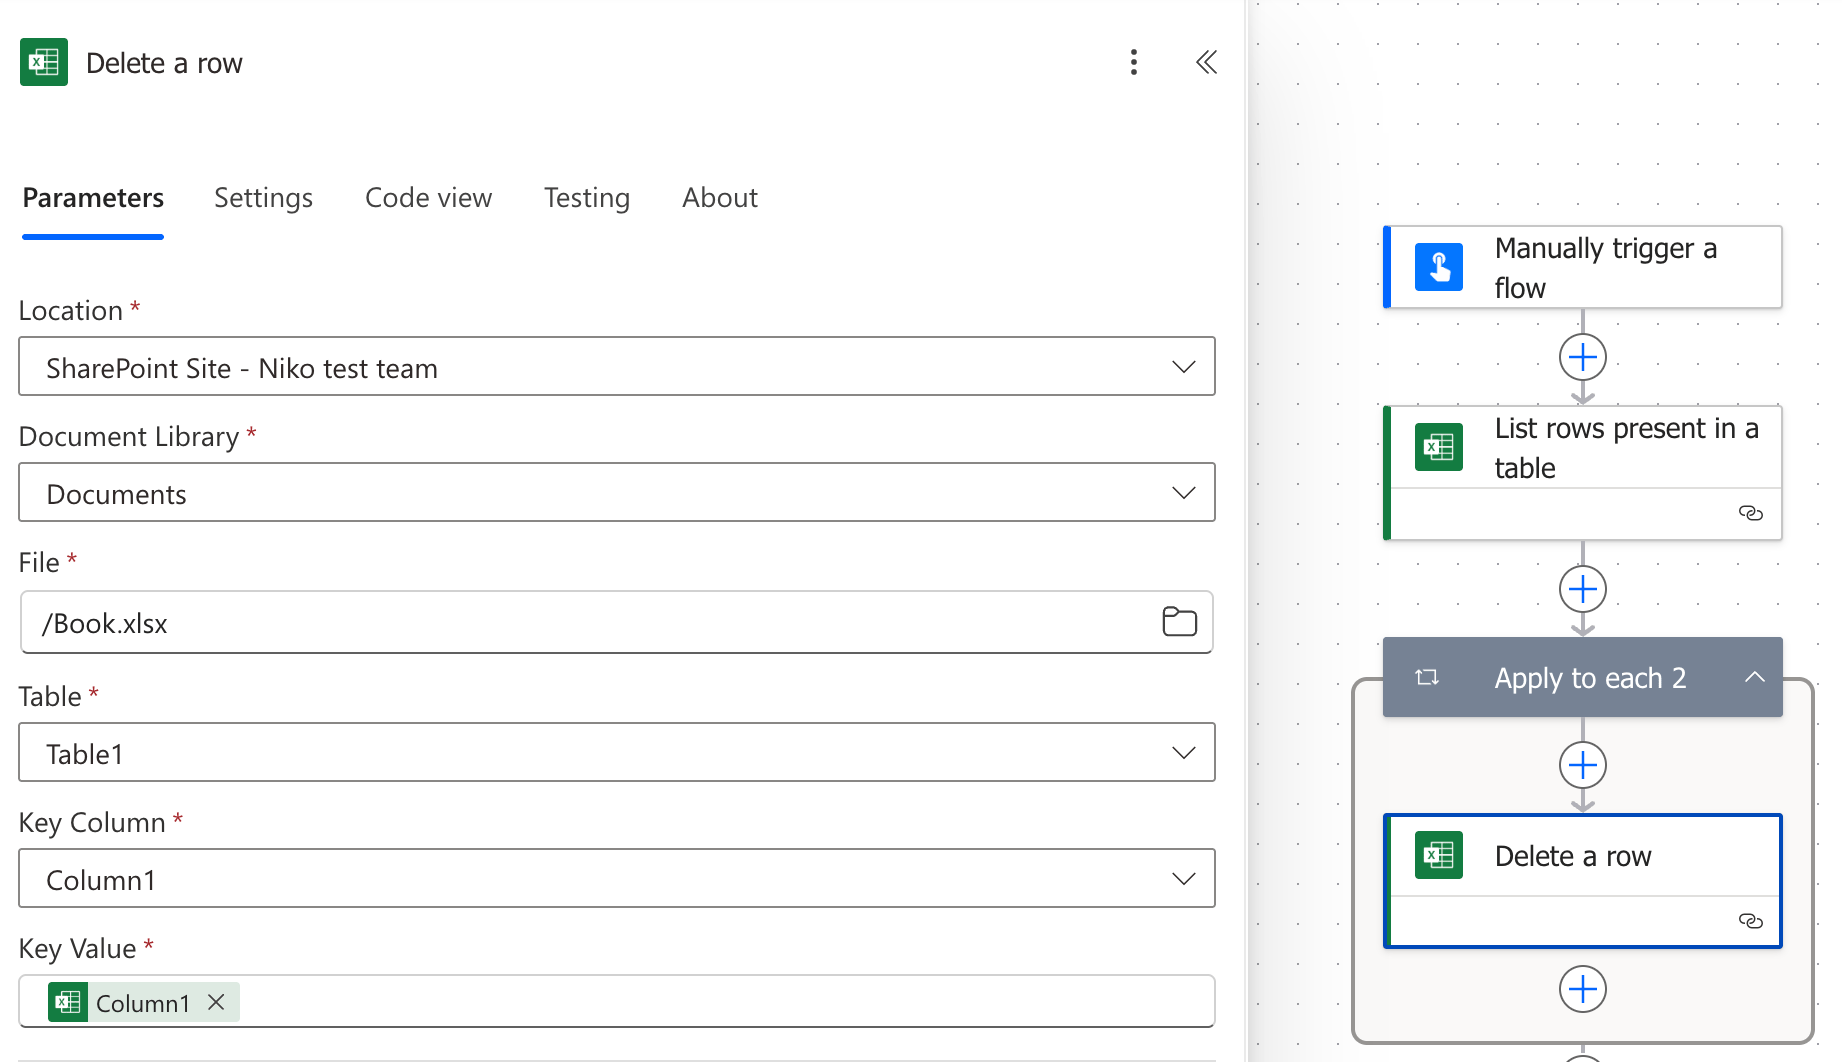
* Inside the loop: add block “Delete a row” (Excel)
# Example 2: send data from Peliqan to an Excel file on Sharepoint
### Step 1: Add a table to Excel
Create an Excel file on Sharepoint and add a Table on a sheet. Select a region on a sheet, then go to Insert > Table.
### Step 2: Make the table empty
In the flow in Power Automate, we first make the table empty, so that in subsequent runs of our flow, we do not keep adding the same rows to our table.
Do this by adding following blocks:
* List rows present in a table (Excel)
* Apply to each: output from previous step is body/value from the list of rows, example expression: `outputs('List_rows_present_in_a_table')?['body/value']`
* Inside the loop: add block “Delete a row” (Excel)
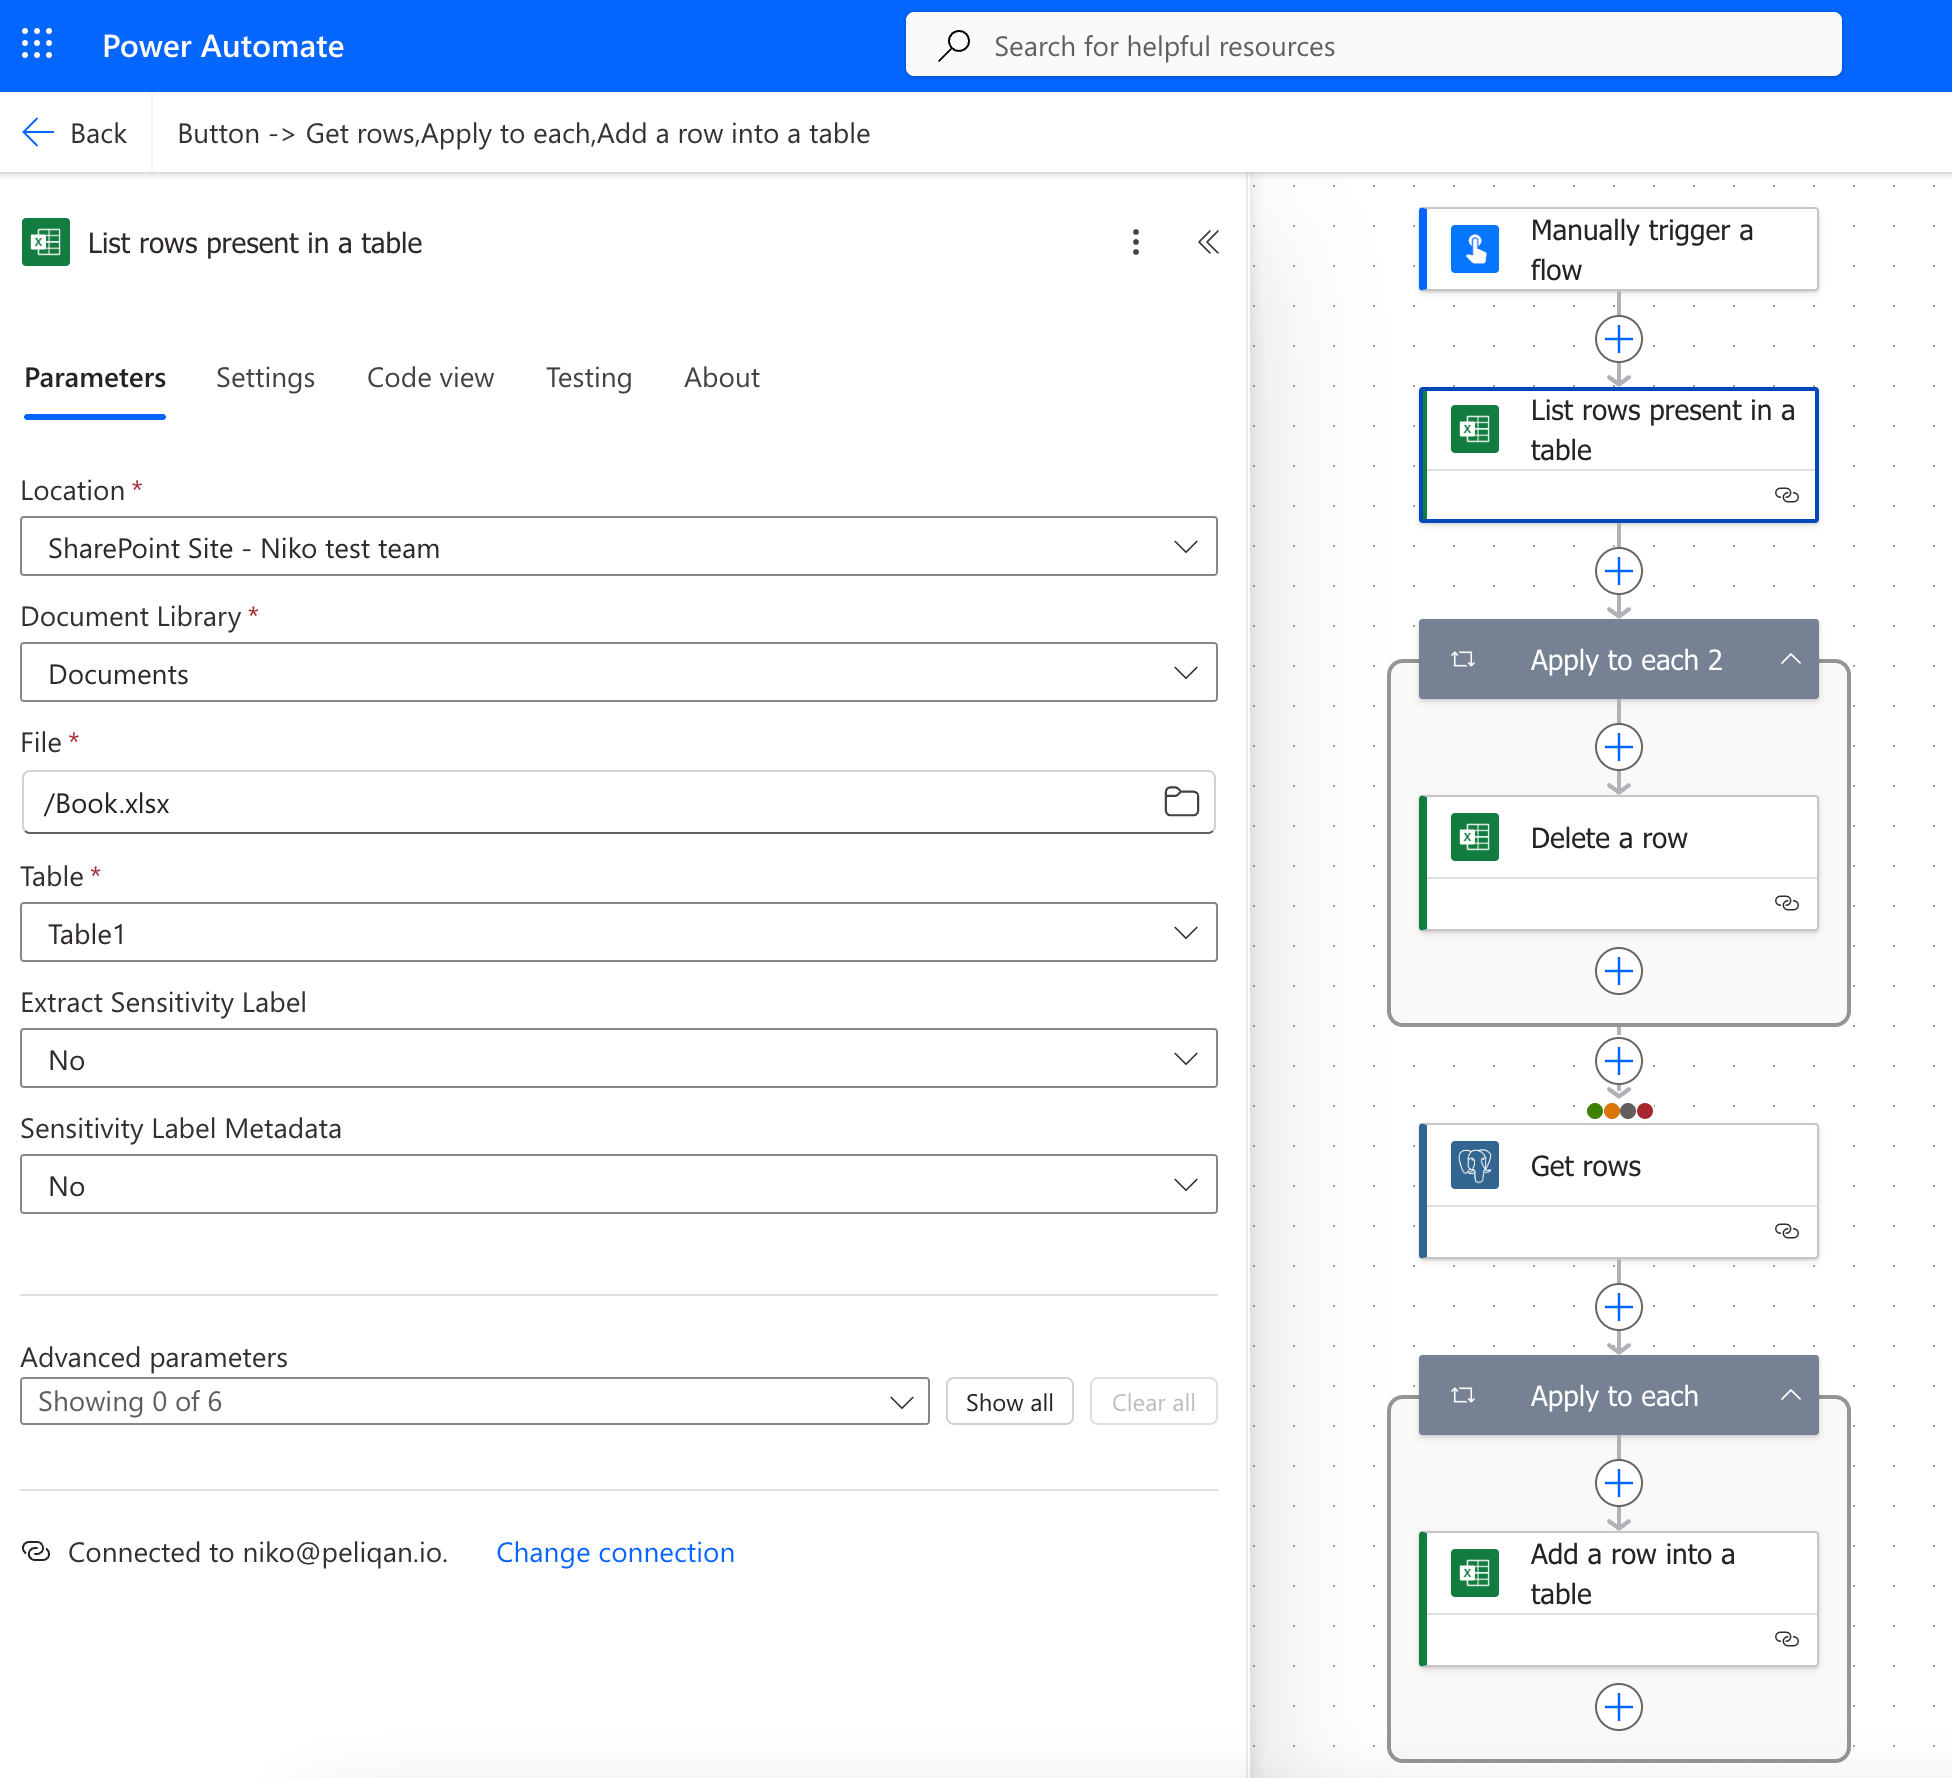 Settings for the block “Delete a row”:
 ### Step 3: add rows from Peliqan to Excel
Now we can read the data from Peliqan and add rows to Excel. Add following blocks in the flow in Power Automate:
* Get rows (Postgres, see above on how to add a connection to the Peliqan data warehouse)
* Apply to each
* Inside the loop: Add a row into a table (Excel)
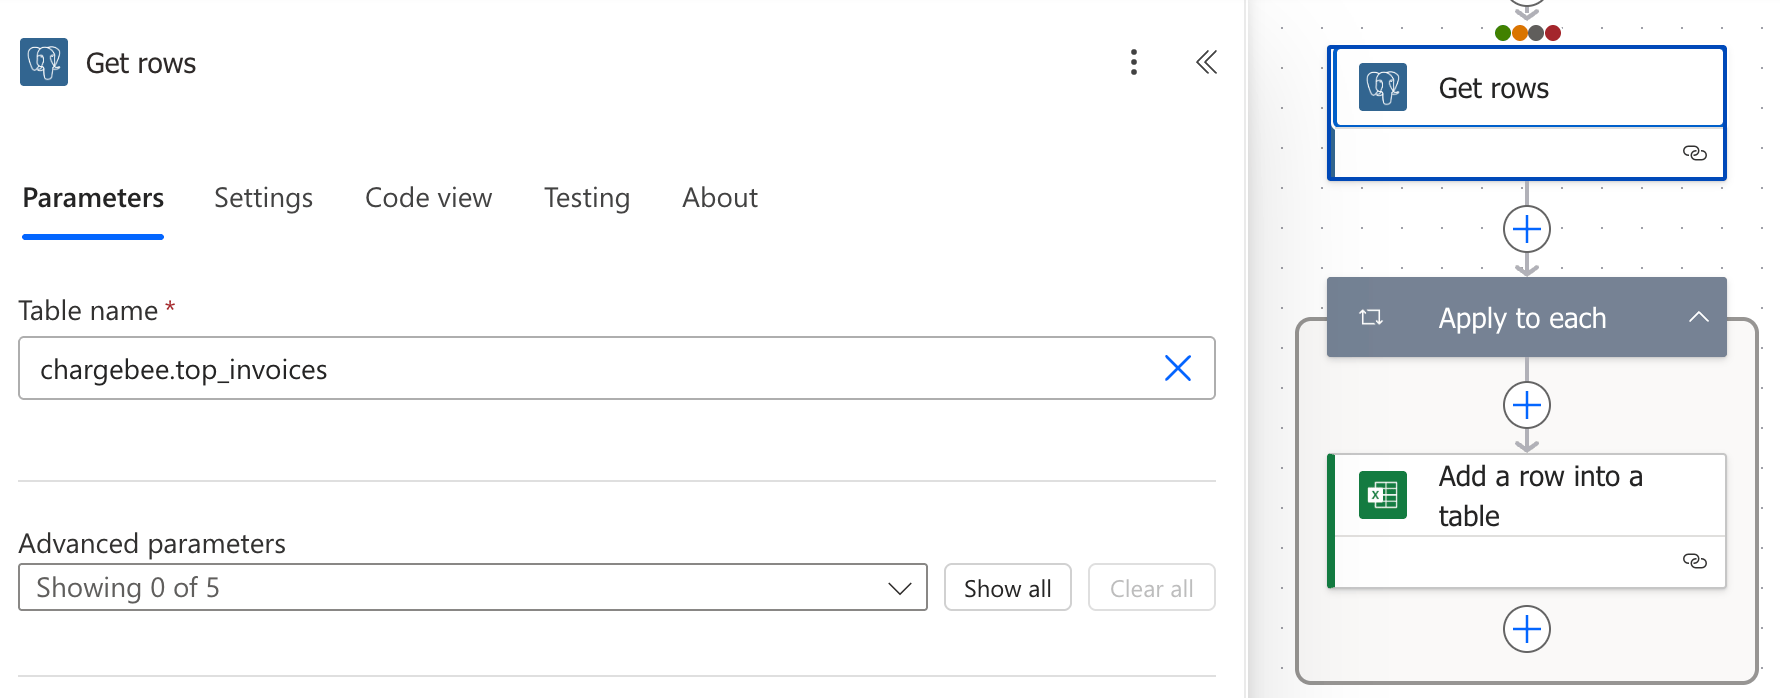
In the block “Get rows”, select a table or view from the Peliqan data warehouse:
### Step 3: add rows from Peliqan to Excel
Now we can read the data from Peliqan and add rows to Excel. Add following blocks in the flow in Power Automate:
* Get rows (Postgres, see above on how to add a connection to the Peliqan data warehouse)
* Apply to each
* Inside the loop: Add a row into a table (Excel)
In the block “Get rows”, select a table or view from the Peliqan data warehouse:
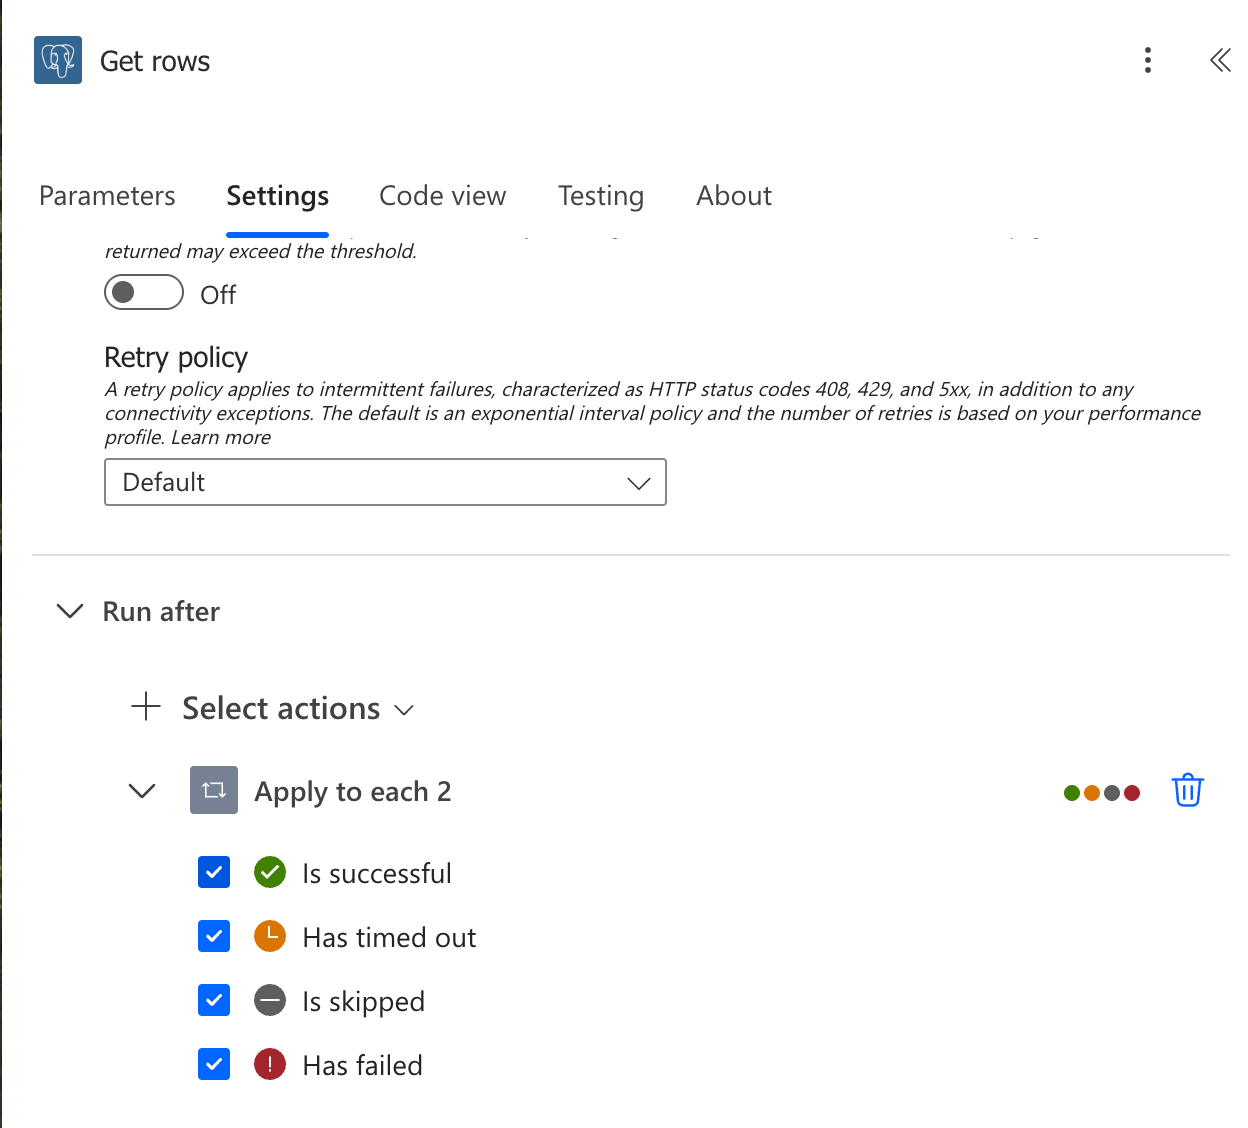
 Note: under Settings, allow the flow to continue, even if the previous block (delete row) failed. This can happen e.g. for empty rows in the table, they don’t have a unique value for the first column and cannot be deleted by Power Automate.
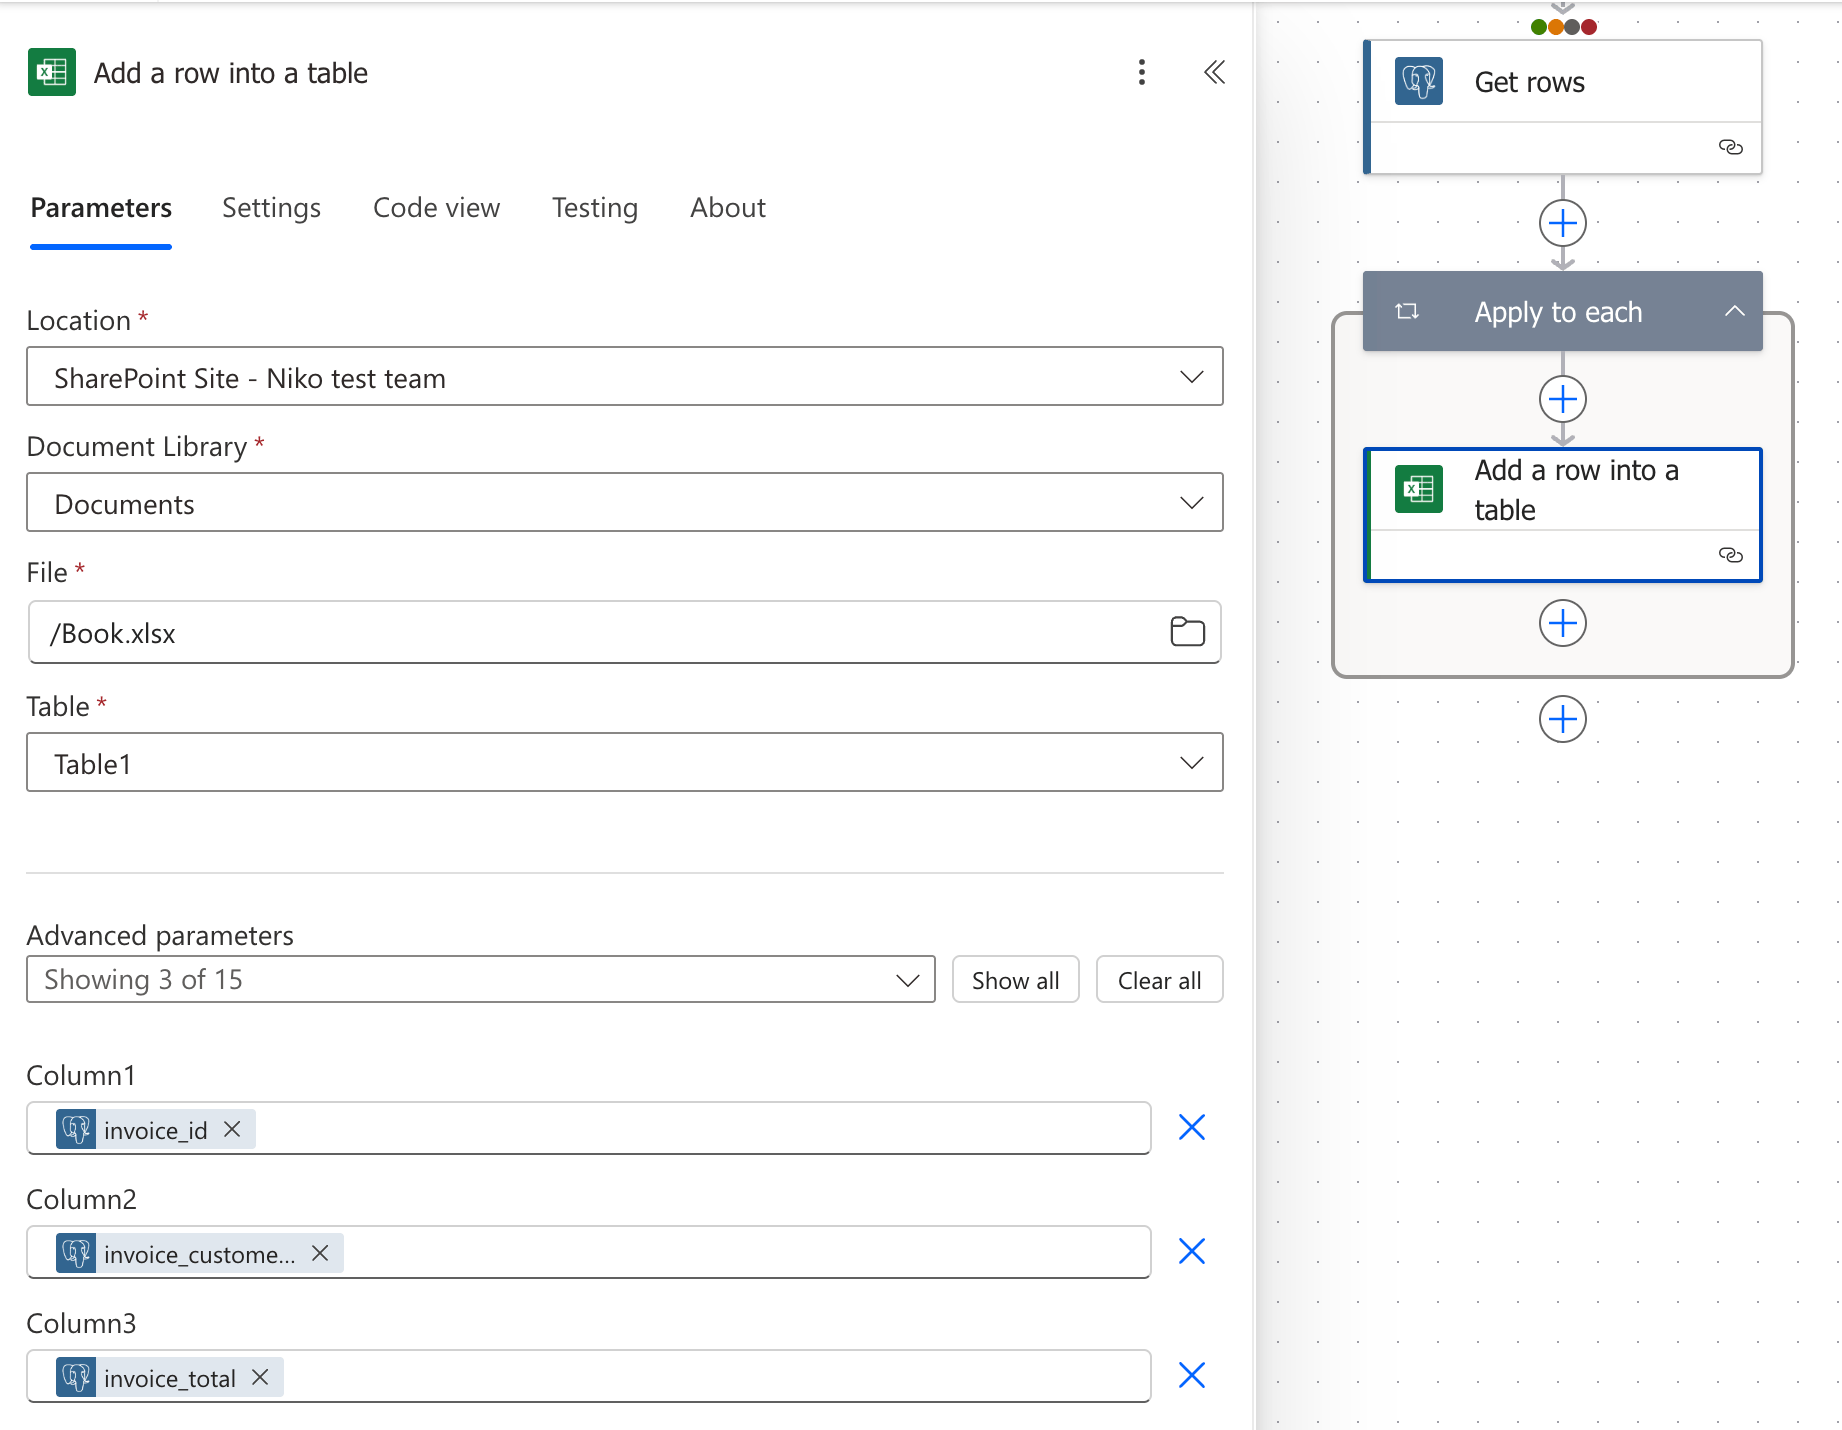
 In the block “Add a row into a table”, reference the same Excel file and table as above, and map values from the row from Postgres, to columns in the table:
 This documentation is built and hosted on [Mintlify](https://mintlify.com), a developer documentation platform.