> ## Documentation Index
> Fetch the complete documentation index at: https://help.peliqan.io/llms.txt
> Use this file to discover all available pages before exploring further.
# Officient - Getting started in Peliqan
> Learn how to connect Officient HR data to Peliqan by creating an OAuth app, authorizing access, and syncing people, contracts, and wages.
***Officient*** *is a modern HR management platform designed to streamline employee administration, contracts, payroll data, and time tracking. It provides an easy way for SMEs and HR teams to manage people data, absences, assets, and fleet in one place. Website*: [https://www.officient.io/](https://www.officient.io/)
The Peliqan connector features full synchronization of people, contracts, wages, calendar requests, assets, and fleet records for efficient data handling. This connector is ideal for businesses looking to:
* Automate HR data flows into analytics or reporting systems
* Sync employee, contract, and wage records with other business applications
* Ensure up-to-date visibility into absences, assets, and fleet across the organization
This article details the steps to get started with Officient in Peliqan. Please [contact support](https://peliqan.io/contact/) if you have any additional questions or remarks.
### Before Connecting Data Pipeline
Officient supports two ways of getting an access token: a **personal access token** (generated directly in the interface, for integrating with your own account) and **OAuth 2.0** (for apps that connect to an account on a customer's behalf).
Peliqan uses **OAuth 2.0 (Authorization Code flow)**, which requires an OAuth app (Client ID and Client Secret) to be created in Officient first. See [Officient's Authentication docs](https://apidocs.officient.io/docs/getting-started) for reference.
**Test credentials:** It's recommended to test with a sandbox account before connecting production data. You can request a sandbox account from Officient at `OfficientProduct@exact.com`.
### Create an OAuth app in Officient
1. Log in to your Officient account and open the **Developer Portal**.
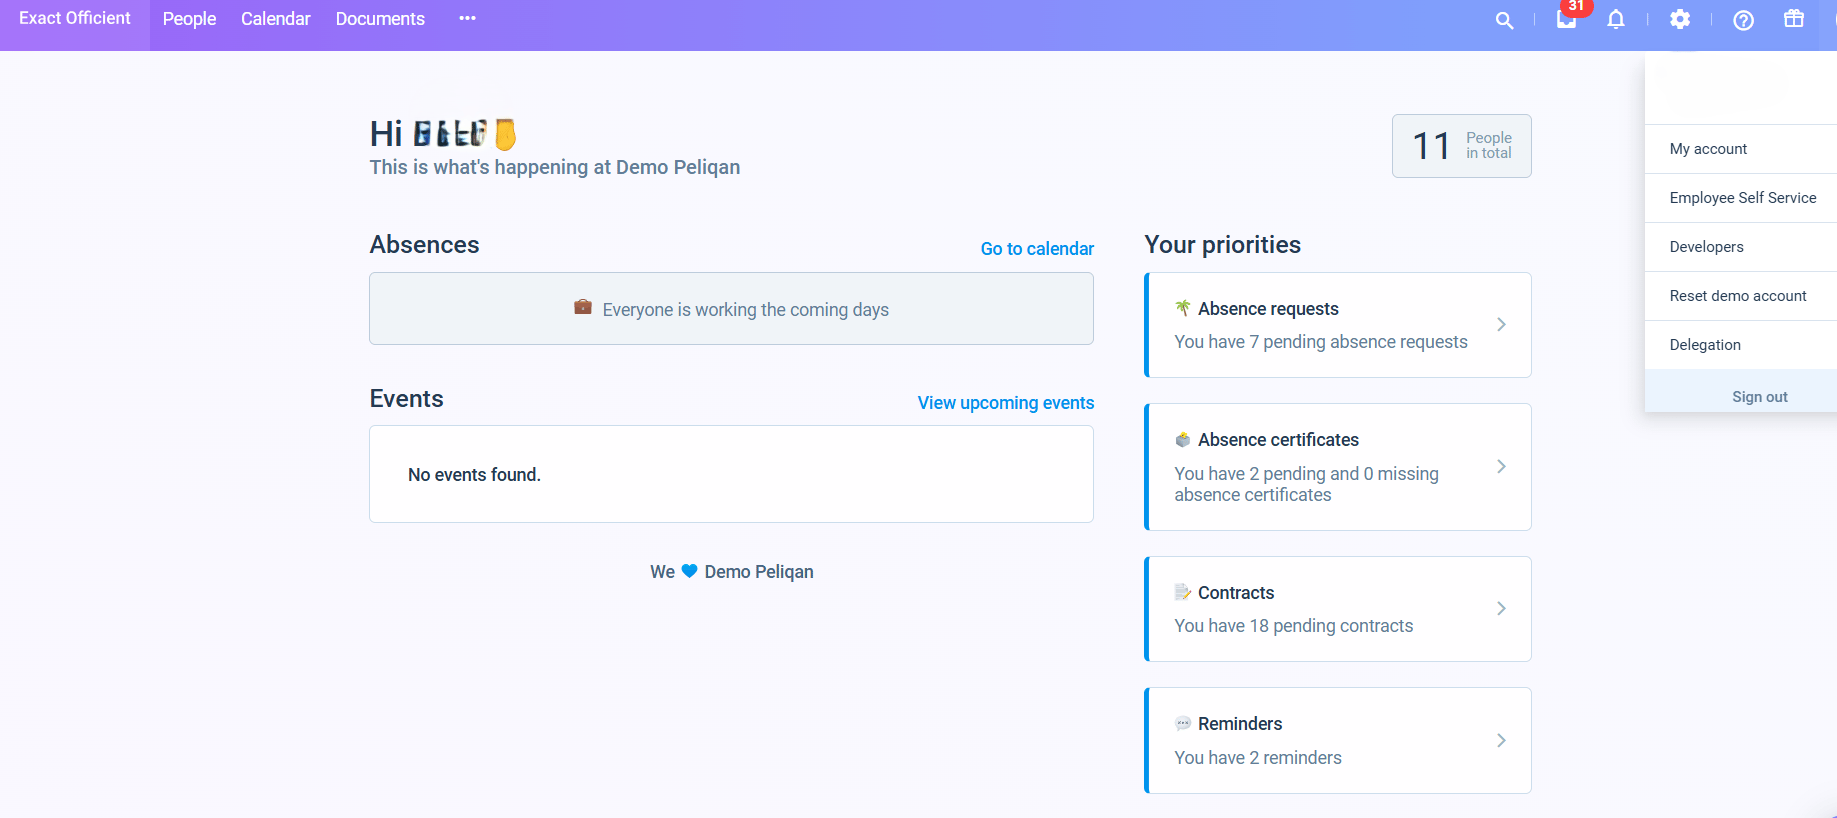 2. Click **Register a new app** (or select an existing app from the list if you already created one).
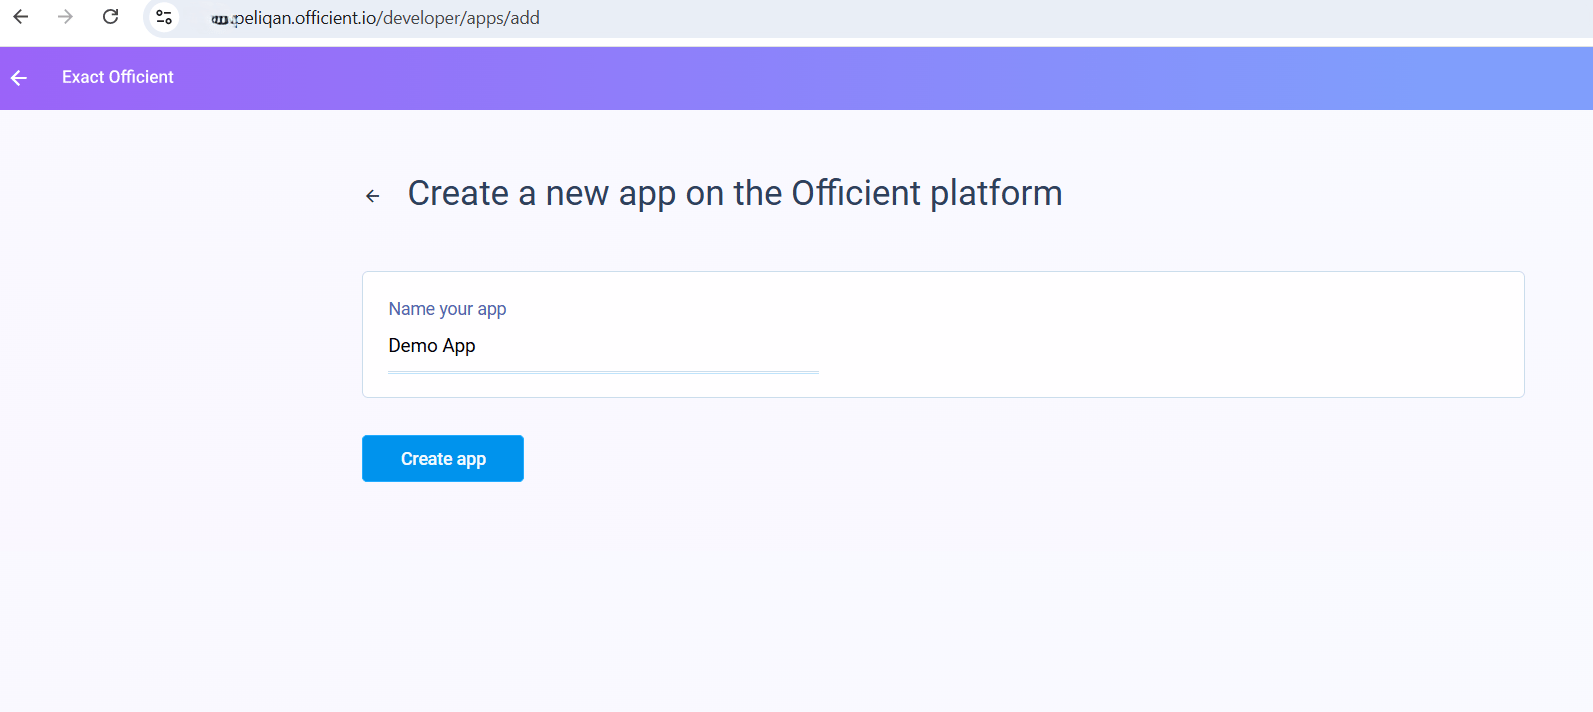
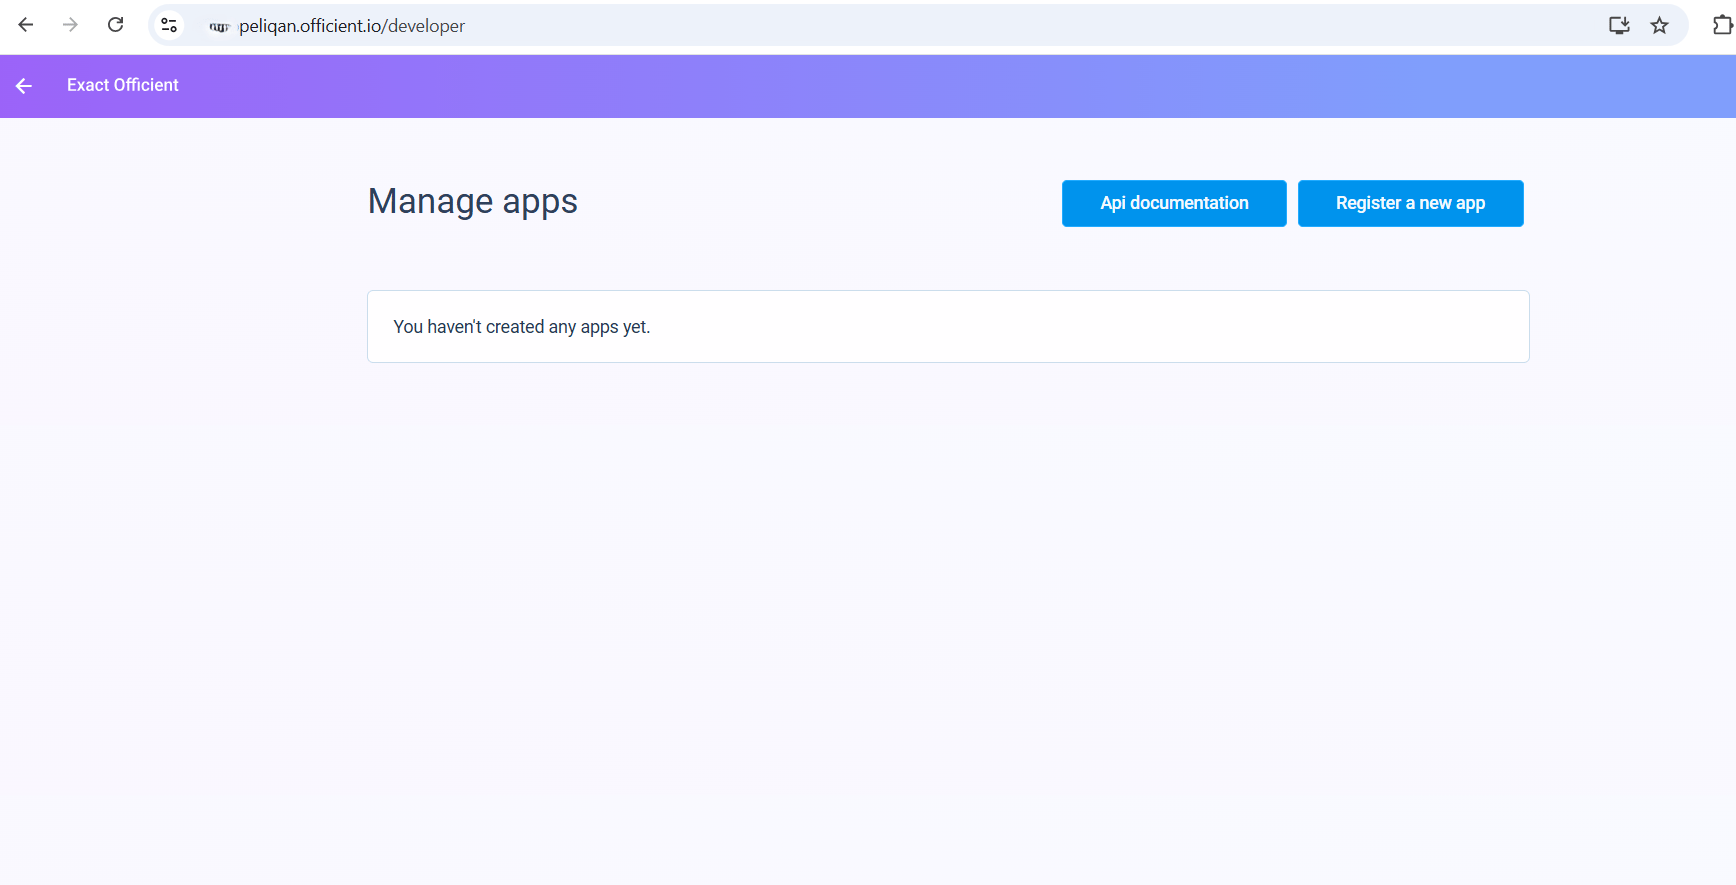 3. Enter an **App name** (for example: *Demo App*) and create the app.
 4. After the app is created, open the **Manage App** screen. You will see the **Client ID**, **Client Secret**, and **Redirect URI**.
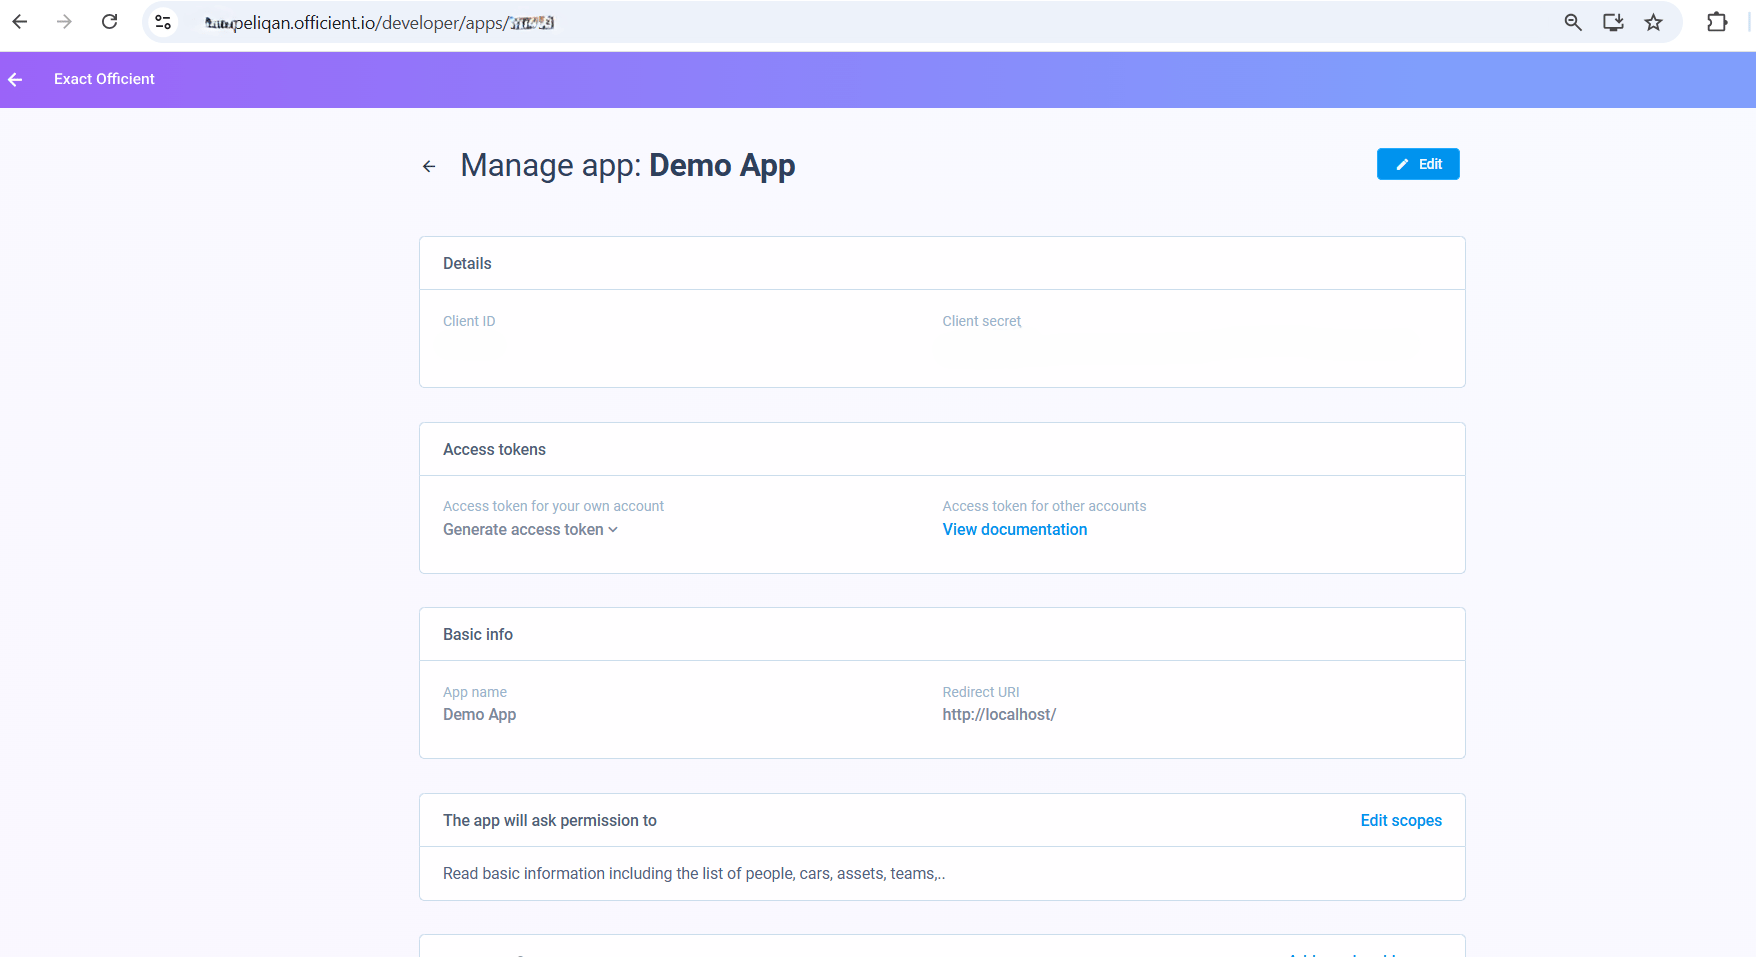 5. Click **Edit** to set the **Redirect URI** to `https://oauth.peliqan.io` and grant the required permissions (scopes).
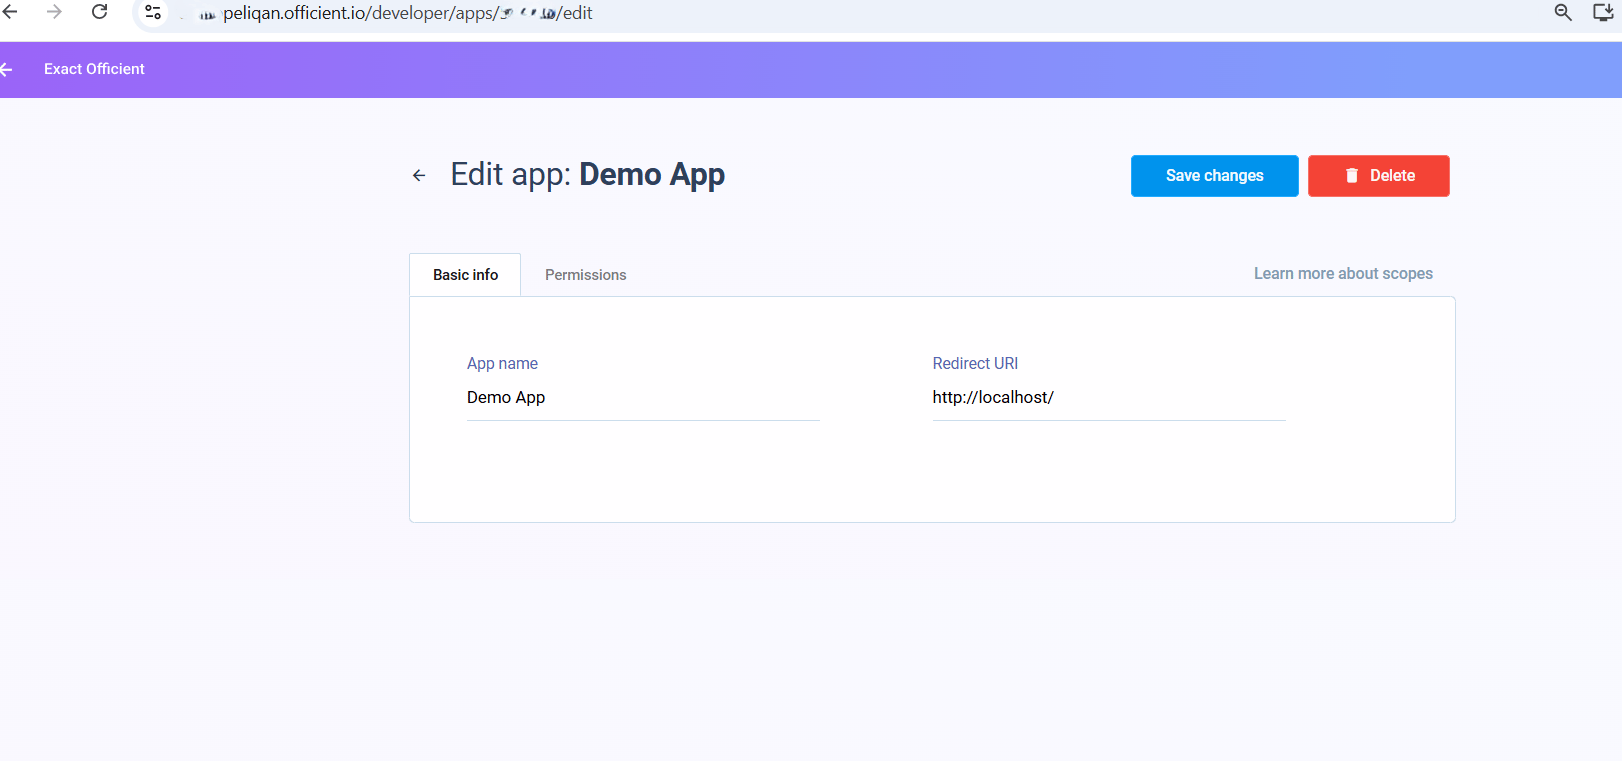
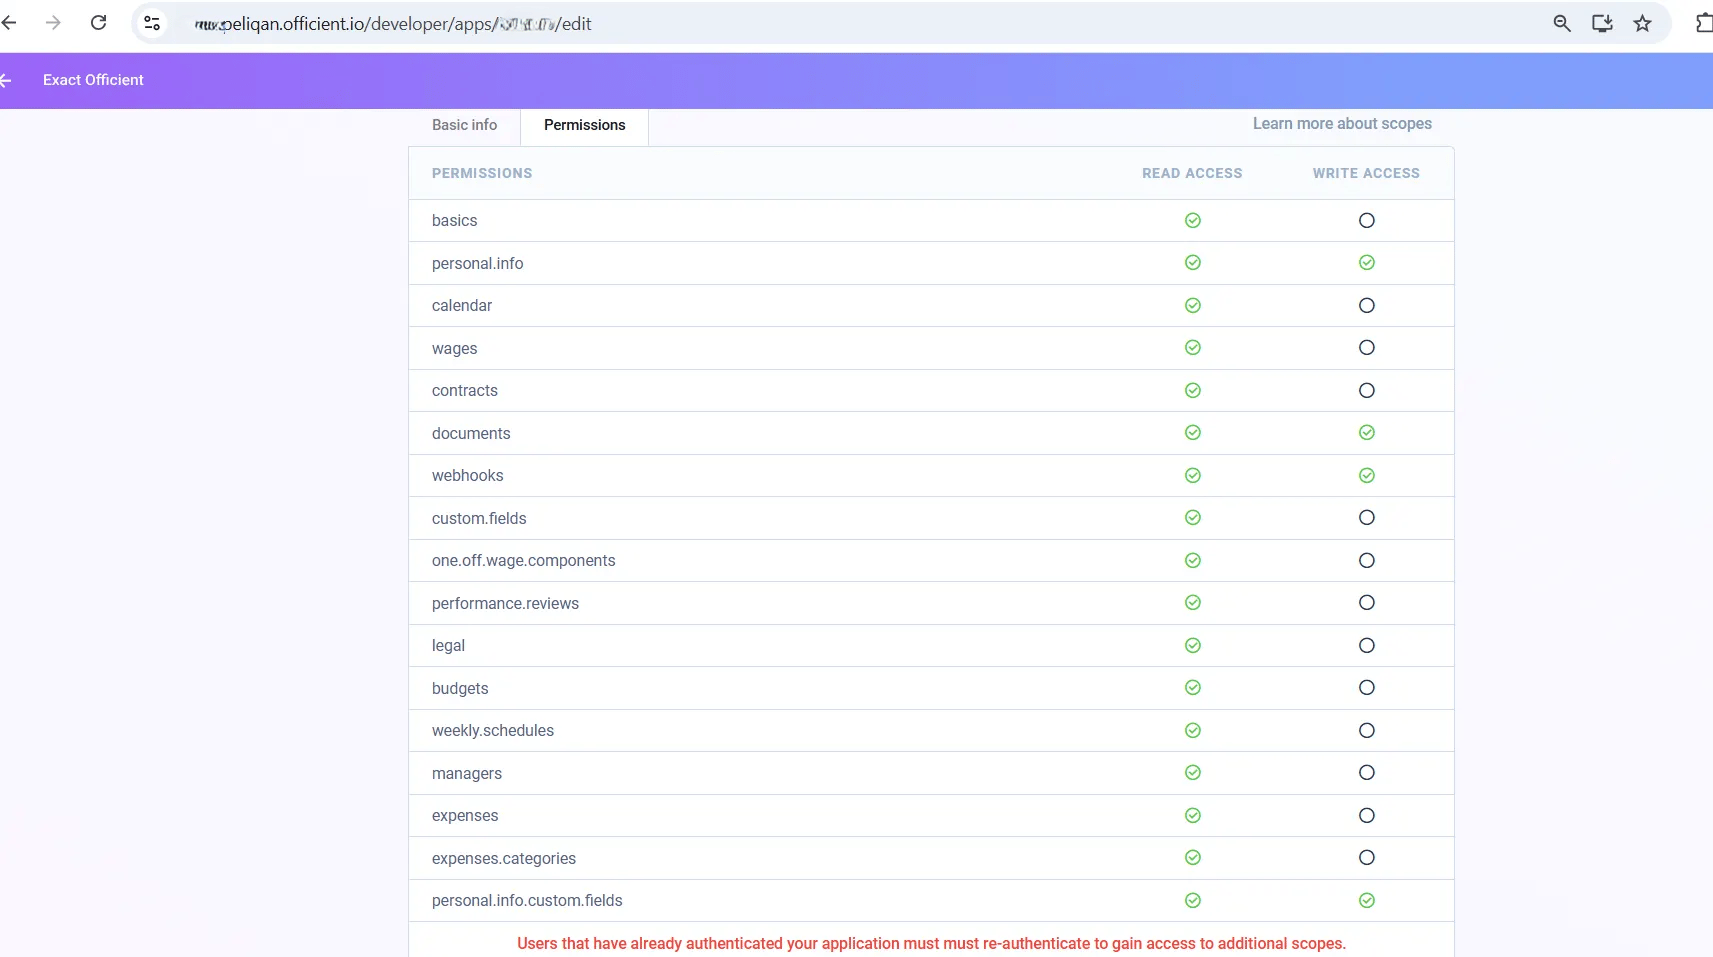 6. Save your changes, then copy the **Client ID** and **Client Secret** — you'll need both in Peliqan.
## Officient Data Pipeline
Connect Officient through the Peliqan Connectivity module:
6. Save your changes, then copy the **Client ID** and **Client Secret** — you'll need both in Peliqan.
## Officient Data Pipeline
Connect Officient through the Peliqan Connectivity module:
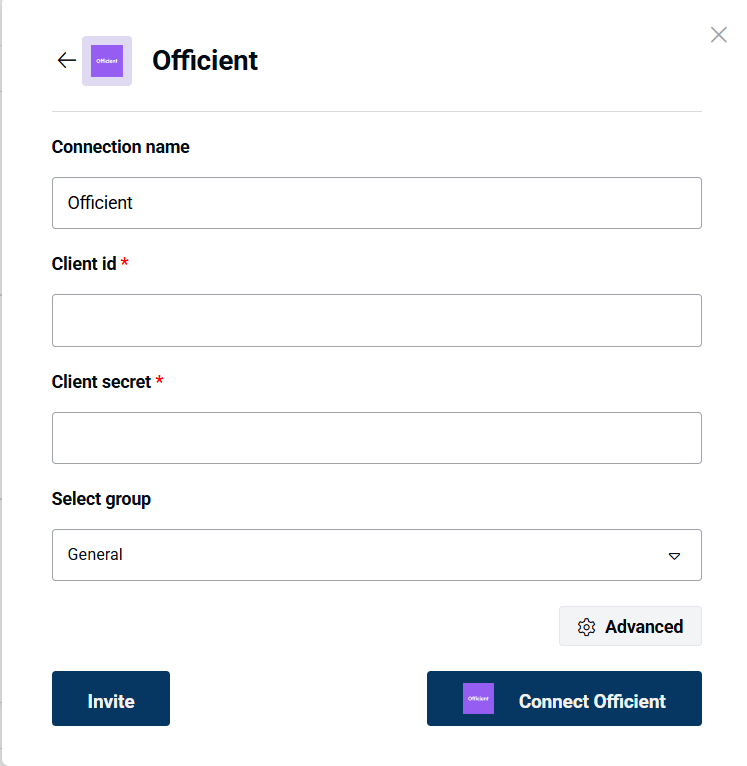 Paste the **Client ID** and **Client Secret** from the OAuth app created above
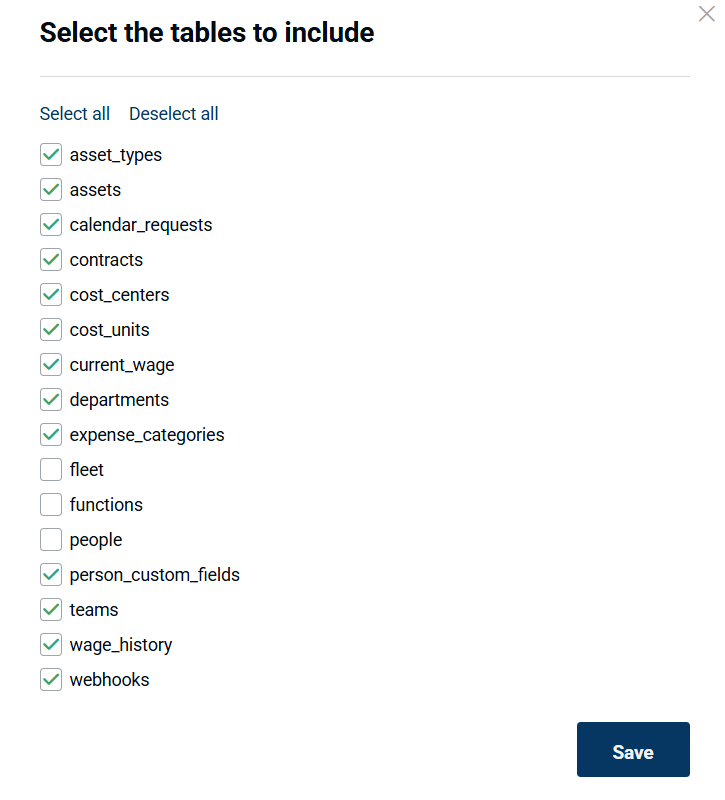
Click **Advanced** to see and select which endpoints to sync for a customised pipeline (see the full list below) — by default, all endpoints are selected.
Paste the **Client ID** and **Client Secret** from the OAuth app created above
Click **Advanced** to see and select which endpoints to sync for a customised pipeline (see the full list below) — by default, all endpoints are selected.
 Click **Authorize** and log in to Officient to grant Peliqan access. Peliqan exchanges the authorization code for an access token and refresh token automatically, so no manual token handling is required.
### Officient data sync to a data warehouse
Peliqan offers an out-of-the-box data warehouse. Optionally, you can choose to sync Officient data to your own data warehouse such as Snowflake, Google BigQuery, MS SQL, etc.
Data will be synced to the selected data warehouse and made available through the Peliqan UI for browsing and analysis.
Click **Authorize** and log in to Officient to grant Peliqan access. Peliqan exchanges the authorization code for an access token and refresh token automatically, so no manual token handling is required.
### Officient data sync to a data warehouse
Peliqan offers an out-of-the-box data warehouse. Optionally, you can choose to sync Officient data to your own data warehouse such as Snowflake, Google BigQuery, MS SQL, etc.
Data will be synced to the selected data warehouse and made available through the Peliqan UI for browsing and analysis.
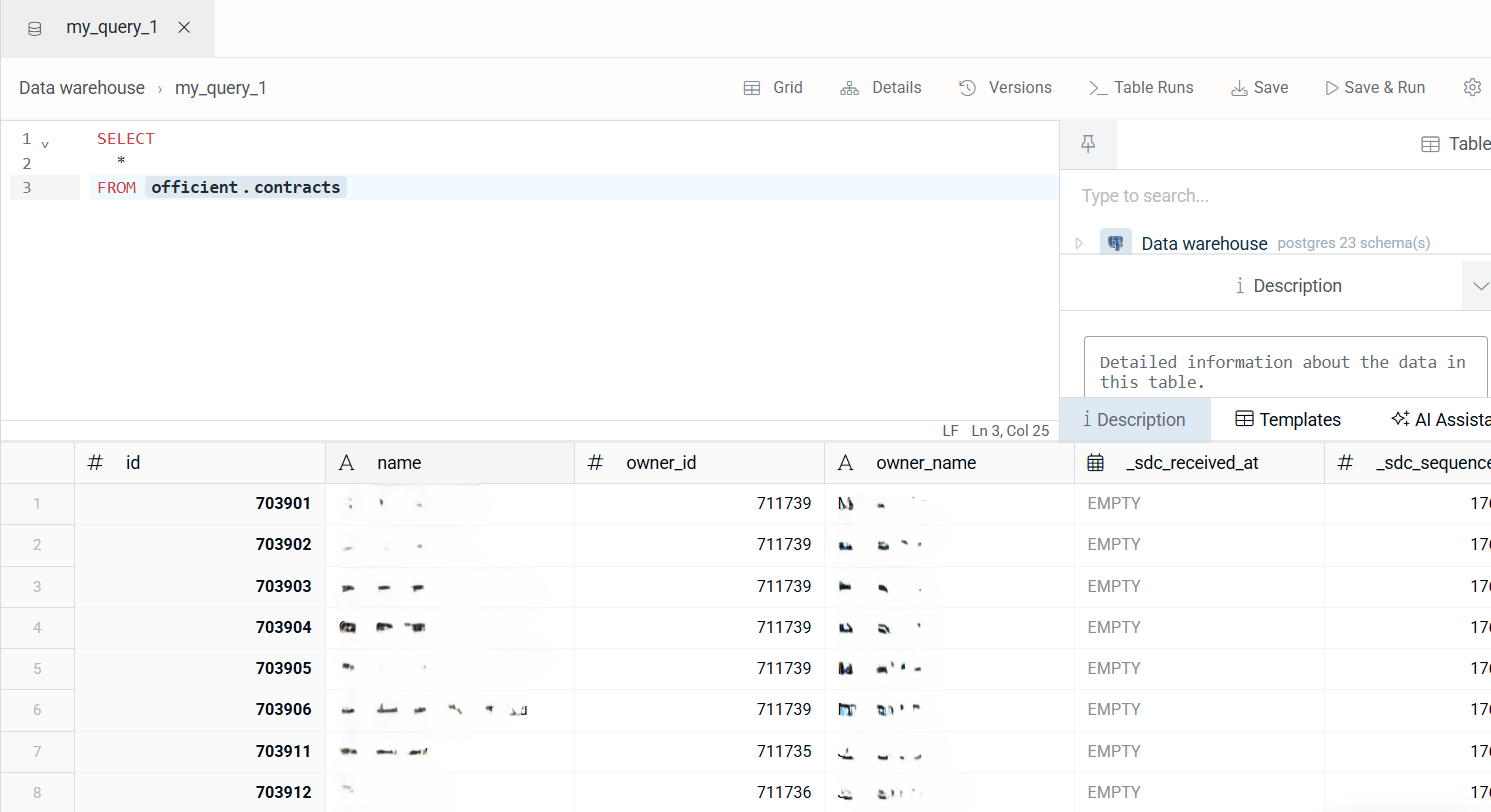
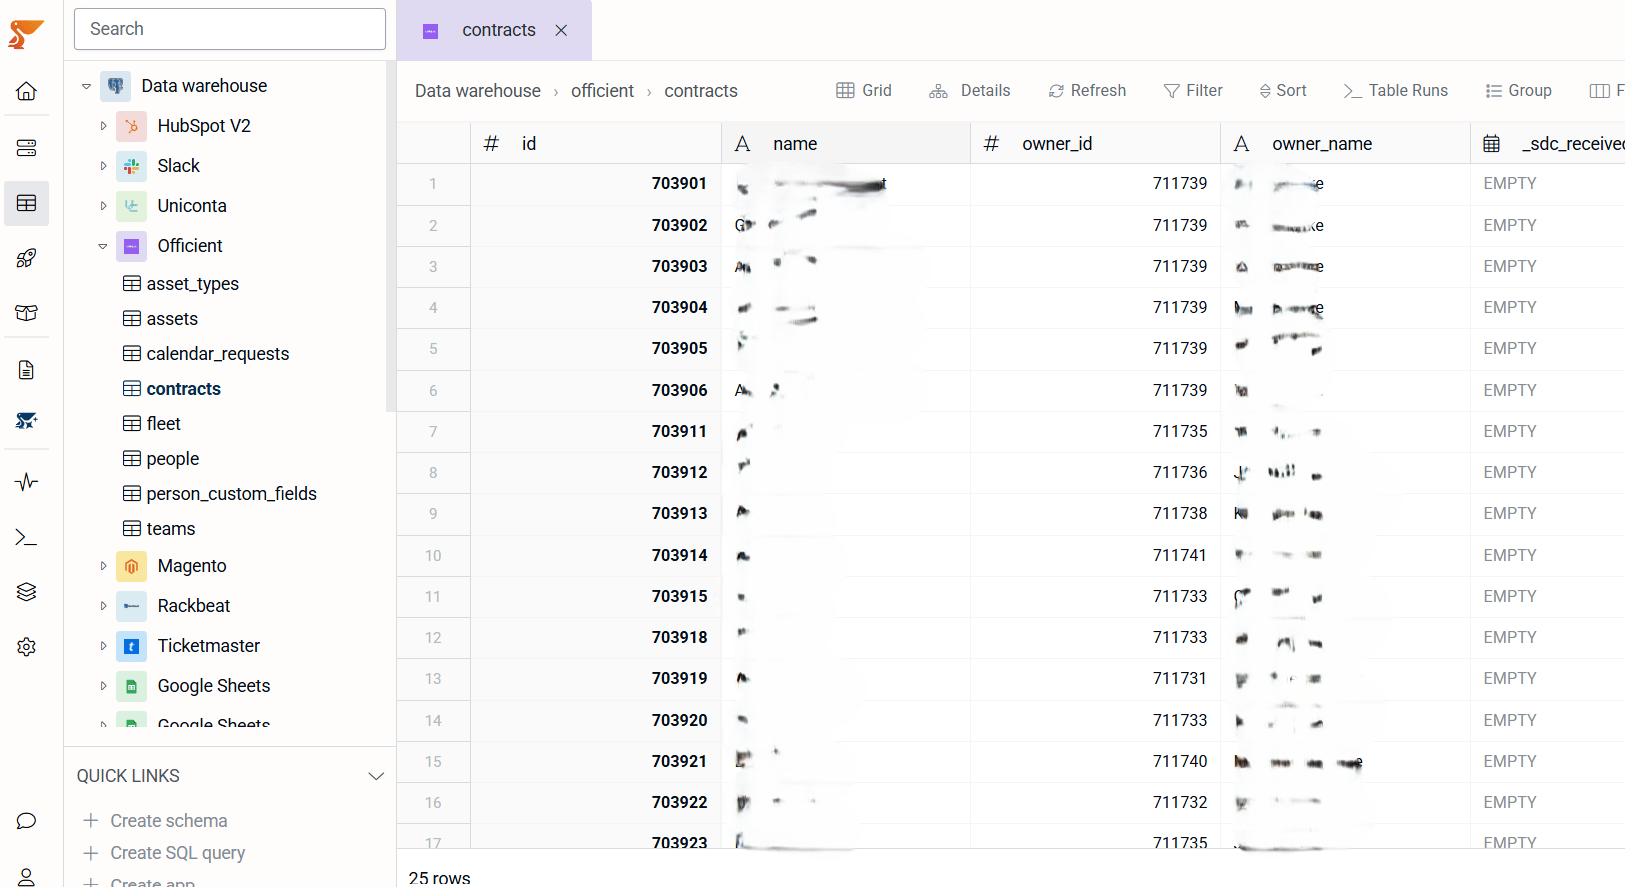 With the Peliqan federated query engine, you can write queries on Officient data, transform it, and join it with other data sources—enabling a unified view of your HR and business operations.
 ## Need further help
Please contact our support for any further assistance via [support@peliqan.io](mailto:support@peliqan.io).
This documentation is built and hosted on [Mintlify](https://mintlify.com), a developer documentation platform.
## Need further help
Please contact our support for any further assistance via [support@peliqan.io](mailto:support@peliqan.io).
This documentation is built and hosted on [Mintlify](https://mintlify.com), a developer documentation platform.