> ## Documentation Index
> Fetch the complete documentation index at: https://help.peliqan.io/llms.txt
> Use this file to discover all available pages before exploring further.
# Looker Studio
In Peliqan, go to Connections, find the Data Warehouse tile and copy/paste your connection details:
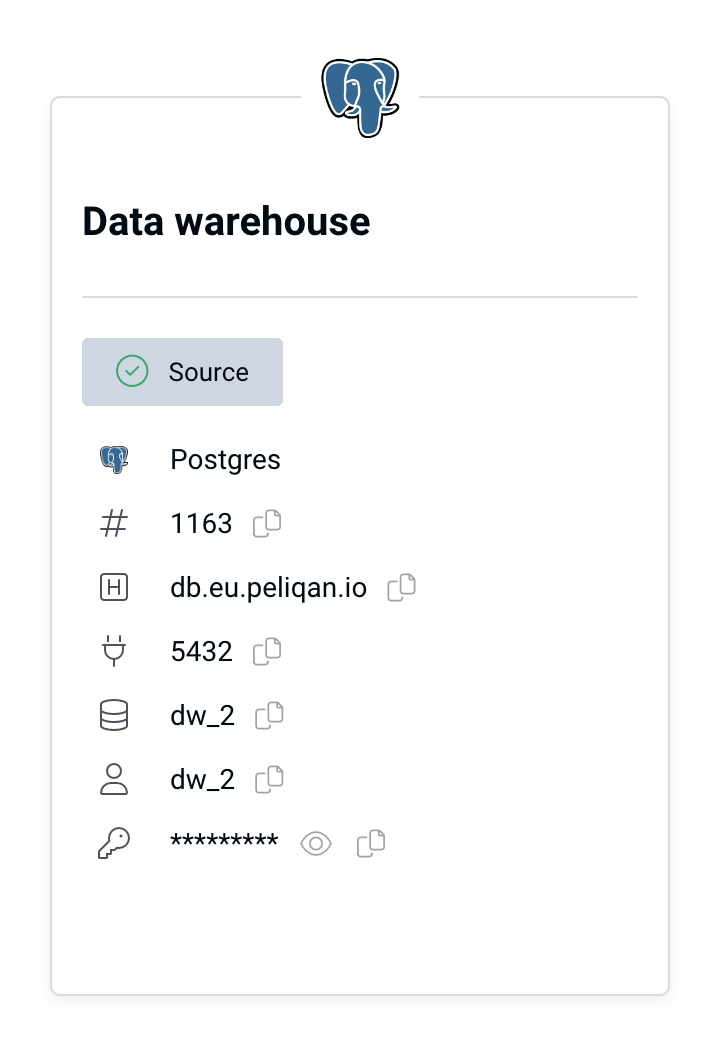 Use these settings in Looker Studio to connect:
* **Connection type**: Postgres (default data warehouse type in Peliqan)
* **Server:**
* [db.eu.peliqan.io](http://db.eu.peliqan.io)
* [db.mydatacloud.com](http://db.mydatacloud.com)
* [db.us.peliqan.io](http://db.us.peliqan.io)
* … (check in your account under Connections > Data warehouse connection)
* **User name & password**: copy / paste from the **Data Warehouse** Connection tile (see above)
* **Database name**: same as the user name
* **SSL**: enabled
# Step by step
In Looker Studio, click on “Create” and choose “Data source”.
Use these settings in Looker Studio to connect:
* **Connection type**: Postgres (default data warehouse type in Peliqan)
* **Server:**
* [db.eu.peliqan.io](http://db.eu.peliqan.io)
* [db.mydatacloud.com](http://db.mydatacloud.com)
* [db.us.peliqan.io](http://db.us.peliqan.io)
* … (check in your account under Connections > Data warehouse connection)
* **User name & password**: copy / paste from the **Data Warehouse** Connection tile (see above)
* **Database name**: same as the user name
* **SSL**: enabled
# Step by step
In Looker Studio, click on “Create” and choose “Data source”.
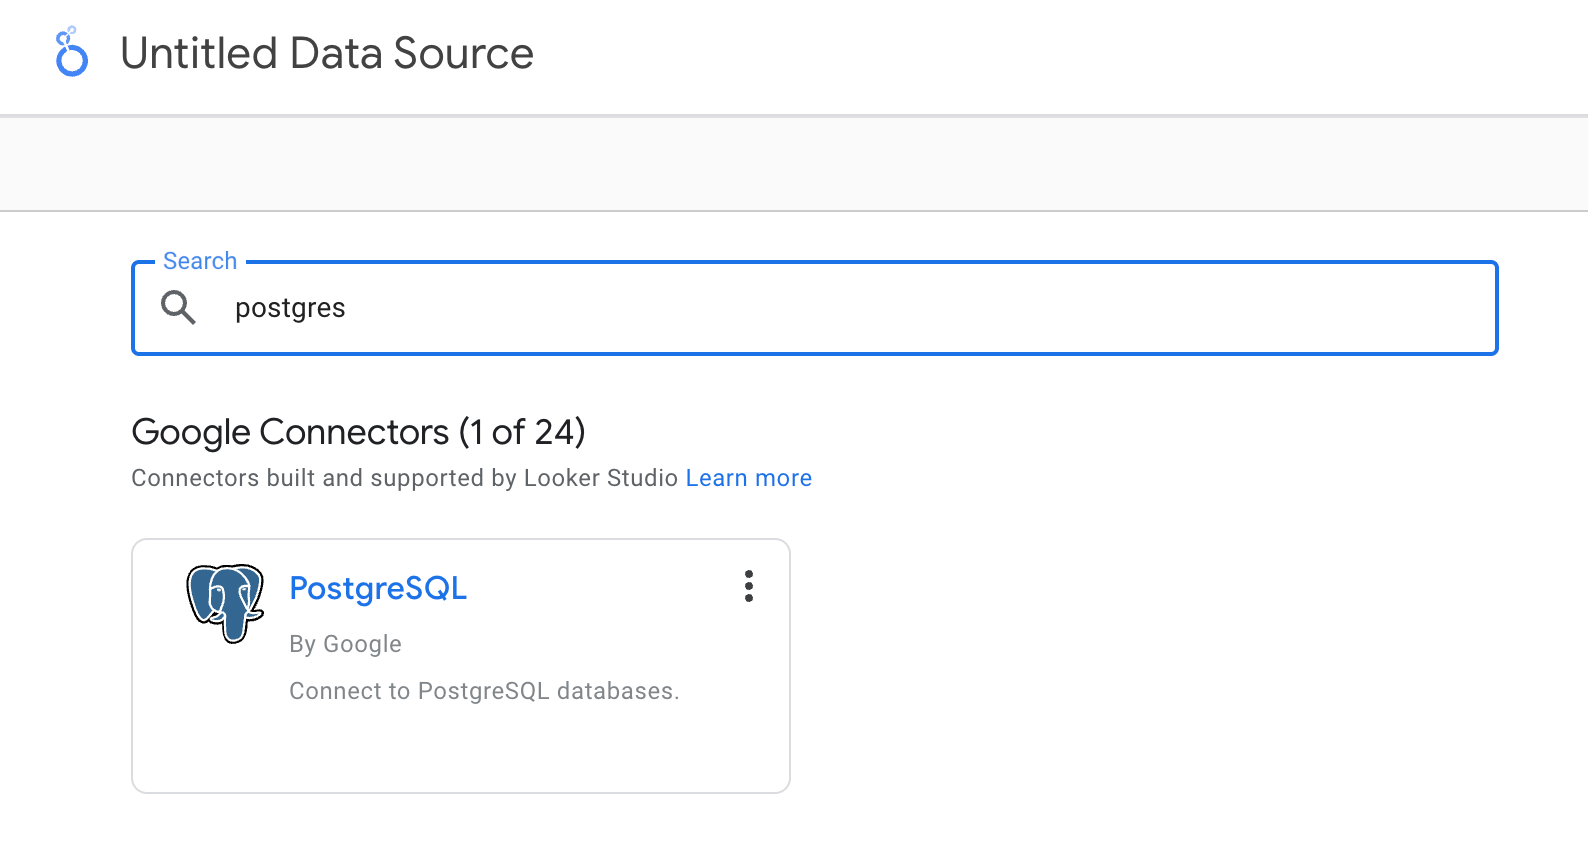
Select PostgreSQL from the list:Select PostgreSQL from the list:
Use these settings in Looker Studio to connect:
* **Connection type**: Postgres (default data warehouse type in Peliqan)
* **Server:**
* [db.eu.peliqan.io](http://db.eu.peliqan.io)
* [db.mydatacloud.com](http://db.mydatacloud.com)
* [db.us.peliqan.io](http://db.us.peliqan.io)
* … (check in your account under Connections > Data warehouse connection)
* **User name & password**: copy / paste from the **Data Warehouse** Connection tile (see above)
* **Database name**: same as the user name
* **SSL**: enabled
# Step by step
In Looker Studio, click on “Create” and choose “Data source”.
Use these settings in Looker Studio to connect:
* **Connection type**: Postgres (default data warehouse type in Peliqan)
* **Server:**
* [db.eu.peliqan.io](http://db.eu.peliqan.io)
* [db.mydatacloud.com](http://db.mydatacloud.com)
* [db.us.peliqan.io](http://db.us.peliqan.io)
* … (check in your account under Connections > Data warehouse connection)
* **User name & password**: copy / paste from the **Data Warehouse** Connection tile (see above)
* **Database name**: same as the user name
* **SSL**: enabled
# Step by step
In Looker Studio, click on “Create” and choose “Data source”.
Select PostgreSQL from the list:Select PostgreSQL from the list:
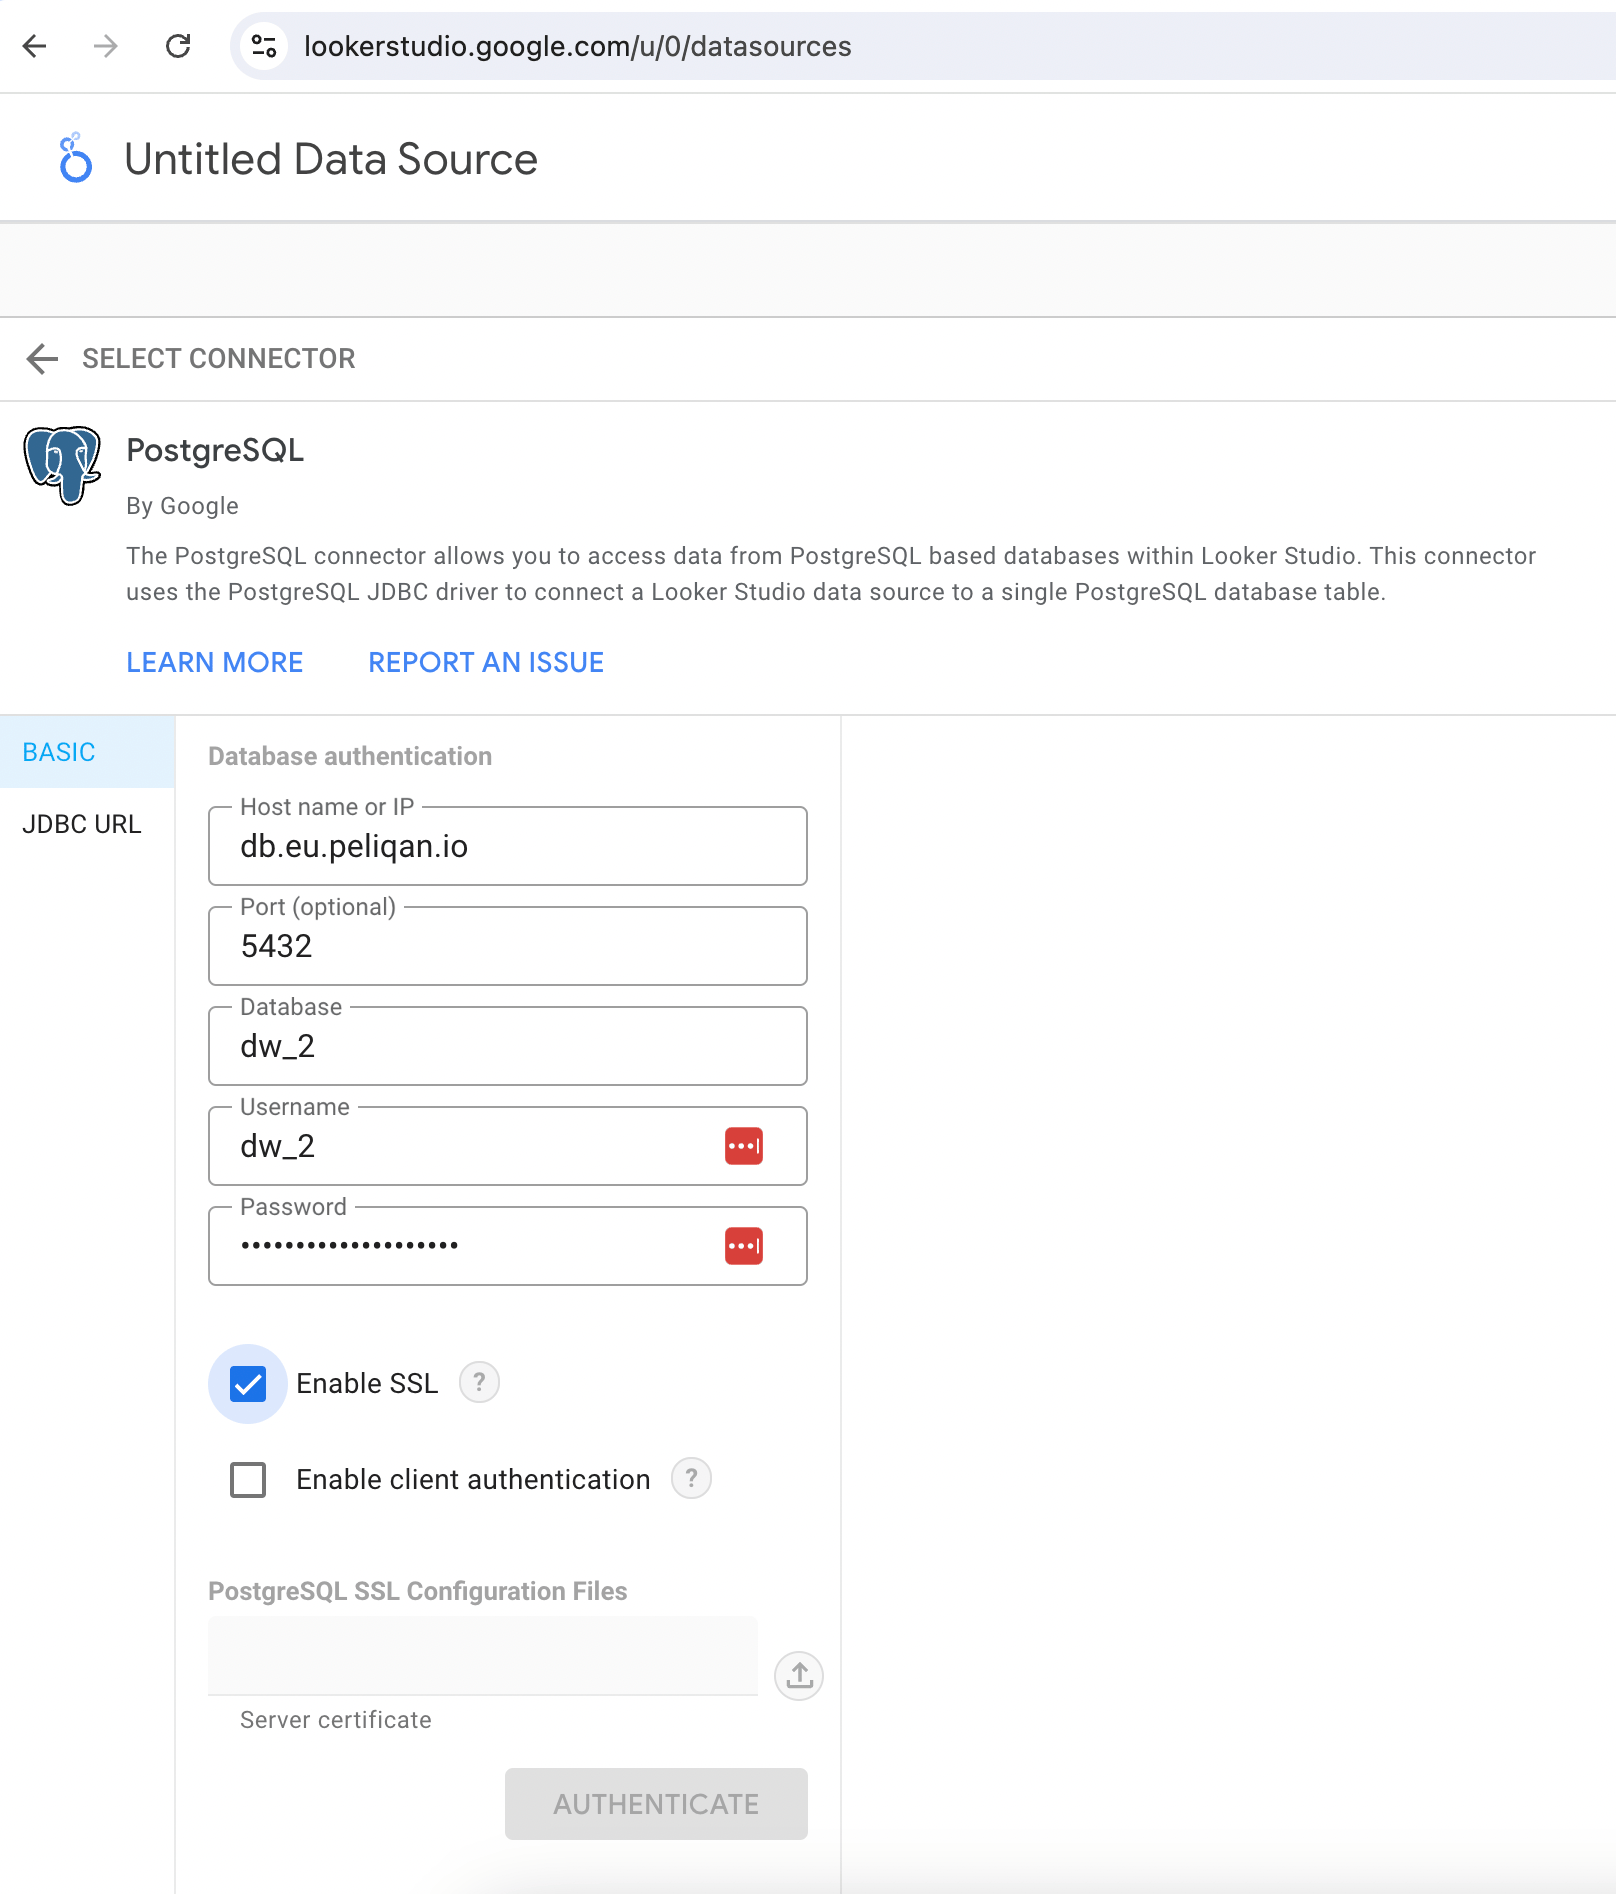
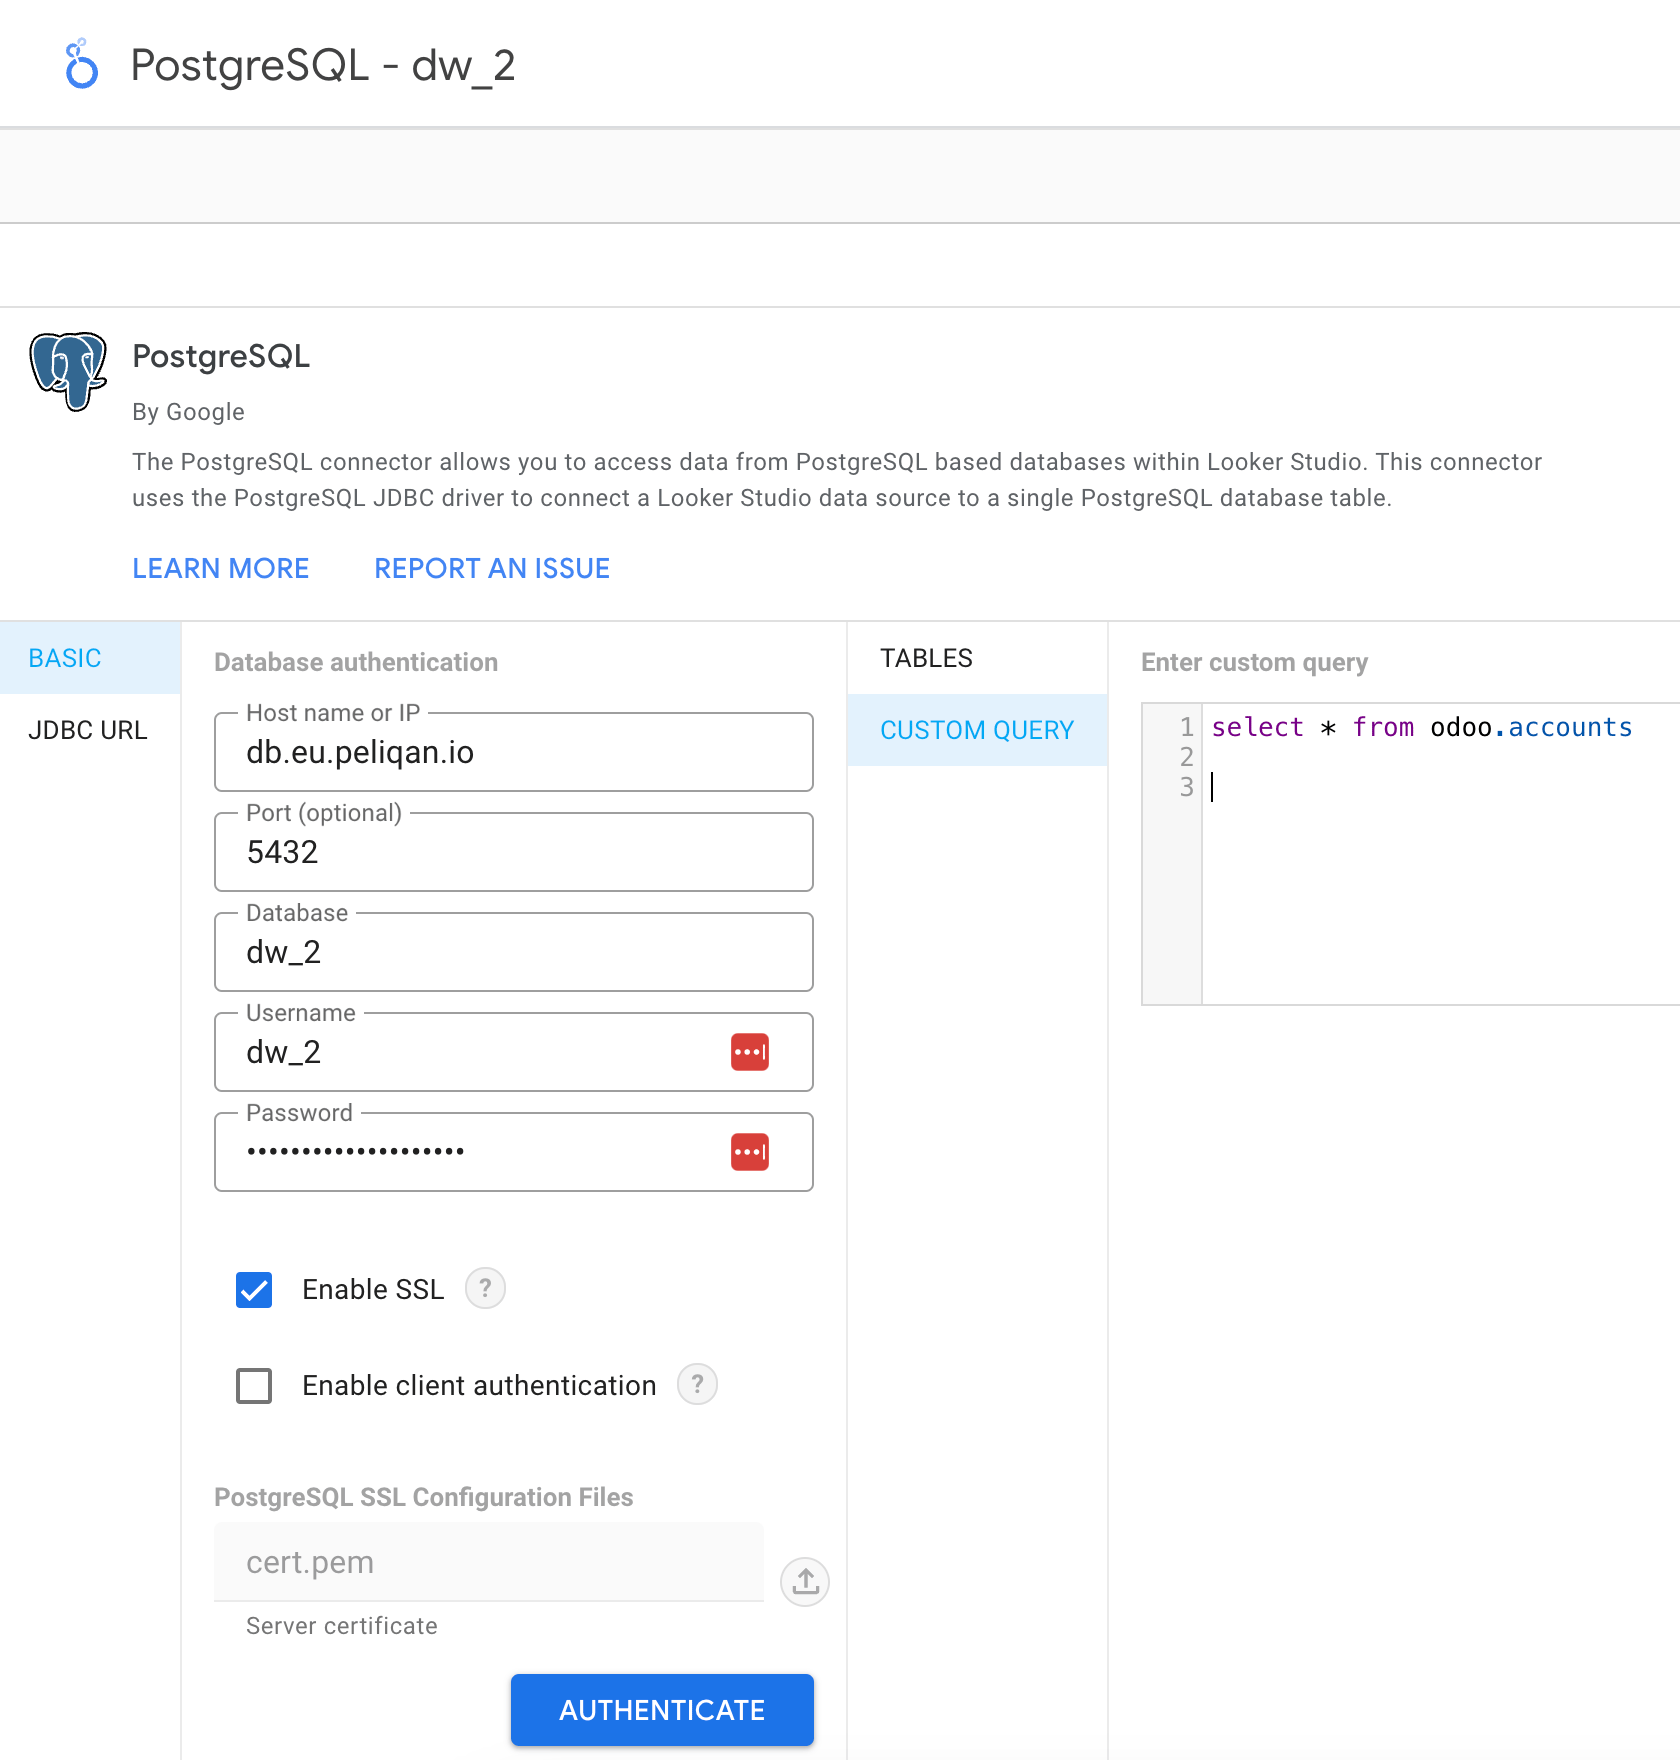
 Paste the host name from the Peliqan data warehouse, e.g. `db.eu.peliqan.io` , the database name, username and password and check the checkbox “Enable SSL”:Paste the host name from the Peliqan data warehouse, e.g. `db.eu.peliqan.io` , the database name, username and password and check the checkbox “Enable SSL”:
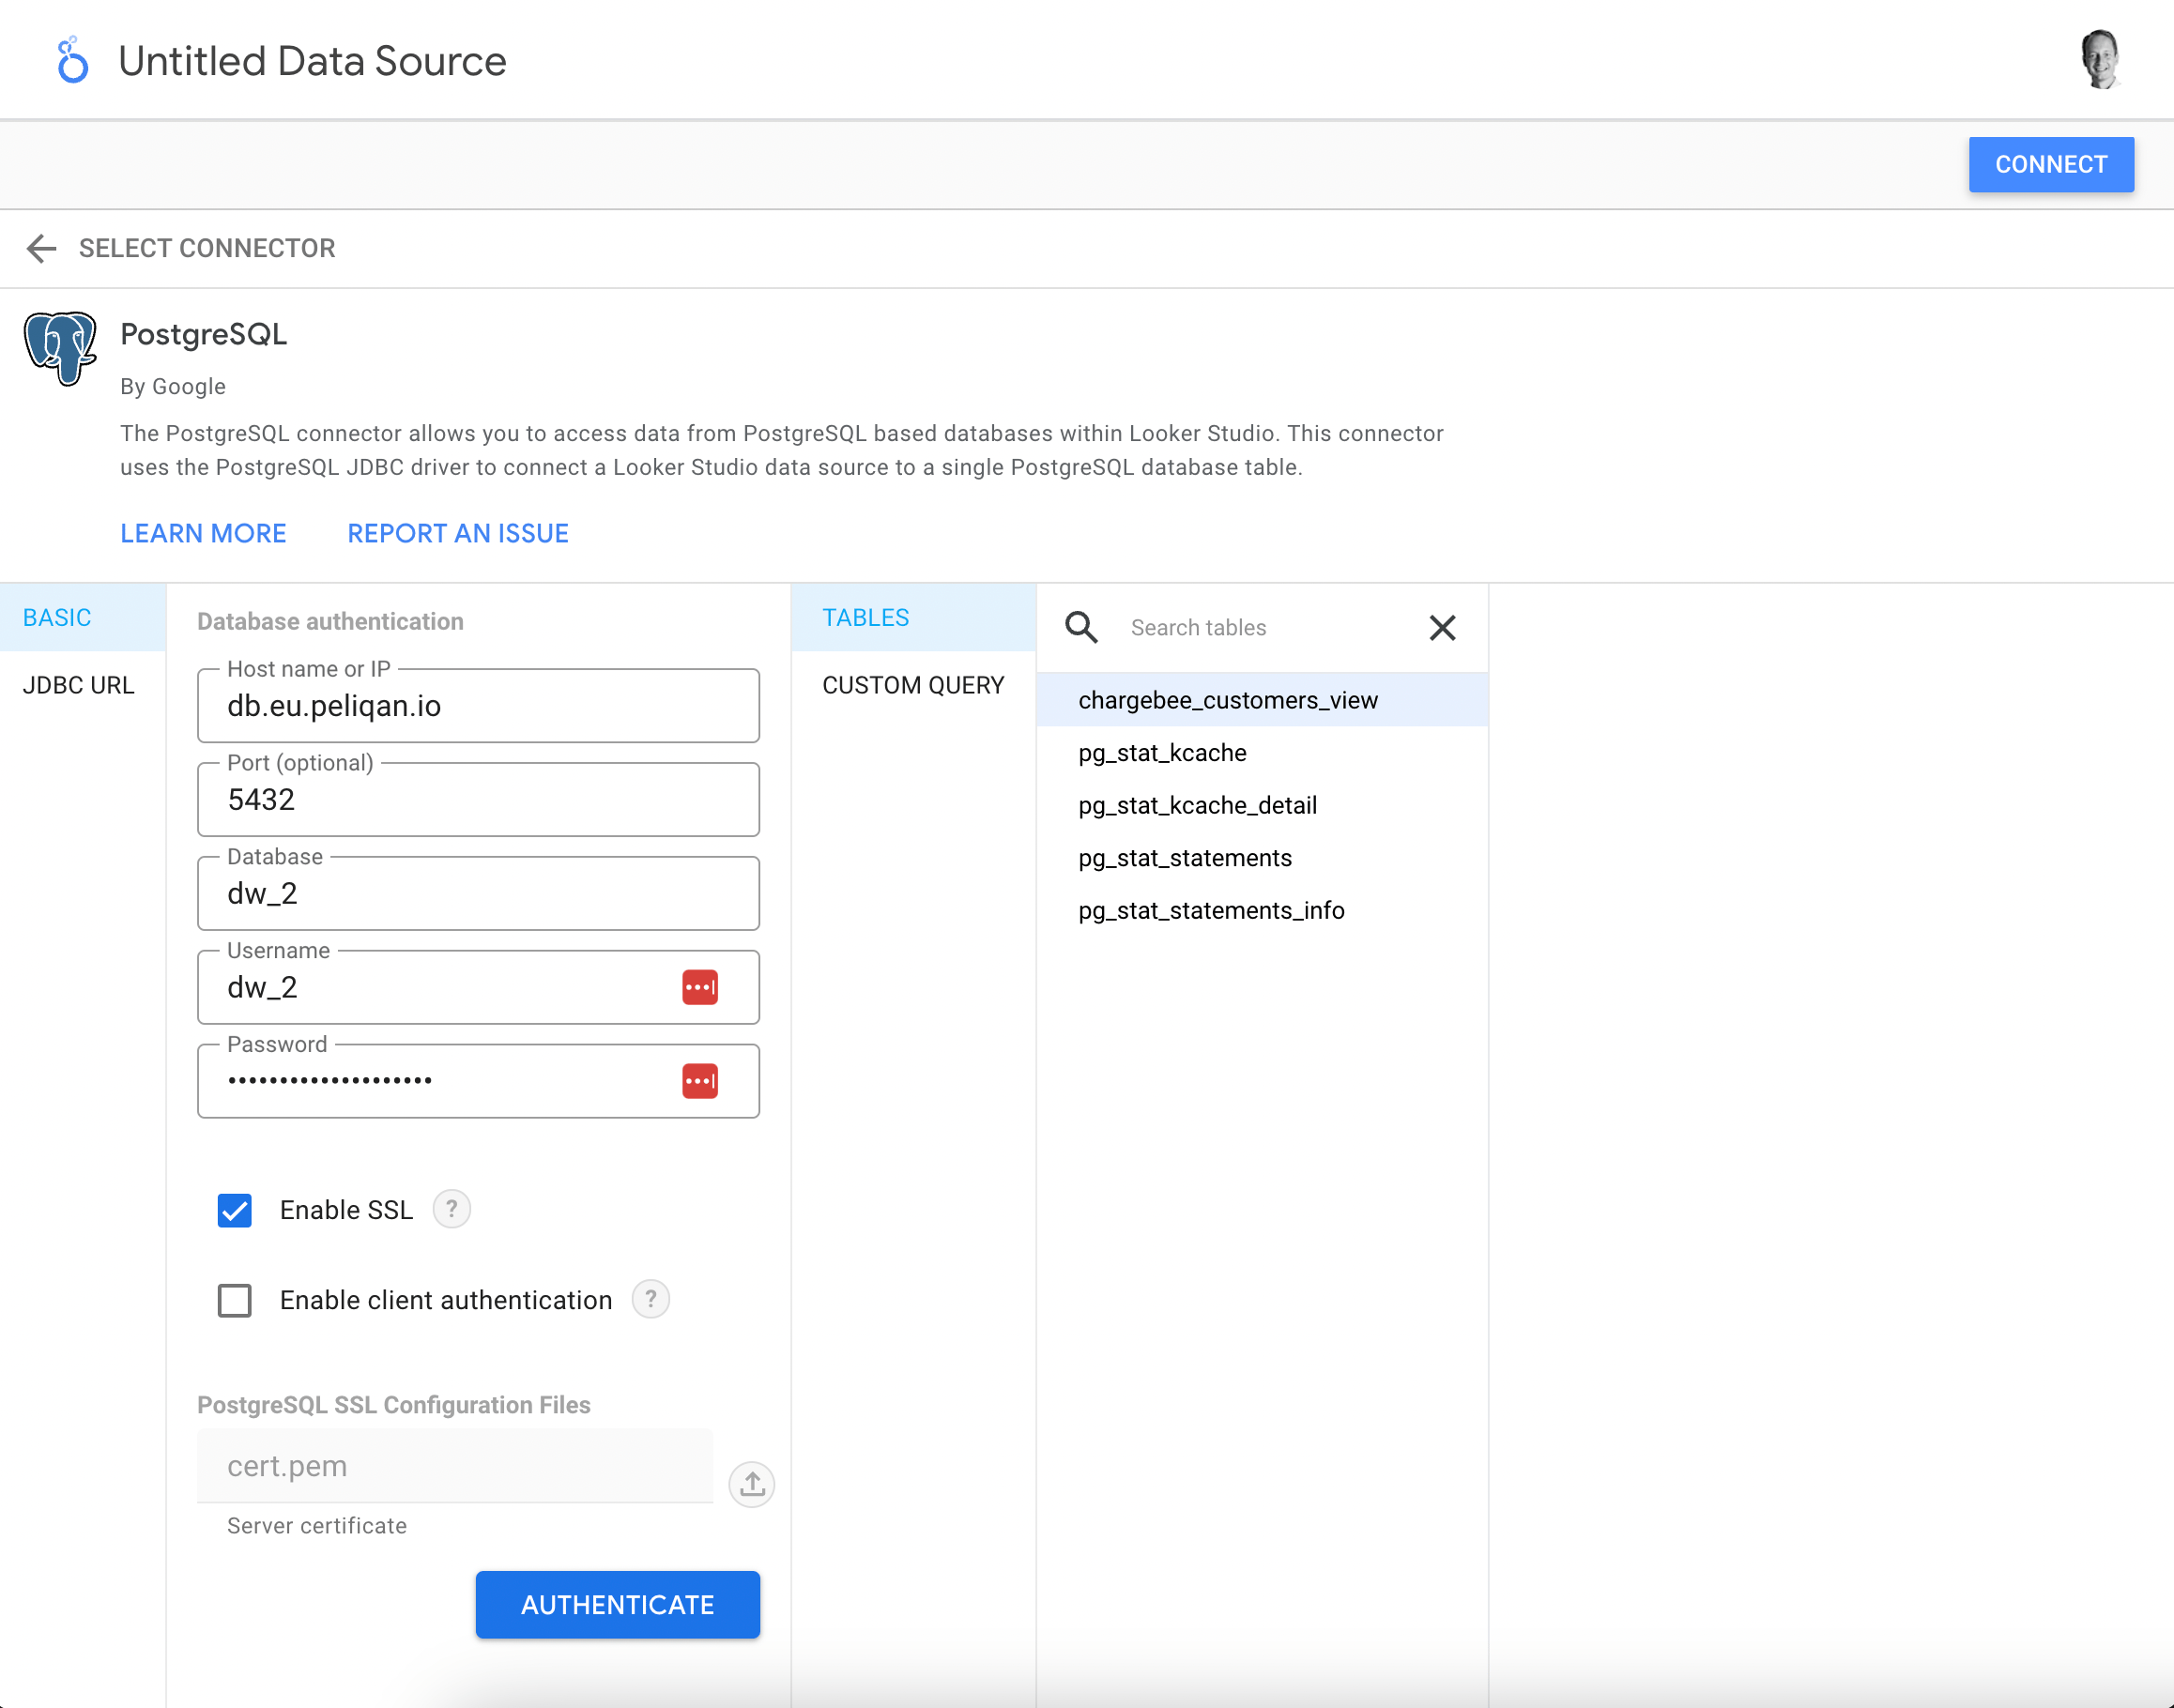
 Click the below link to download the SSL certficate from your instance of the Peliqan data warehouseClick the below link to download the SSL certficate from your instance of the Peliqan data warehouse:
[SSL certificates for the Peliqan data warehouse](/connect-your-bi-or-db-tool/ssl-certificates-for-the-peliqan-data-warehouse)
Upload the Peliqan Server Certificate (public key) and click on Authenticate.
Upload the Peliqan Server Certificate (public key) and click on Authenticate.
Select the table to include in Looker StudioSelect the table to include in Looker Studio:
Click the below link to download the SSL certficate from your instance of the Peliqan data warehouseClick the below link to download the SSL certficate from your instance of the Peliqan data warehouse:
[SSL certificates for the Peliqan data warehouse](/connect-your-bi-or-db-tool/ssl-certificates-for-the-peliqan-data-warehouse)
Upload the Peliqan Server Certificate (public key) and click on Authenticate.
Upload the Peliqan Server Certificate (public key) and click on Authenticate.
Select the table to include in Looker StudioSelect the table to include in Looker Studio:
 If the table you need is not visible, use a custom query using the correct schema name and table name, for example to get data from Odoo:If the table you need is not visible, use a custom query using the correct schema name and table name, for example to get data from Odoo:
 You can now build charts and reports in Looker Studio.
This documentation is built and hosted on [Mintlify](https://mintlify.com), a developer documentation platform.
You can now build charts and reports in Looker Studio.
This documentation is built and hosted on [Mintlify](https://mintlify.com), a developer documentation platform.