> ## Documentation Index
> Fetch the complete documentation index at: https://help.peliqan.io/llms.txt
> Use this file to discover all available pages before exploring further.
# Attio - Getting start in Peliqan
> Learn how to connect Attio CRM to Peliqan using OAuth to sync data to your data warehouse and perform federated queries.
Attio is the **CRM** for modern go-to-market teams. It has a highly flexible data model and is easy to build with, allowing you to tailor your CRM exactly to your business model. Whether you run a high-growth PLG startup, a B2B marketplace, or sell products to distributors globally. Website: [https://attio.com/](https://attio.com/)
This article provides an overview to get started with the **Attio** connector in Peliqan. Please [contact support](https://peliqan.io/contact) if you have any additional questions or remarks.
## Attio Data Pipeline
### Guide to Build an App
To start building, go to the [Attio Developer Dashboard](https://build.attio.com/)
1. **Sign in Developer Dashboard and Create Developer Account**
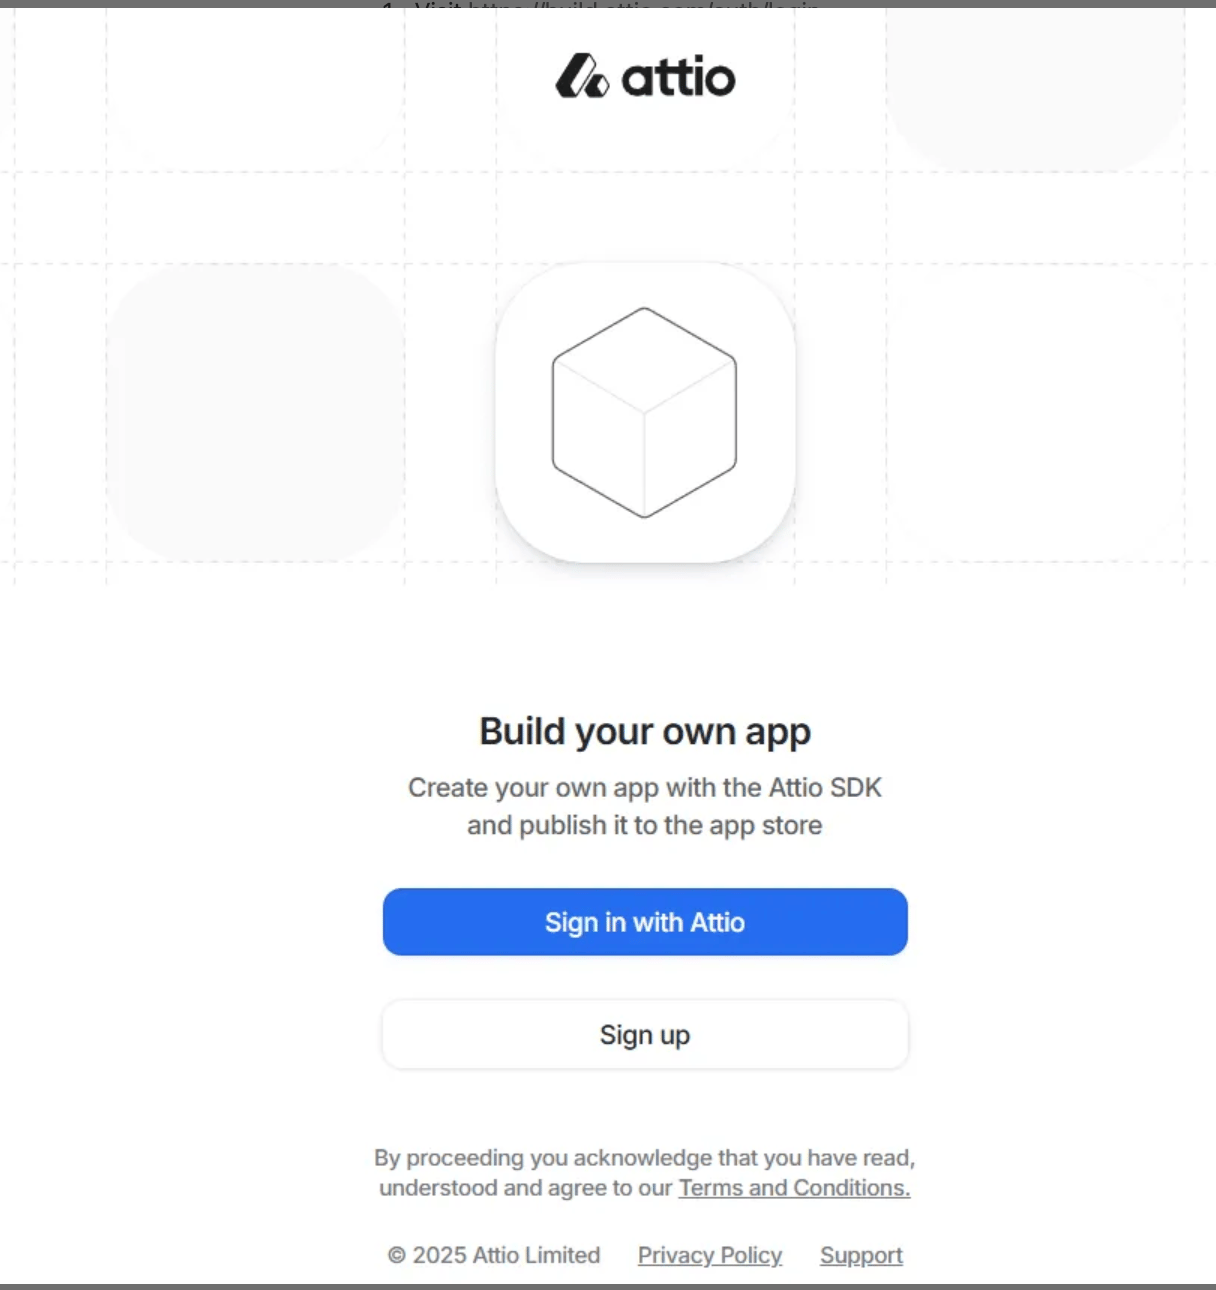
1. Visit [https://build.attio.com/auth/login](https://build.attio.com/auth/login)
2. Log in using your Attio account or Sign up
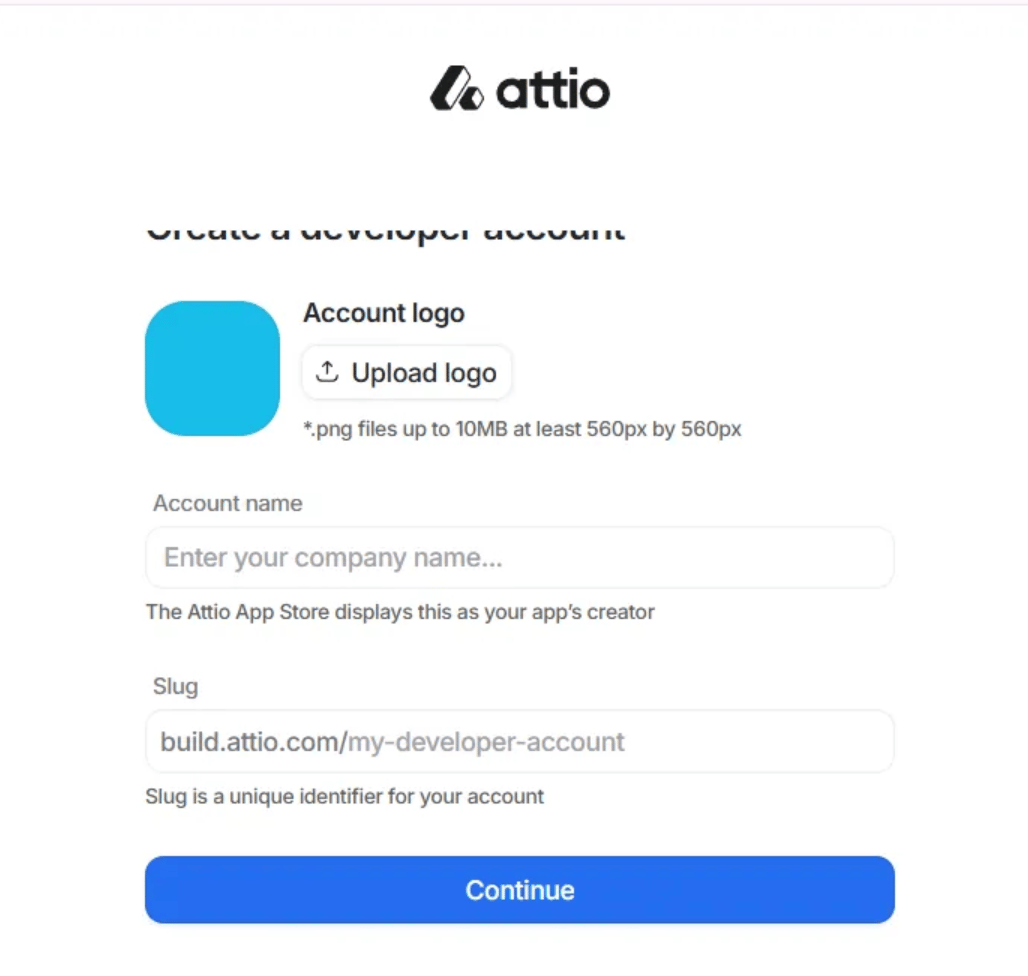
3. Create a new developer account.
 4. Provide details such as Account name (the Attio App Store displays this as your app's creator) & Slug (Slug is a unique identifier for your account)
 2. **Create new App**
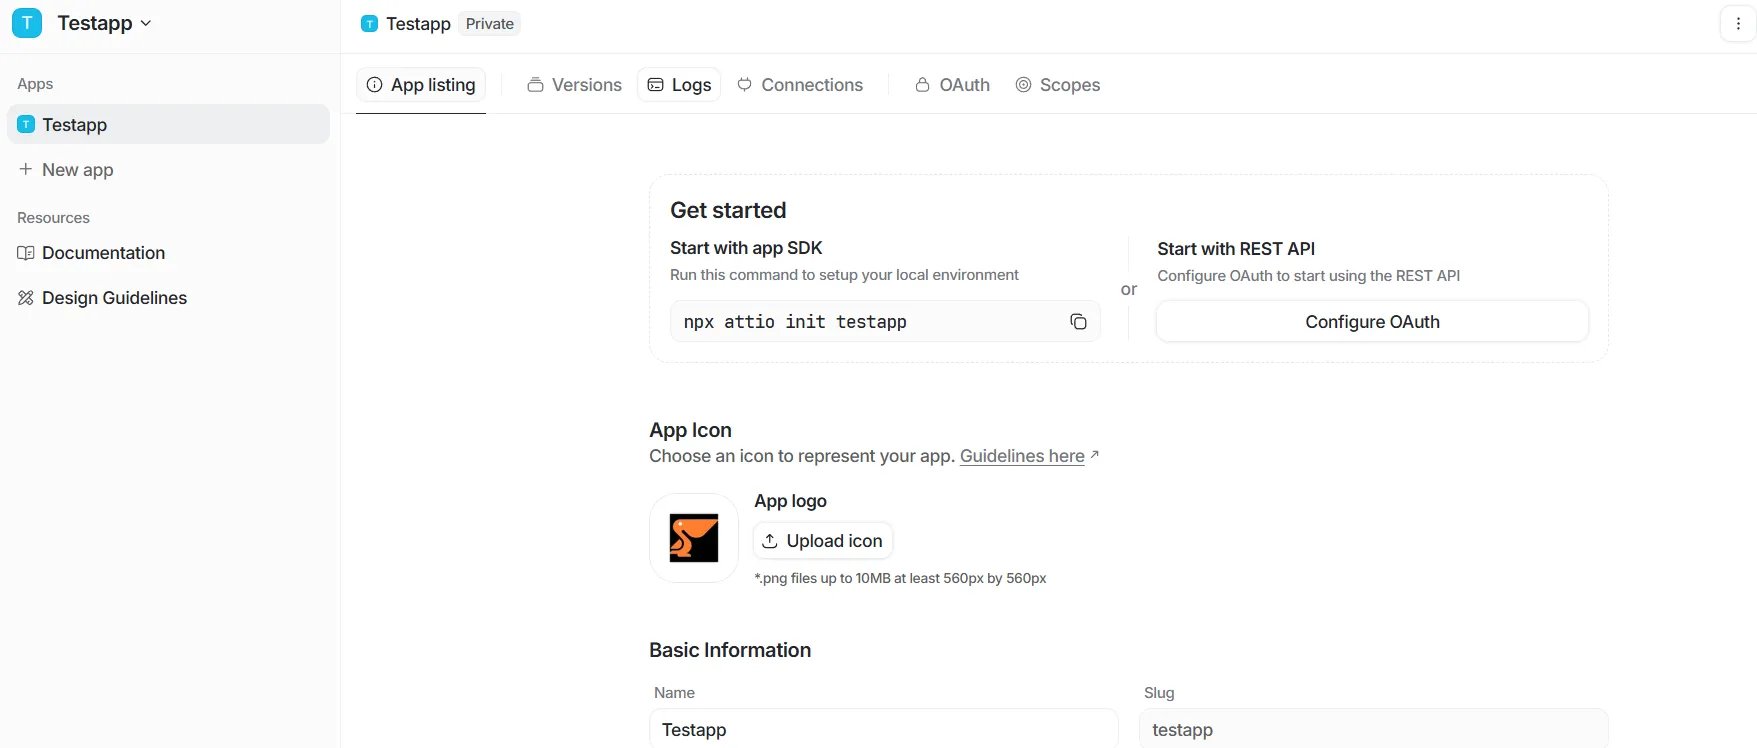
1. Click on **Create App**
2. Enter a unique name for your app and click on **Create.**
3. Your app is now created!
2. **Create new App**
1. Click on **Create App**
2. Enter a unique name for your app and click on **Create.**
3. Your app is now created!
 3. **Configure Oath Settings**
1. Click on **Configure OAuth** & Navigate to **OAuth** Tab.
2. Under OAuth Tab, copy the **Client ID** and **Client Secret.** Keep them safe, they are required to connect your app.
3. Provide **Redirect Uri** as: `https://oauth.peliqan.io/` This is required for apps that authenticate through Peliqan. Without this URI, the app won't complete the OAuth2 flow successfully.
4. **Configure App Scopes**
1. Please select **Configure Scopes** add appropriate scopes as per your requirements
3. **Configure Oath Settings**
1. Click on **Configure OAuth** & Navigate to **OAuth** Tab.
2. Under OAuth Tab, copy the **Client ID** and **Client Secret.** Keep them safe, they are required to connect your app.
3. Provide **Redirect Uri** as: `https://oauth.peliqan.io/` This is required for apps that authenticate through Peliqan. Without this URI, the app won't complete the OAuth2 flow successfully.
4. **Configure App Scopes**
1. Please select **Configure Scopes** add appropriate scopes as per your requirements 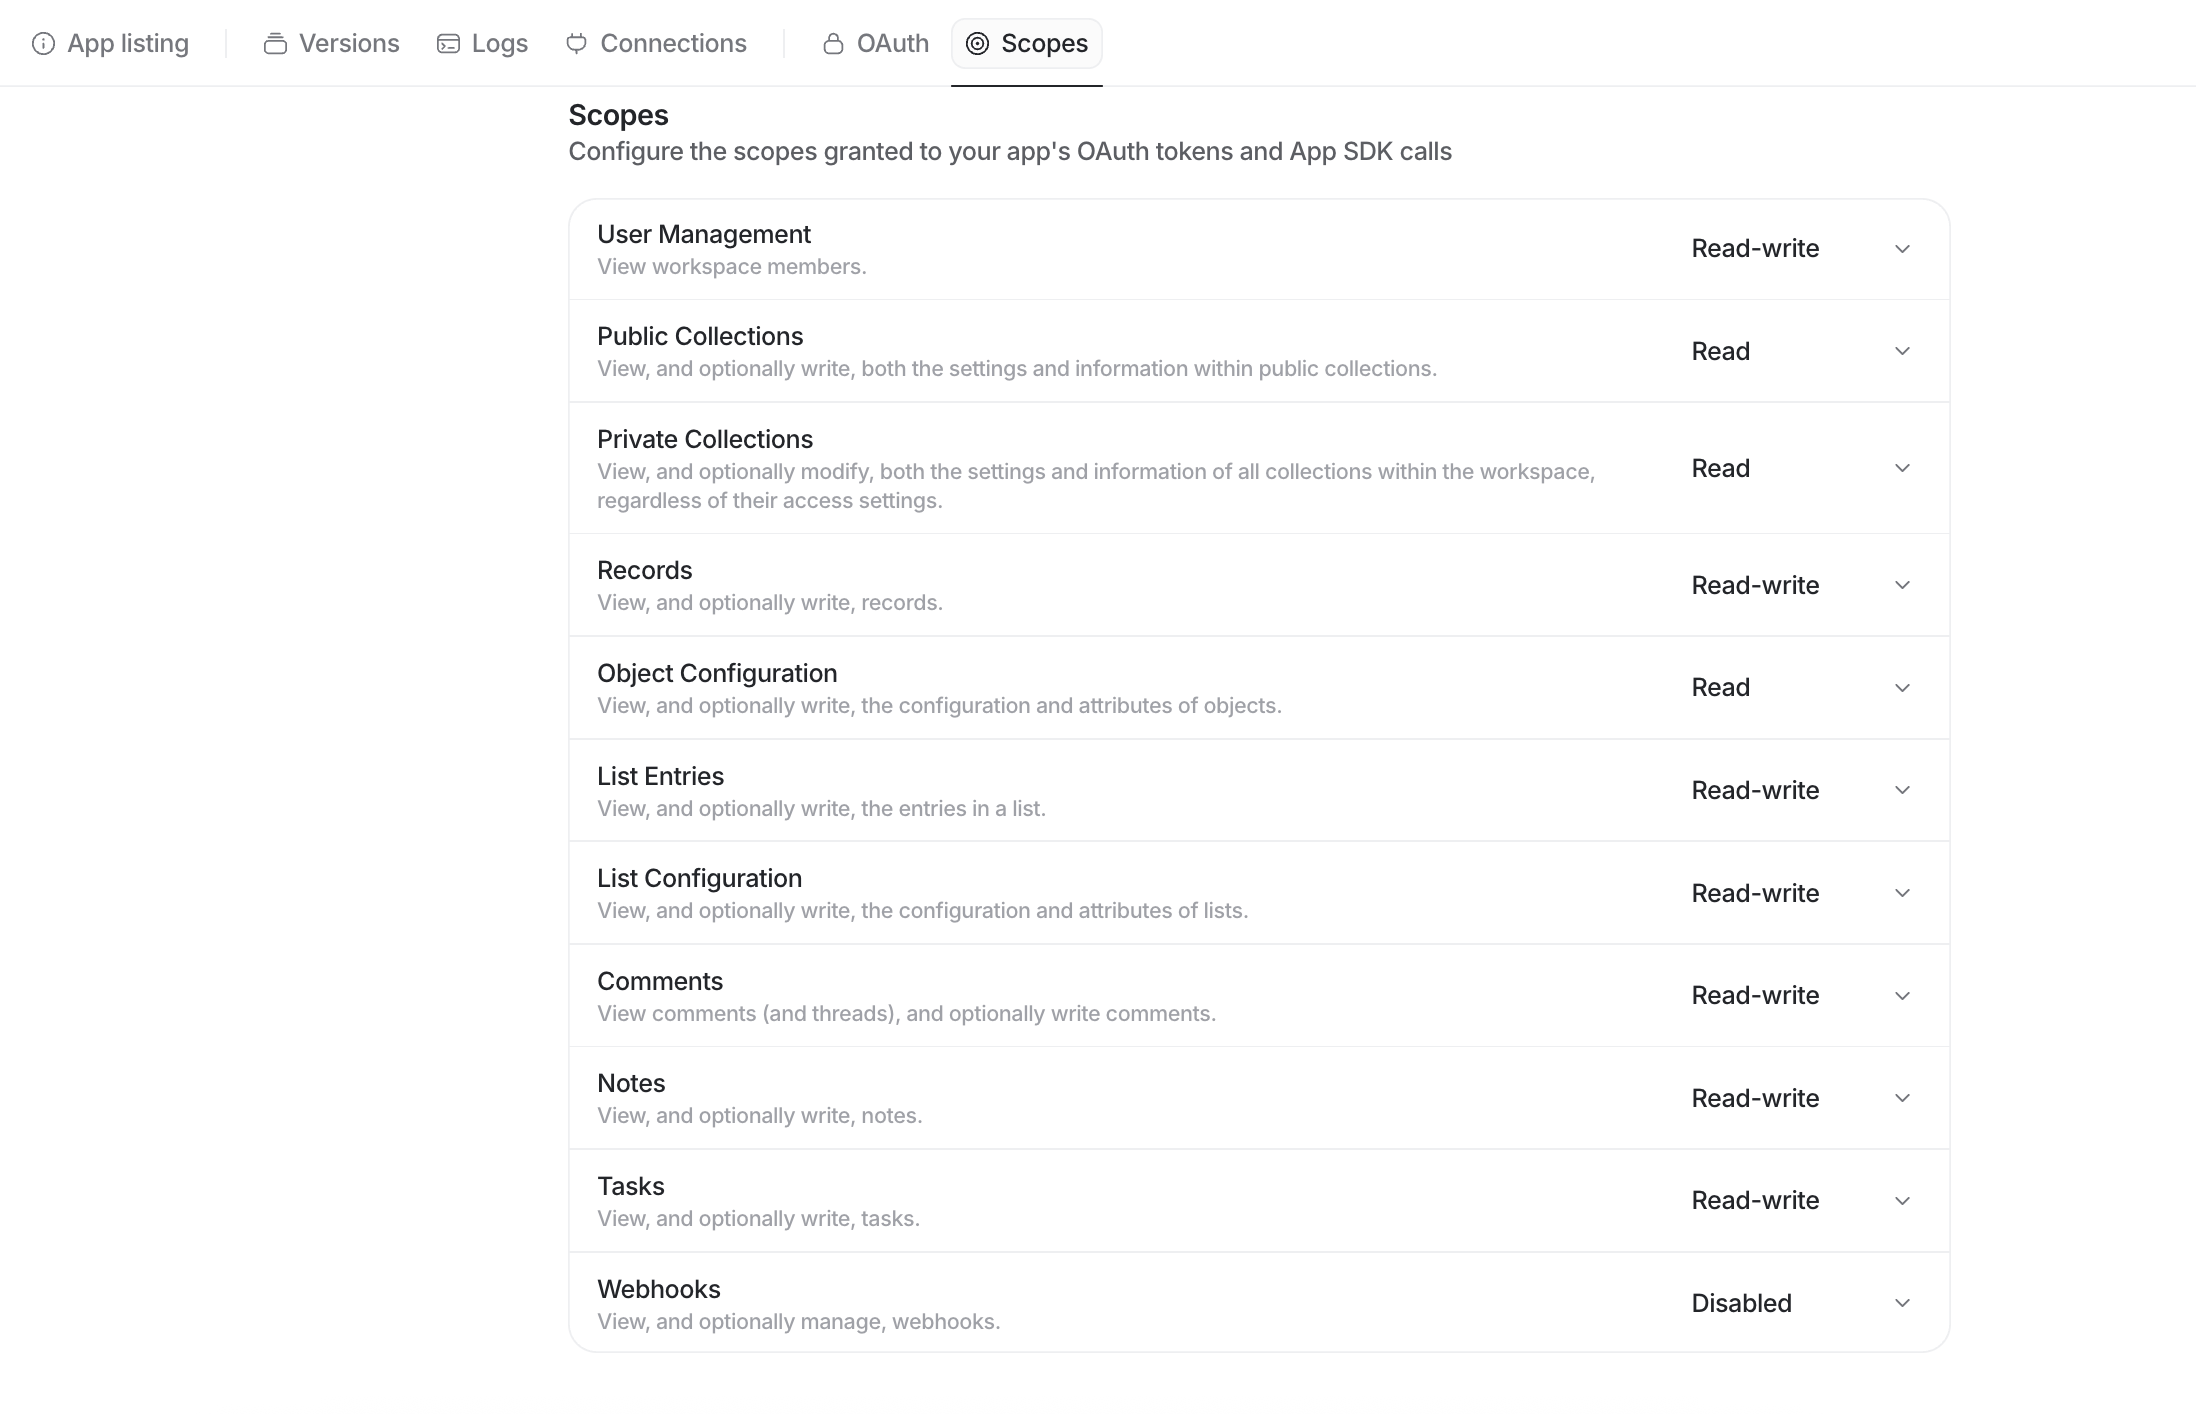 5. Once done, please click on **Save Changes**
### Connect Attio
Connect Attio through the Peliqan Connectivity Module:
5. Once done, please click on **Save Changes**
### Connect Attio
Connect Attio through the Peliqan Connectivity Module:
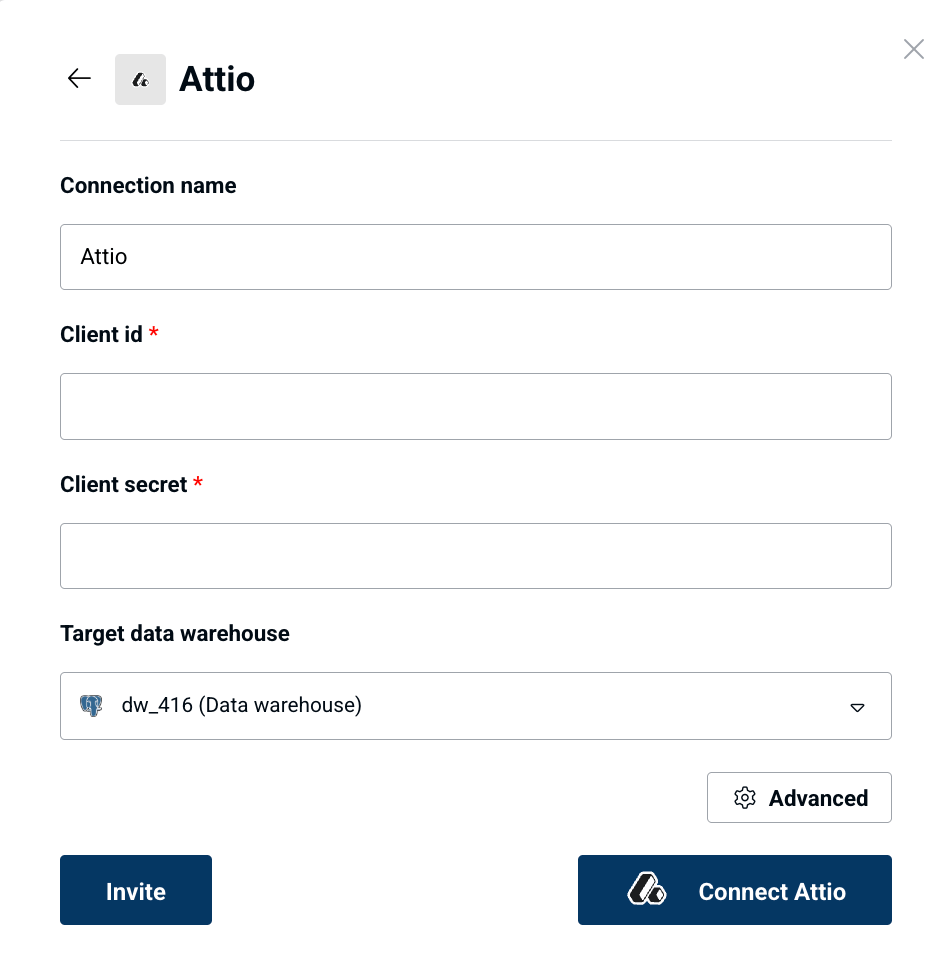 Configuration options:
* App Client ID
* App Client Secret
* (Optional) table selection via 'Advanced'
Once filled, click on **Connect to Attio** to initiate the OAuth Flow and get the data synced in.
## Attio Data Sync to Data Warehouse
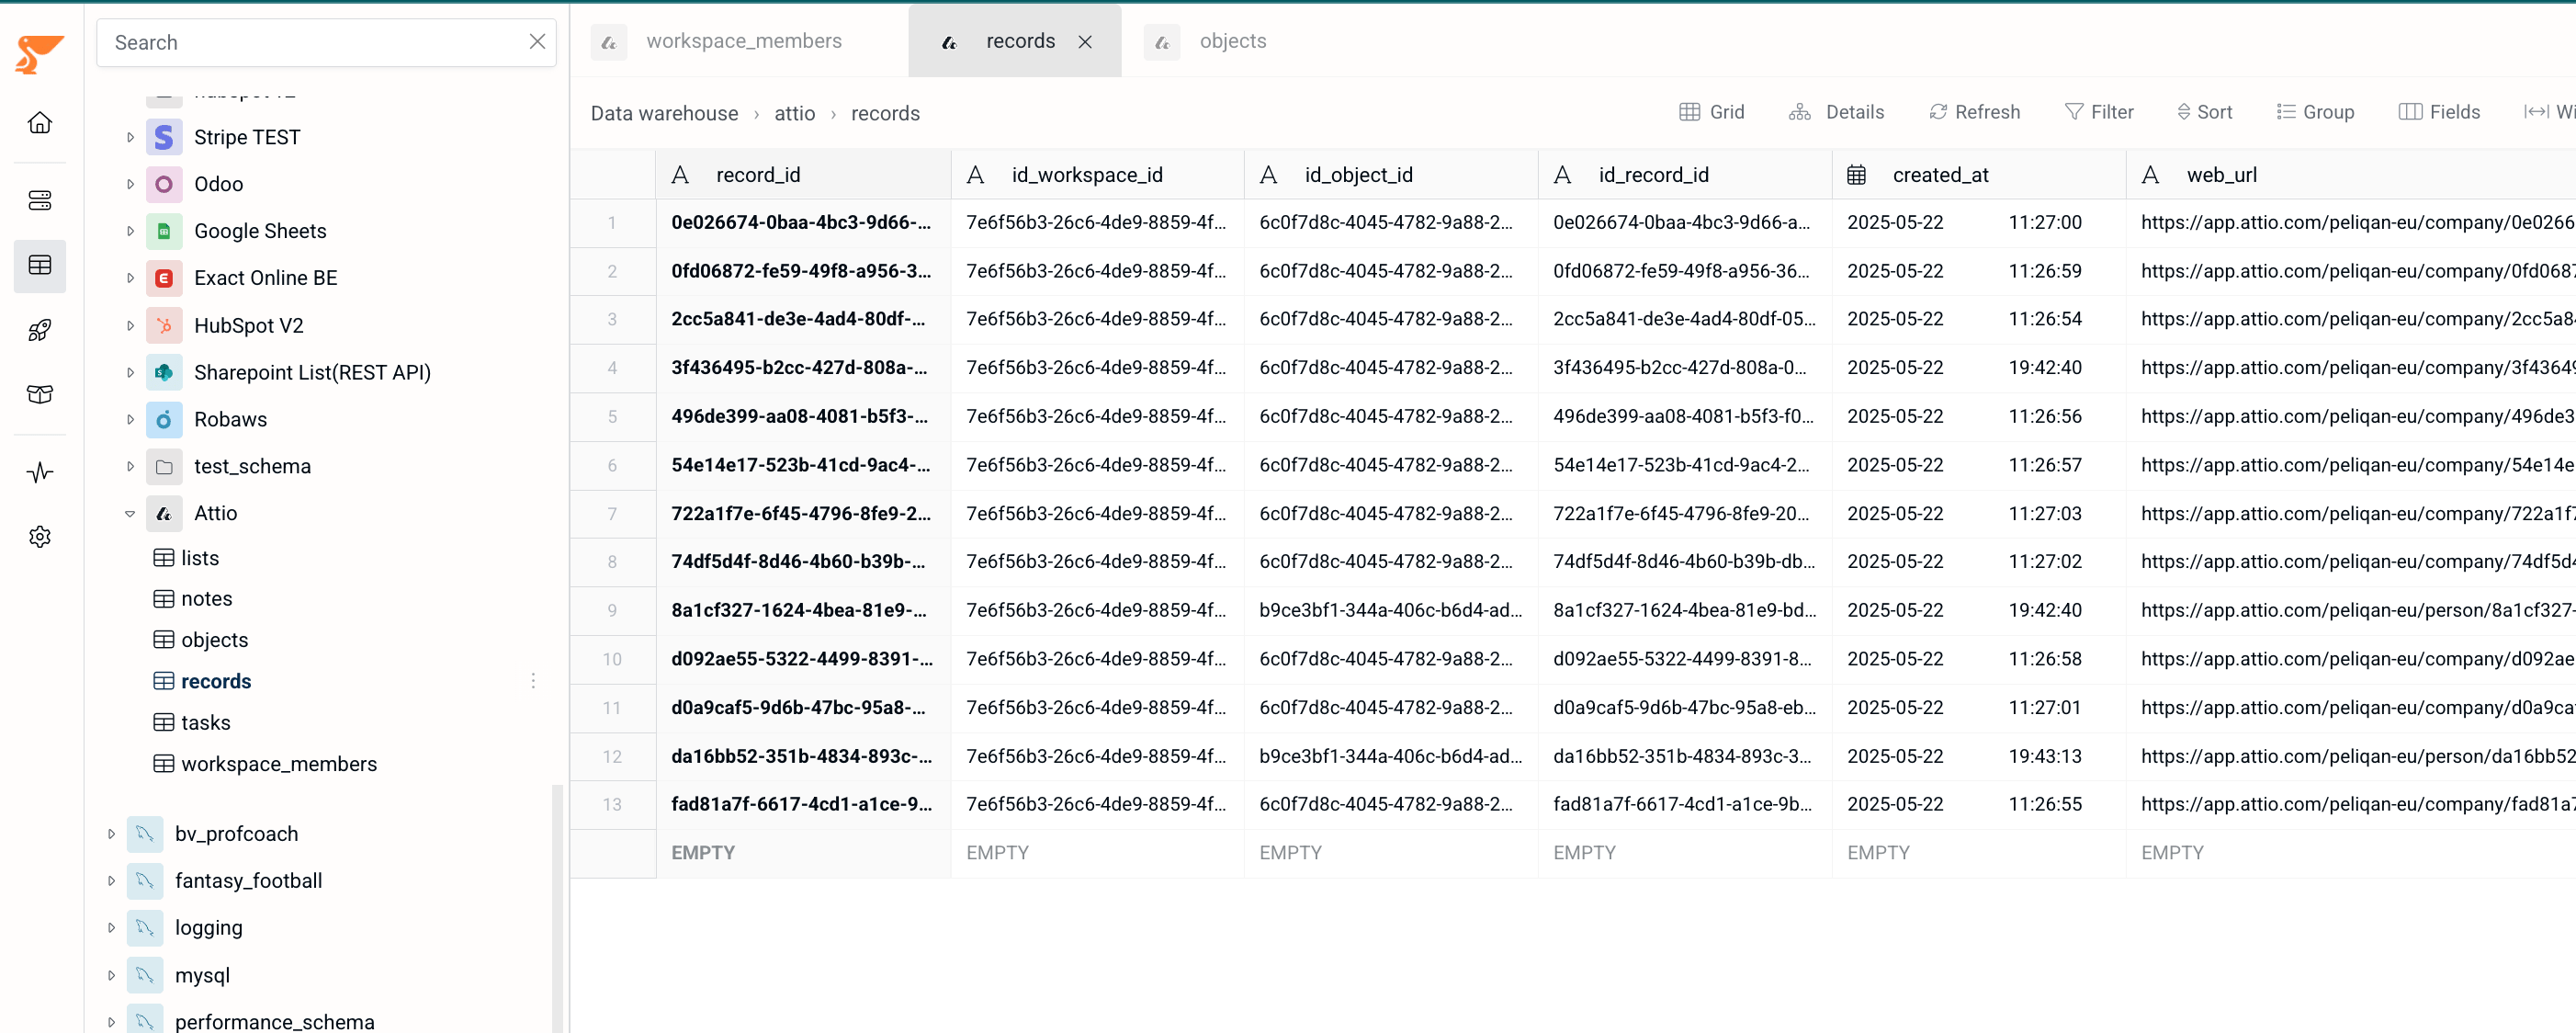
Peliqan offers an out of the box data warehouse. Optionally the user can choose to sync Attio data to their own data warehouse such as Snowflake, Google BigQuery, MS SQL etc.
Data will be synced to the chosen data warehouse and made available through the Peliqan UI for exploration.
Configuration options:
* App Client ID
* App Client Secret
* (Optional) table selection via 'Advanced'
Once filled, click on **Connect to Attio** to initiate the OAuth Flow and get the data synced in.
## Attio Data Sync to Data Warehouse
Peliqan offers an out of the box data warehouse. Optionally the user can choose to sync Attio data to their own data warehouse such as Snowflake, Google BigQuery, MS SQL etc.
Data will be synced to the chosen data warehouse and made available through the Peliqan UI for exploration.
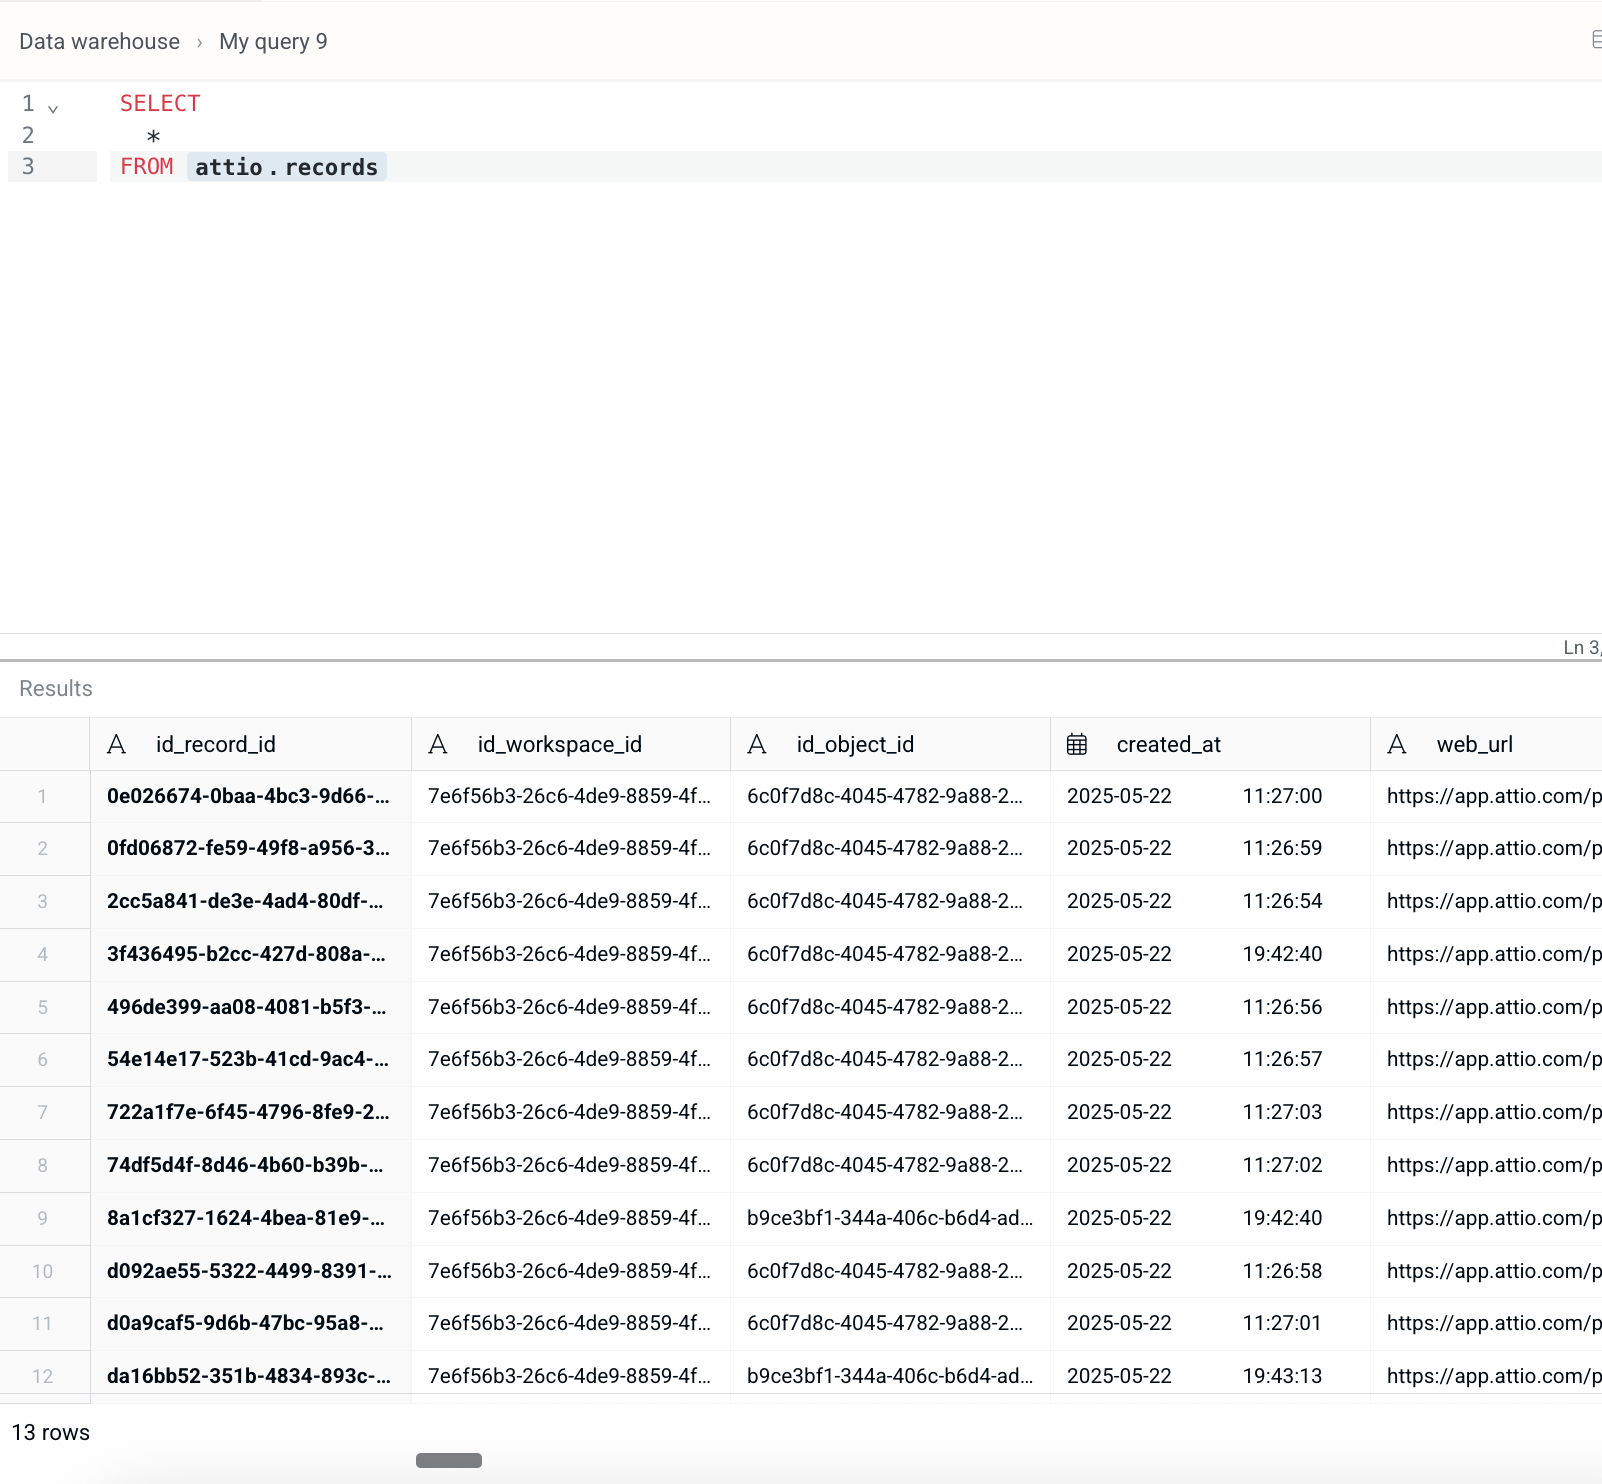
 With the Peliqan federated query engine, queries on the Attio data can be written and data can be transformed and combined with other sources.
 This documentation is built and hosted on [Mintlify](https://mintlify.com), a developer documentation platform.